Family-owned · Insured · No subcontractor shuffle

Real work. Exact photo sets.

See the work
take shape.

Every journal keeps one project’s photographs together, so you can follow what Mo-Nady actually completed—from demolition and hidden repairs to the finished result.

10verified project
photo journals
01

Custom outdoor feature · Atlanta, GA · 5 business days

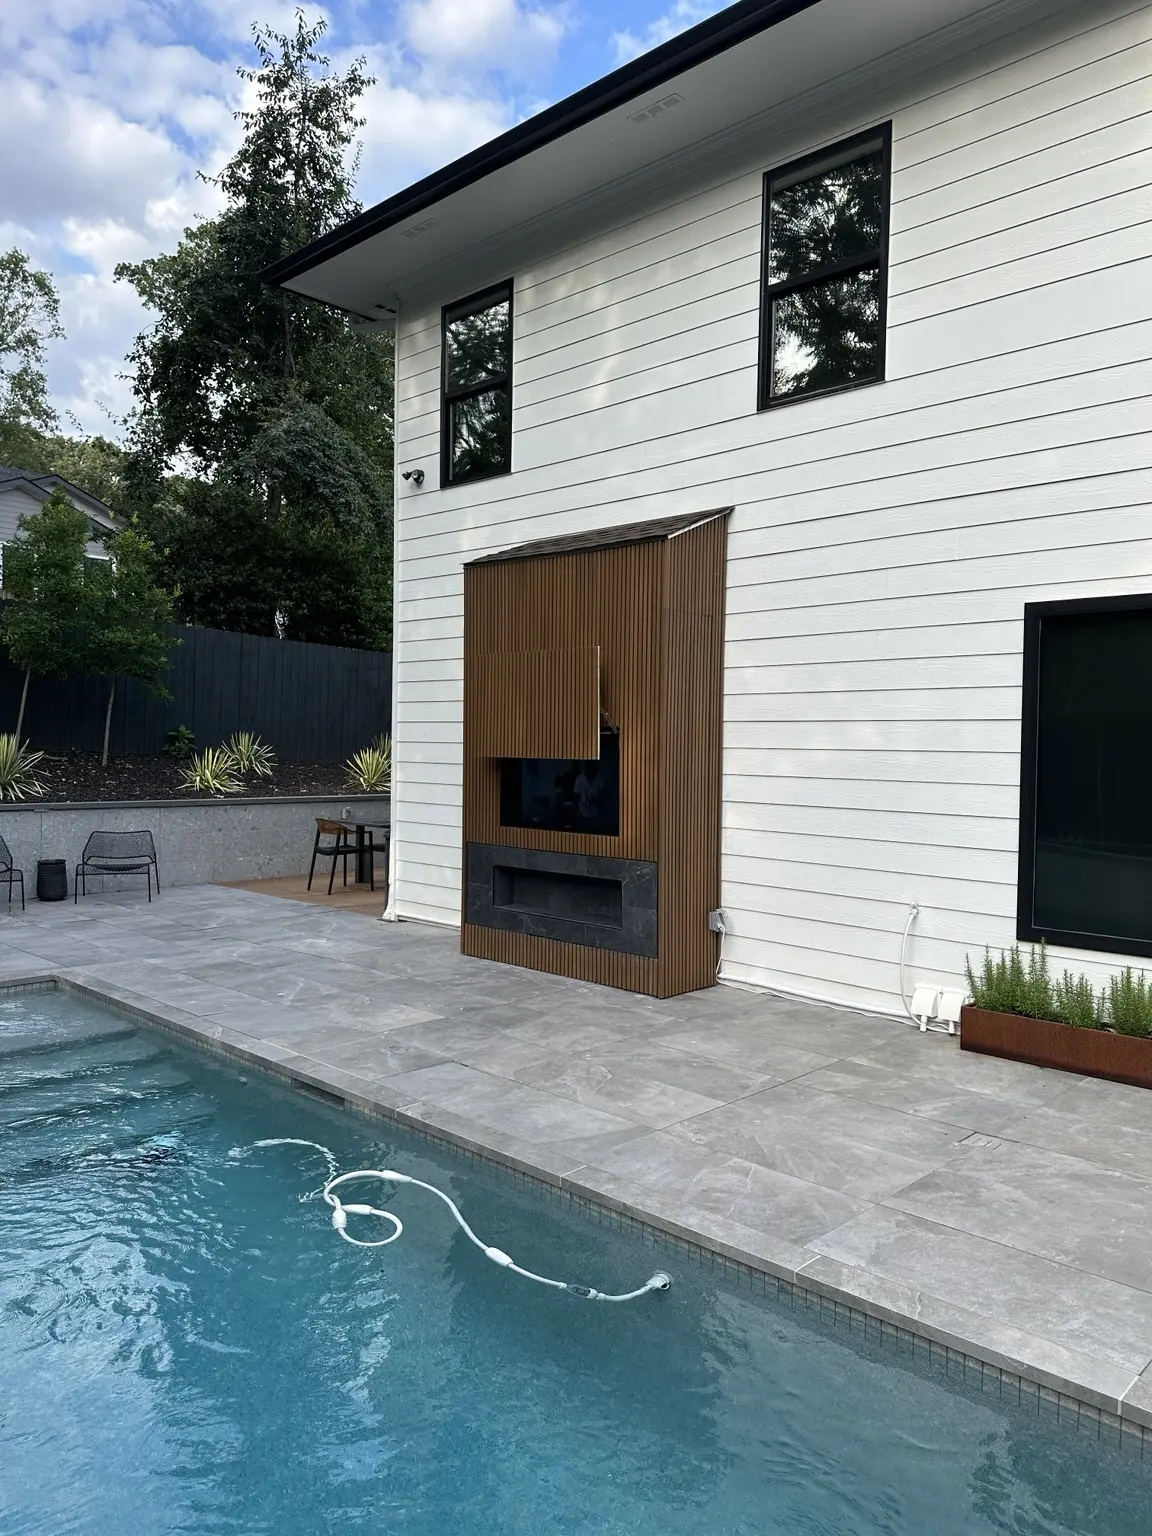
A poolside feature designed to hide the television in plain sight.

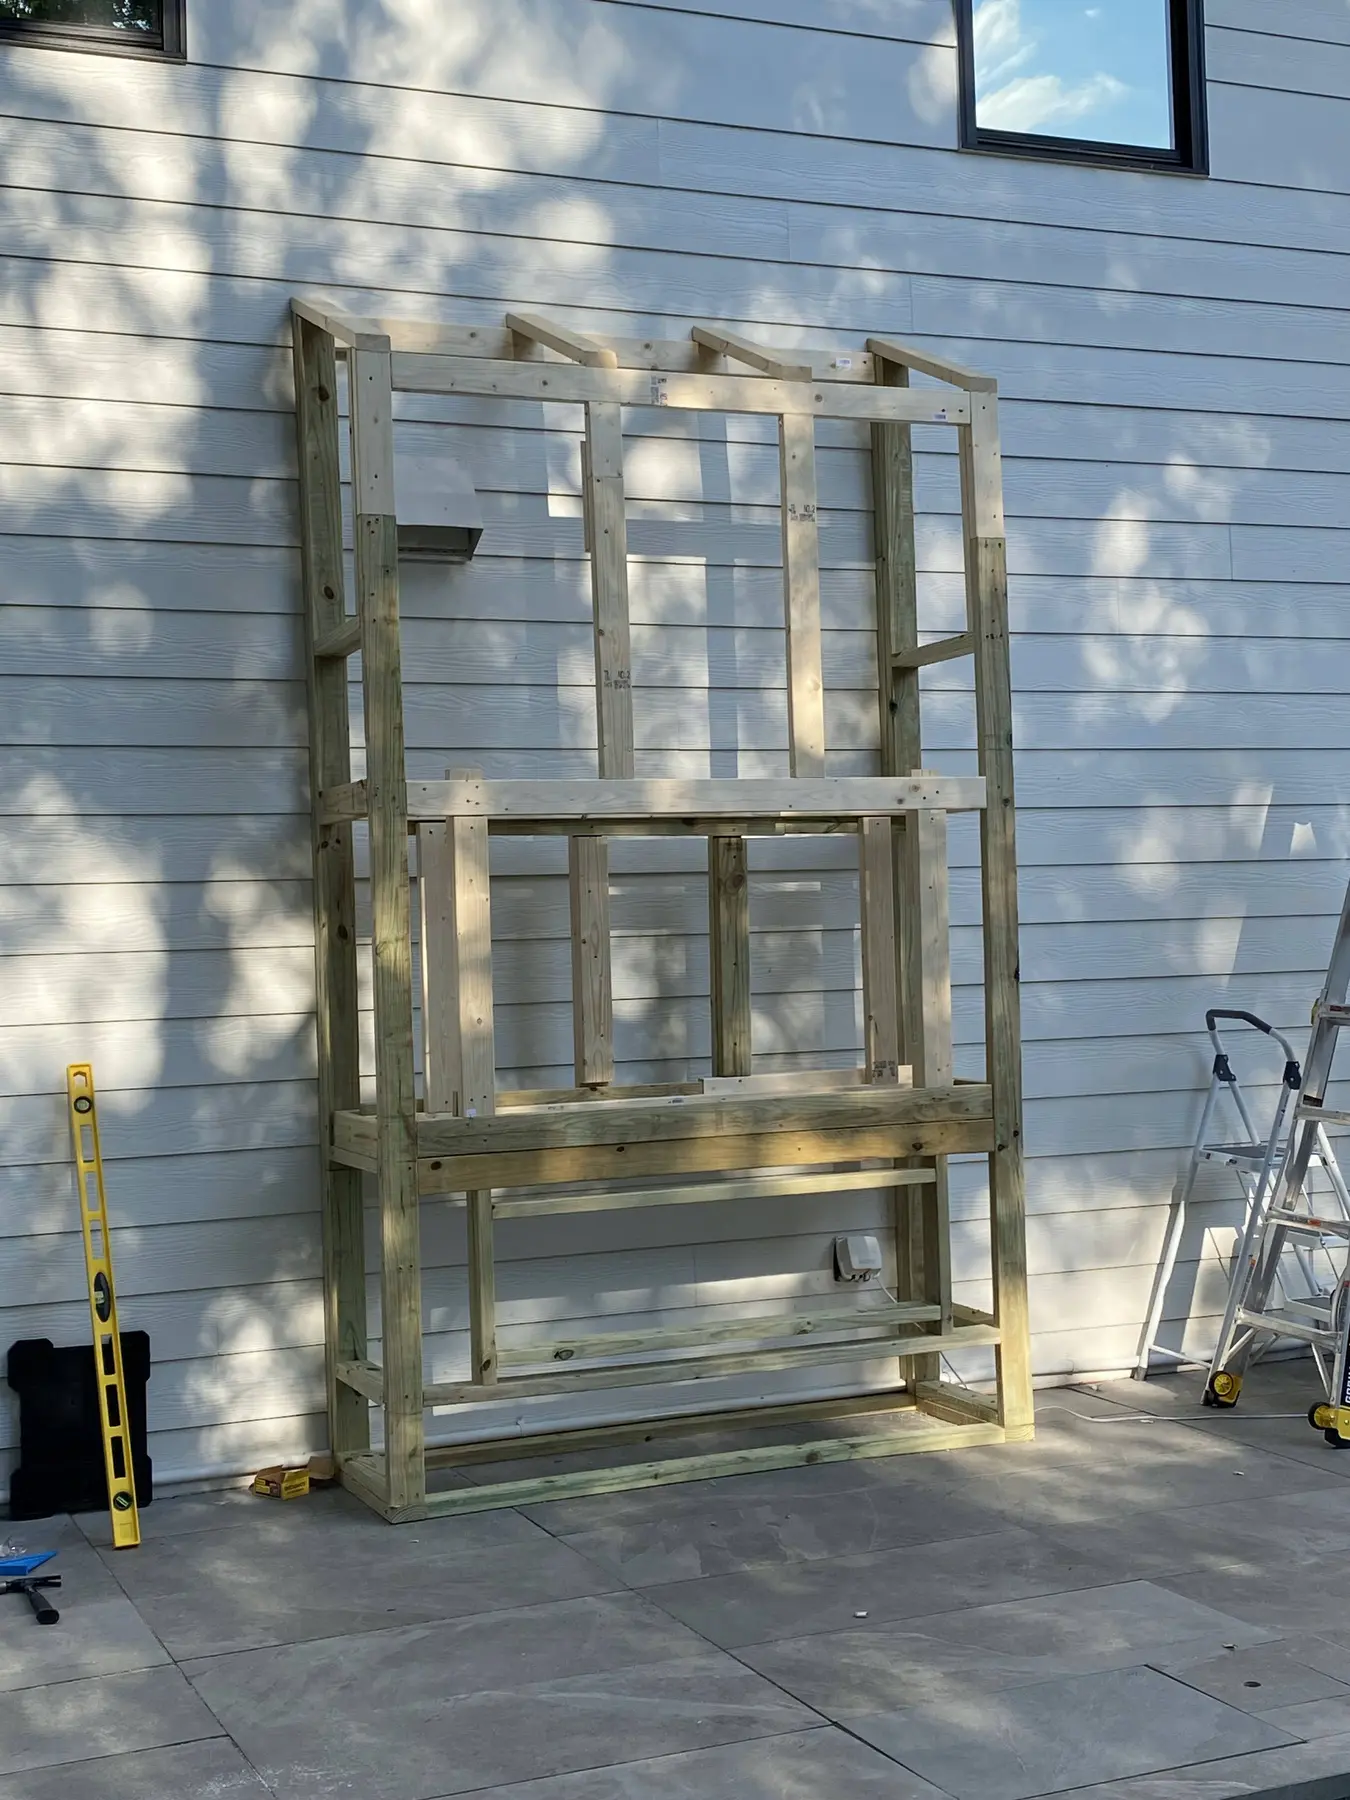
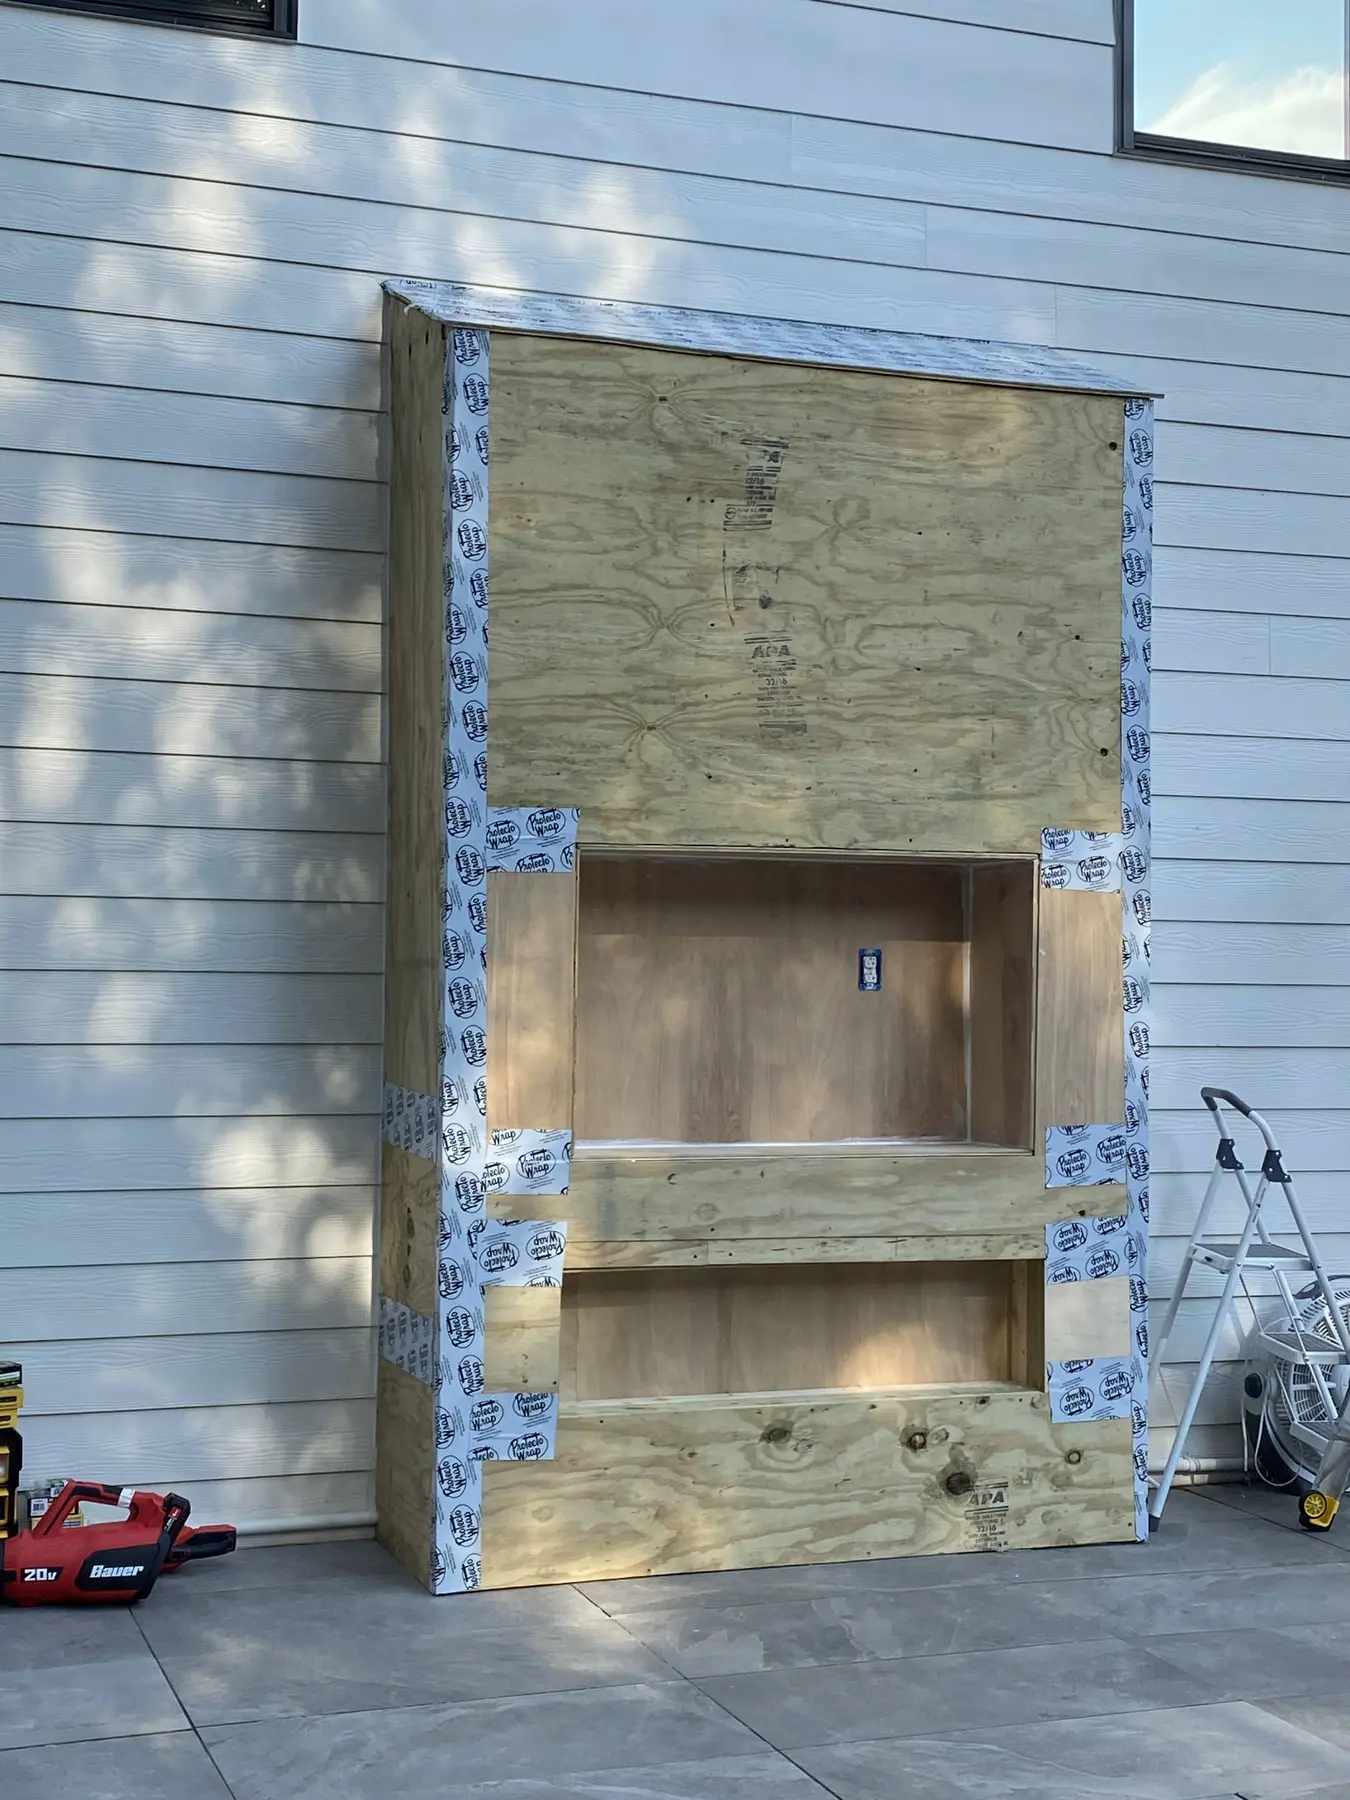
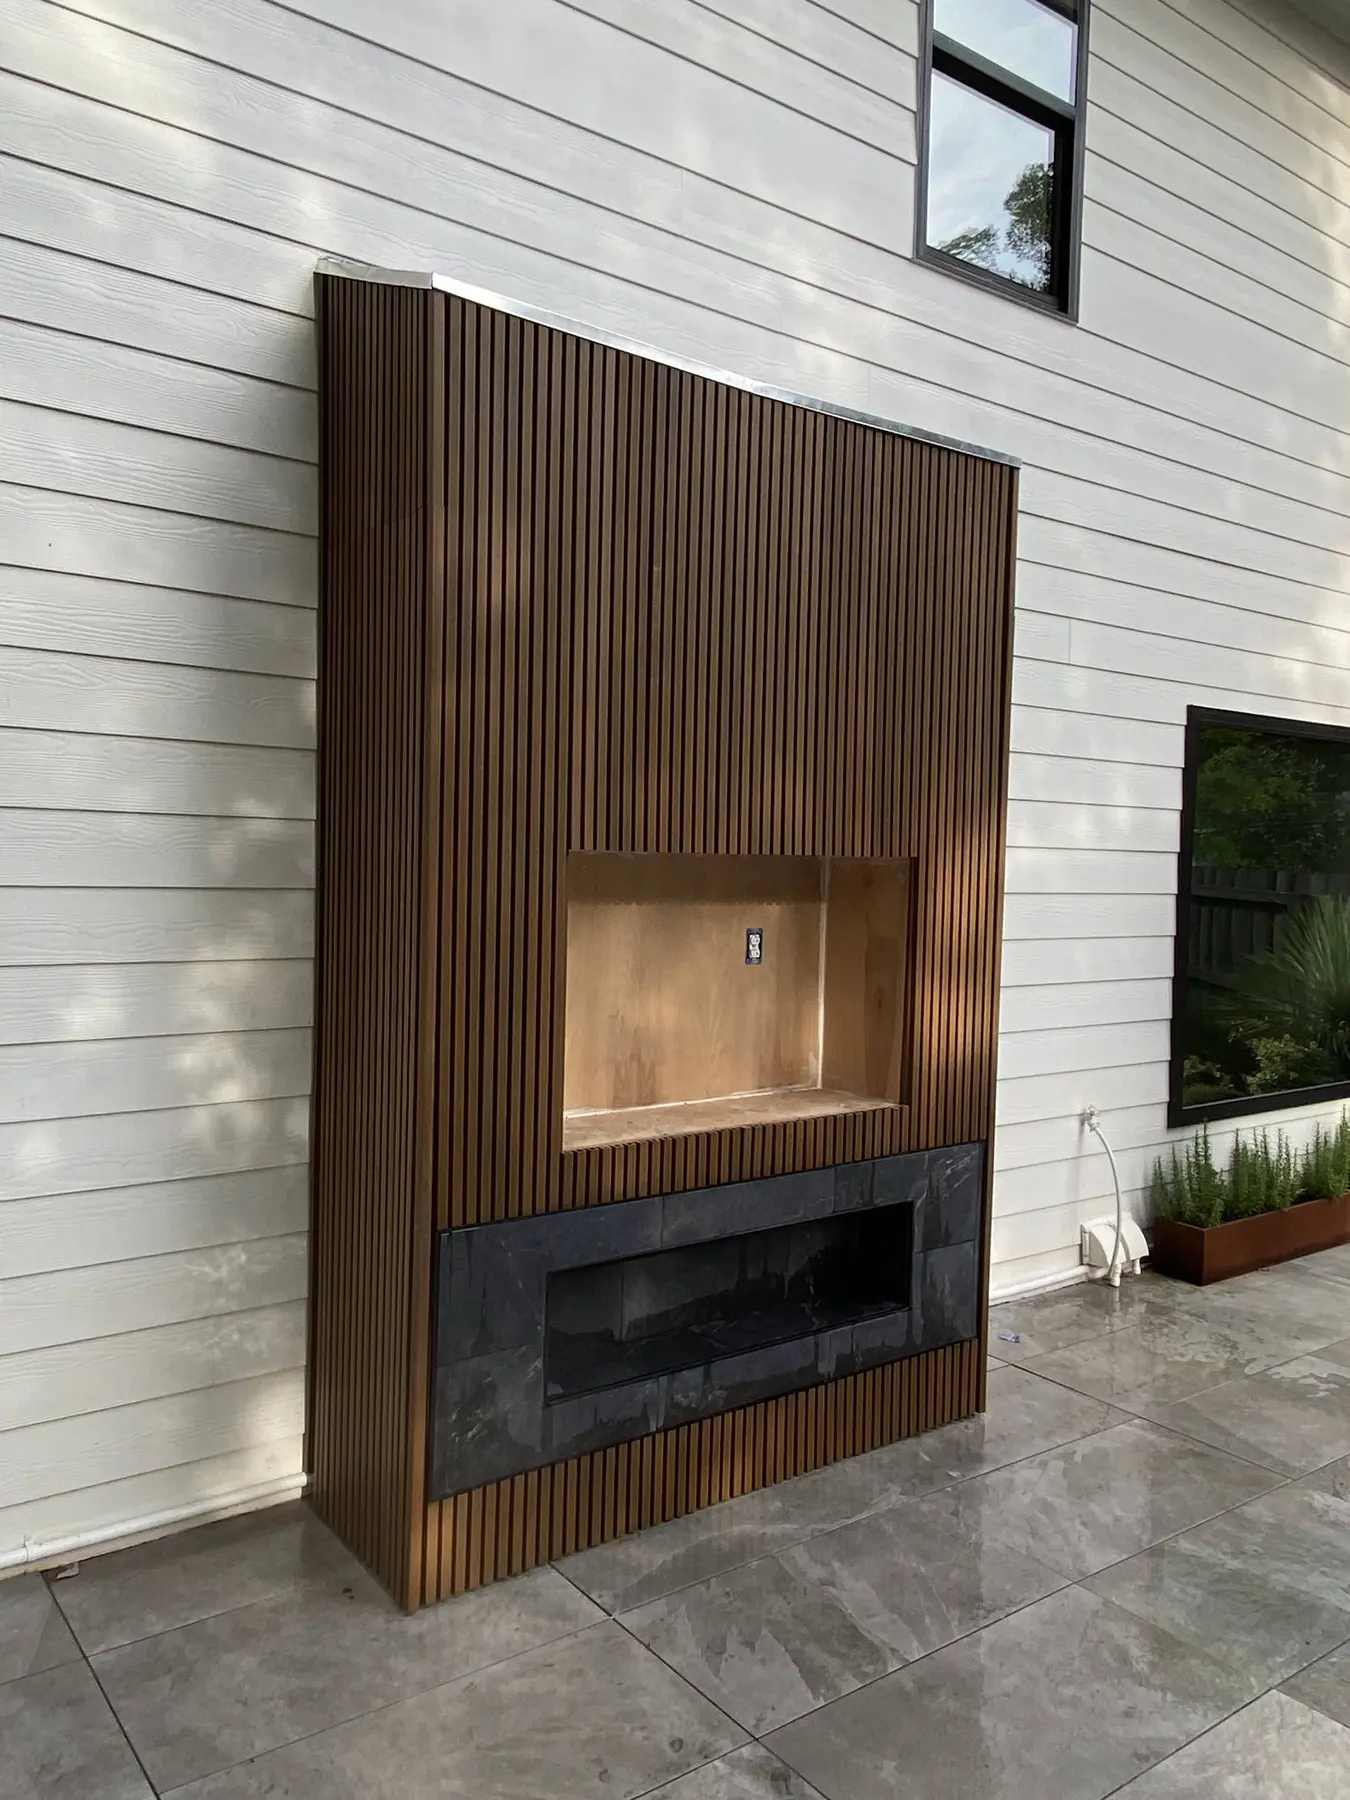
Mo-Nady designed and built this weather-resistant structure from scratch, combining a slatted architectural finish, a visual fireplace, and custom hinged doors that lift and overlap above the concealed television.

MOST DEMANDING DETAILThe precision installation of the custom lift-up hinged doors.
01Design & layout02Structural framing03Weatherproofing04Custom door system
Plan a related project
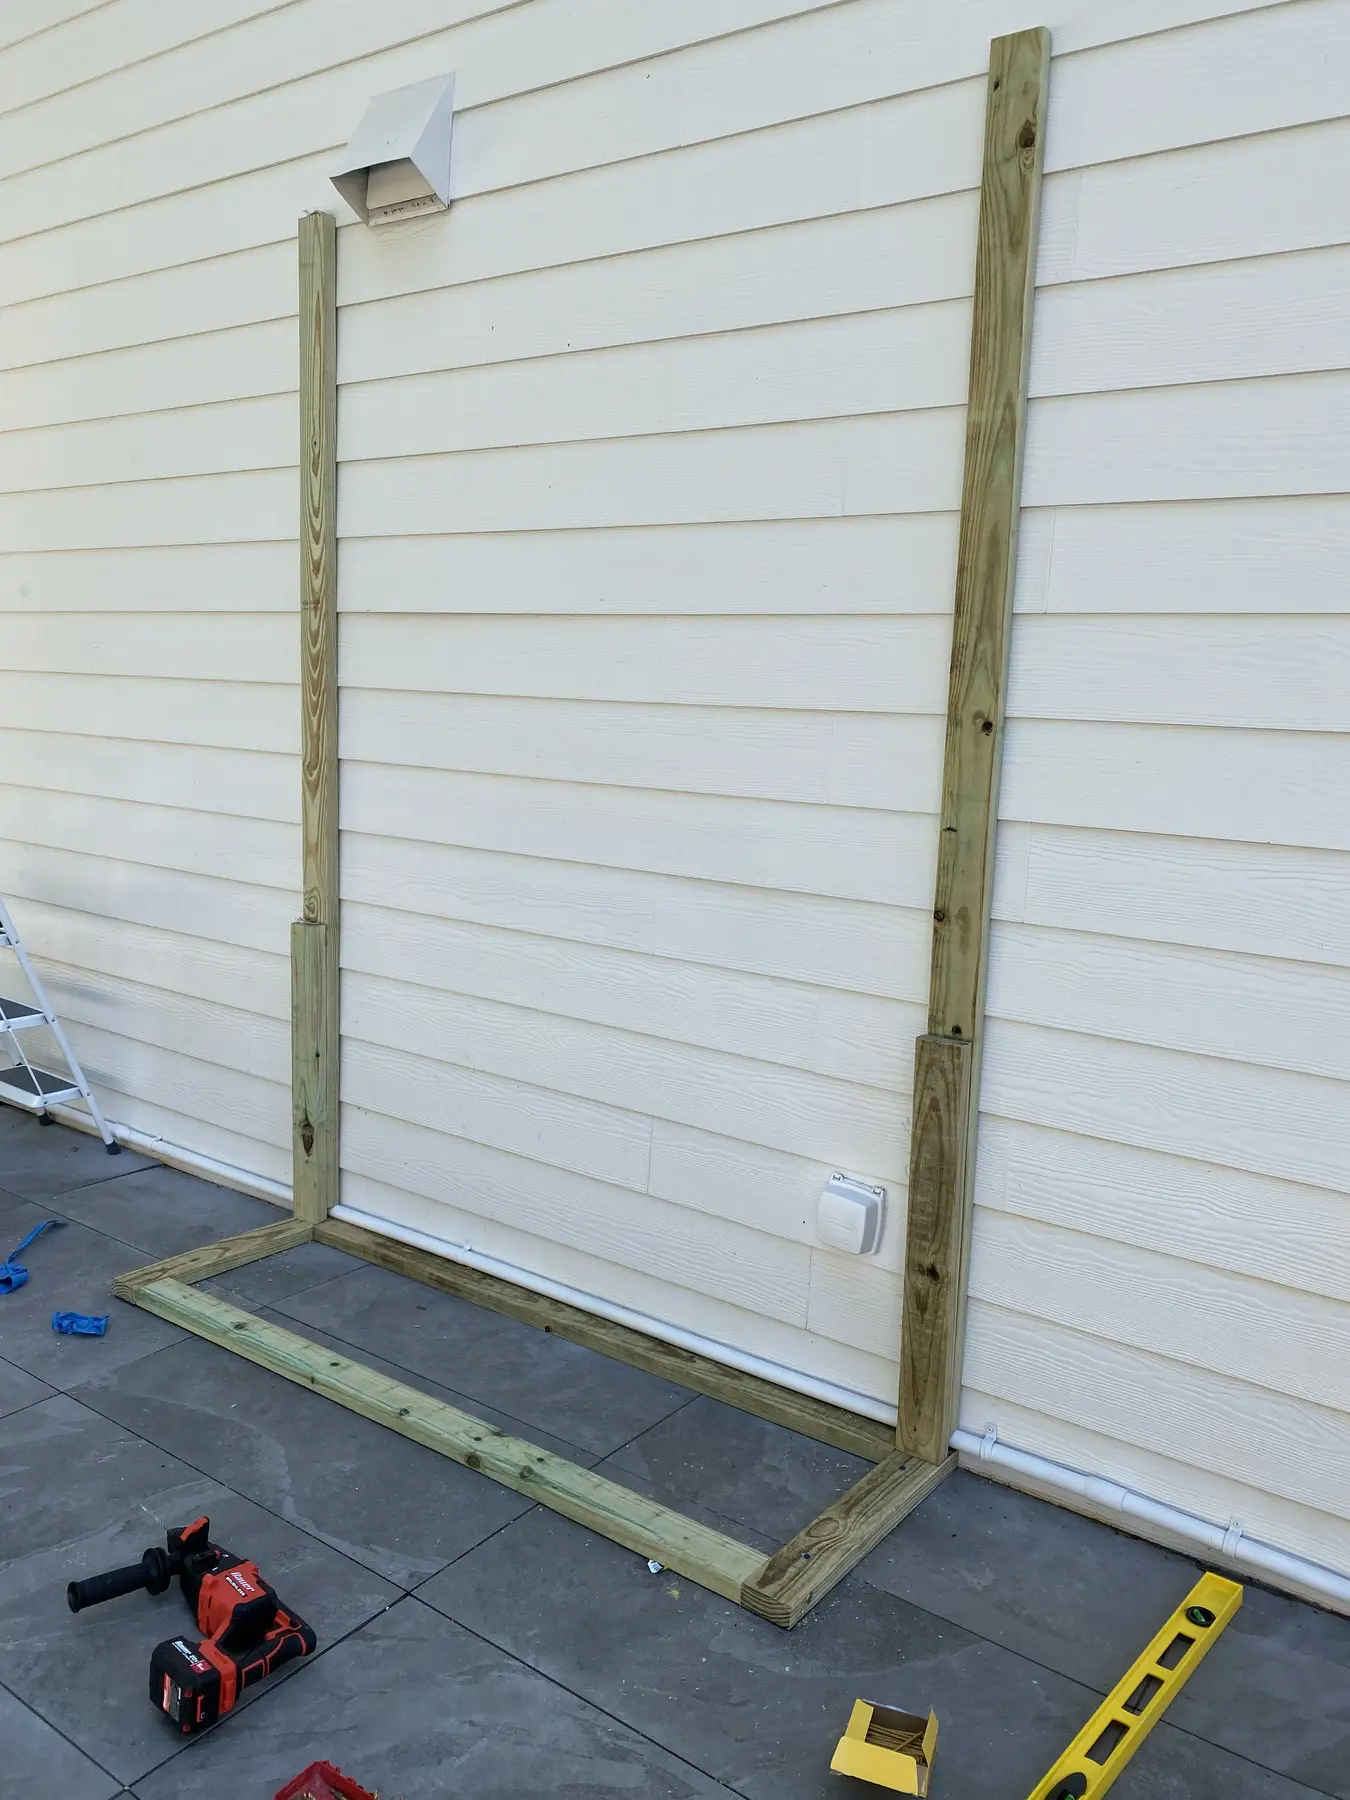
Initial structural layout for a custom Mo-Nady poolside television enclosure in Atlanta
01.1LAYOUT
Full wood framing for the custom poolside feature
01.2FRAME
Sheathing and weatherproofing installed on the poolside television enclosure
01.3SEAL
Slatted exterior finish and fireplace opening on the custom poolside feature
01.4FINISH
Completed poolside television enclosure with lift-up concealed doors and visual fireplace
01.5REVEAL
02

Window-to-door conversion · Marietta, GA · 5 business days

A window became a direct connection from the living room to the backyard.

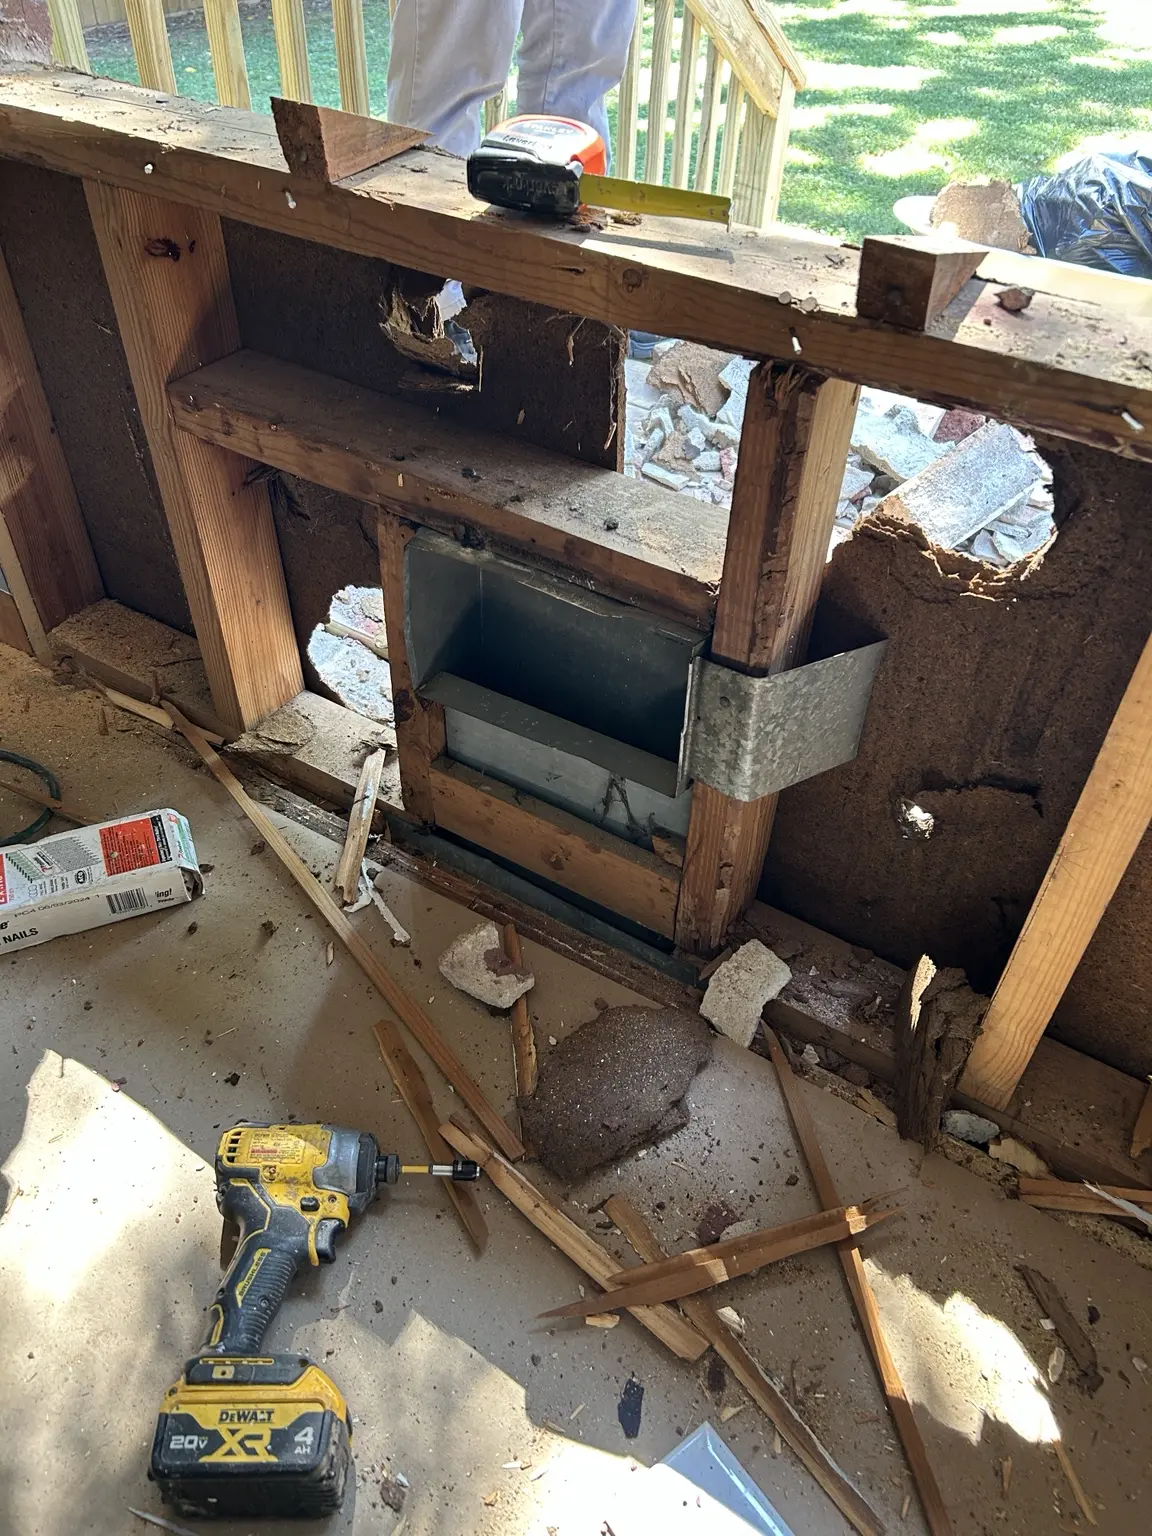
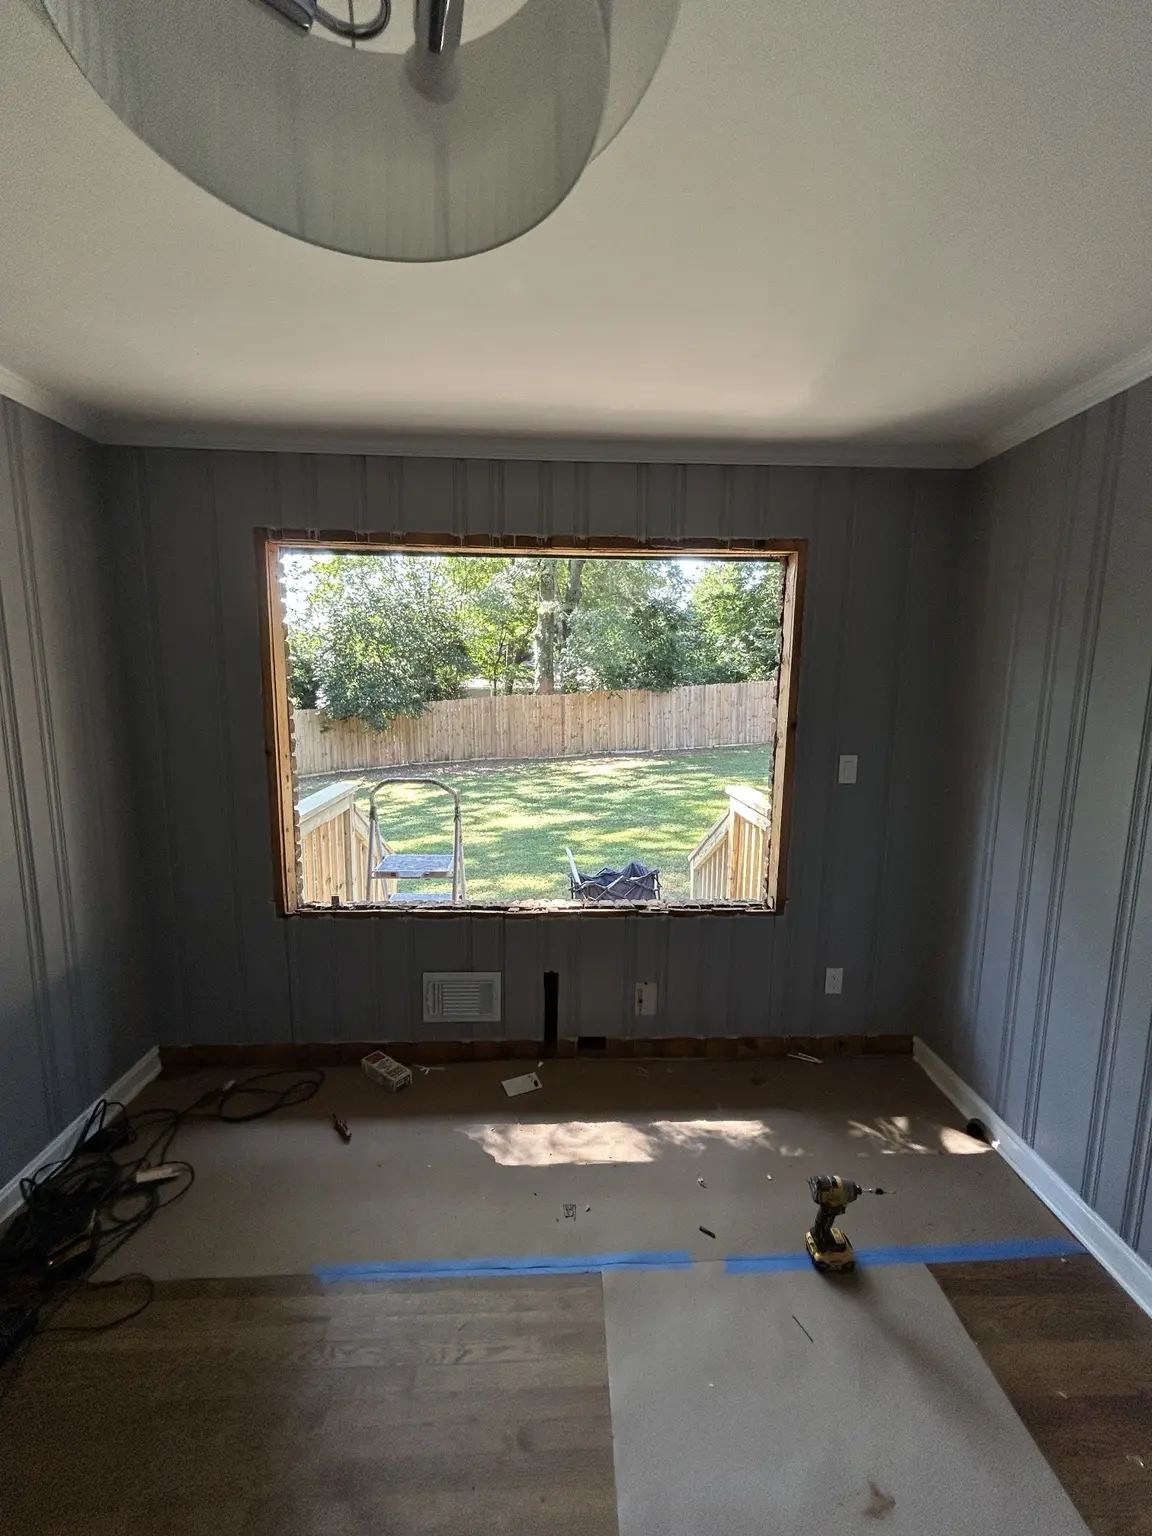
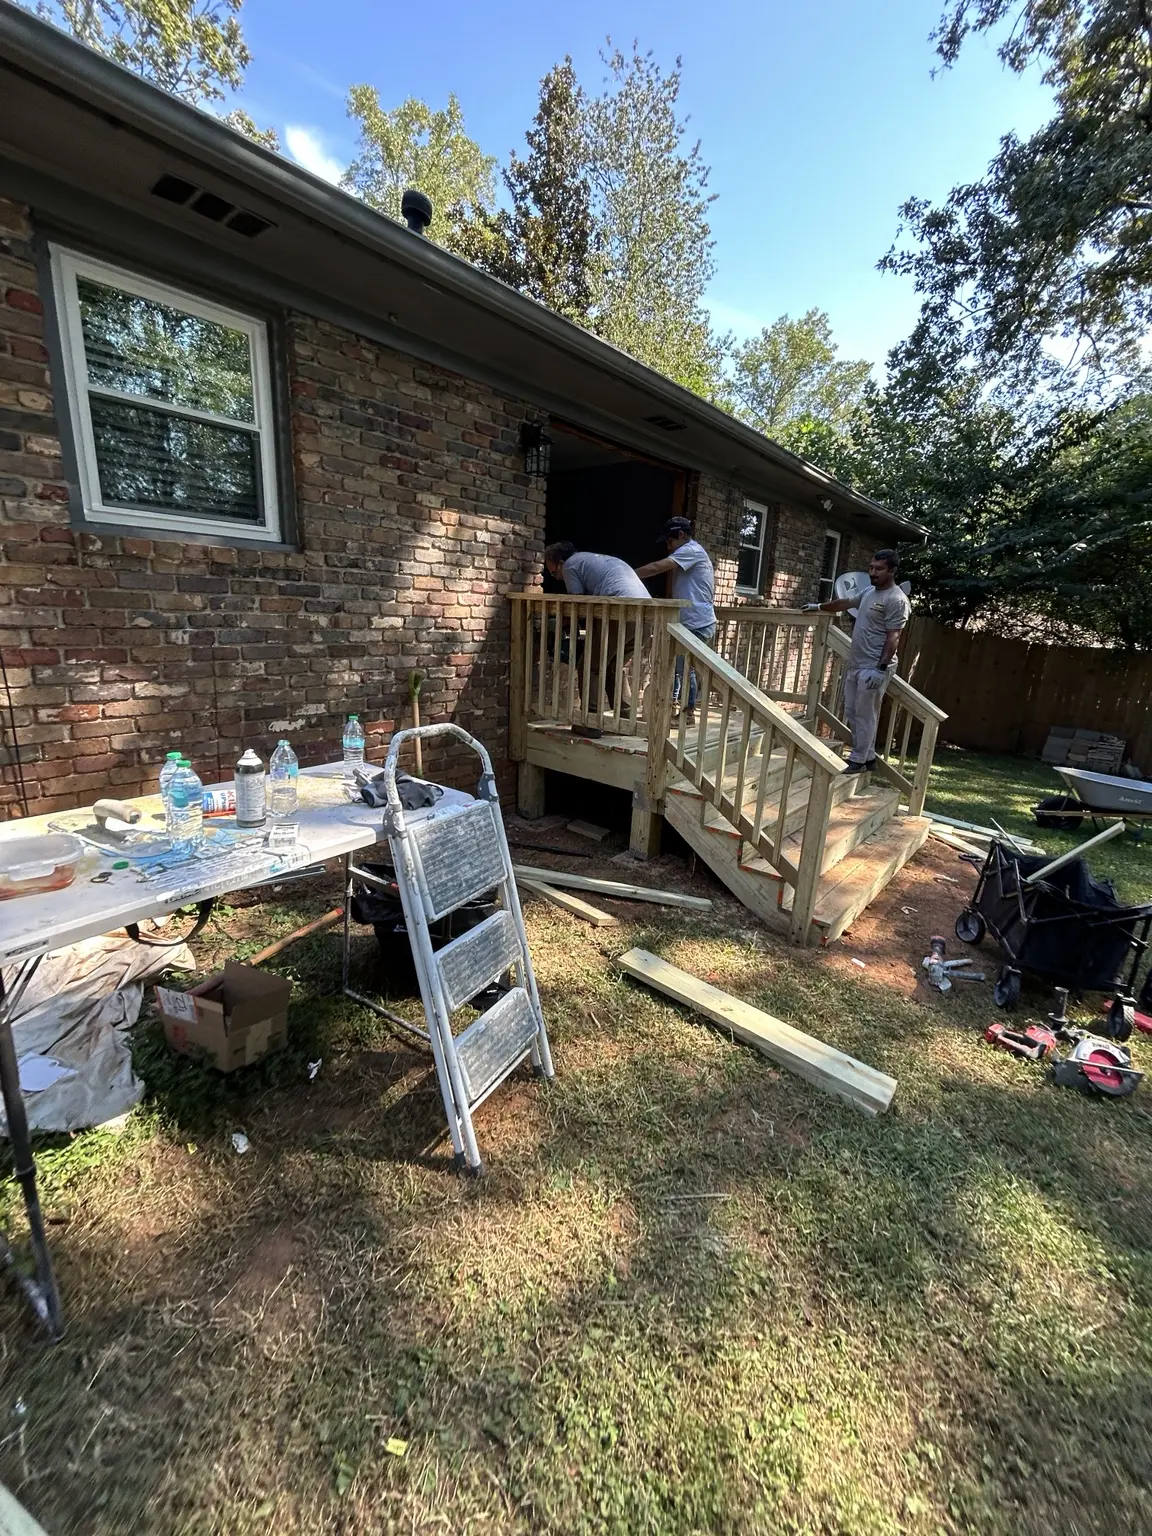
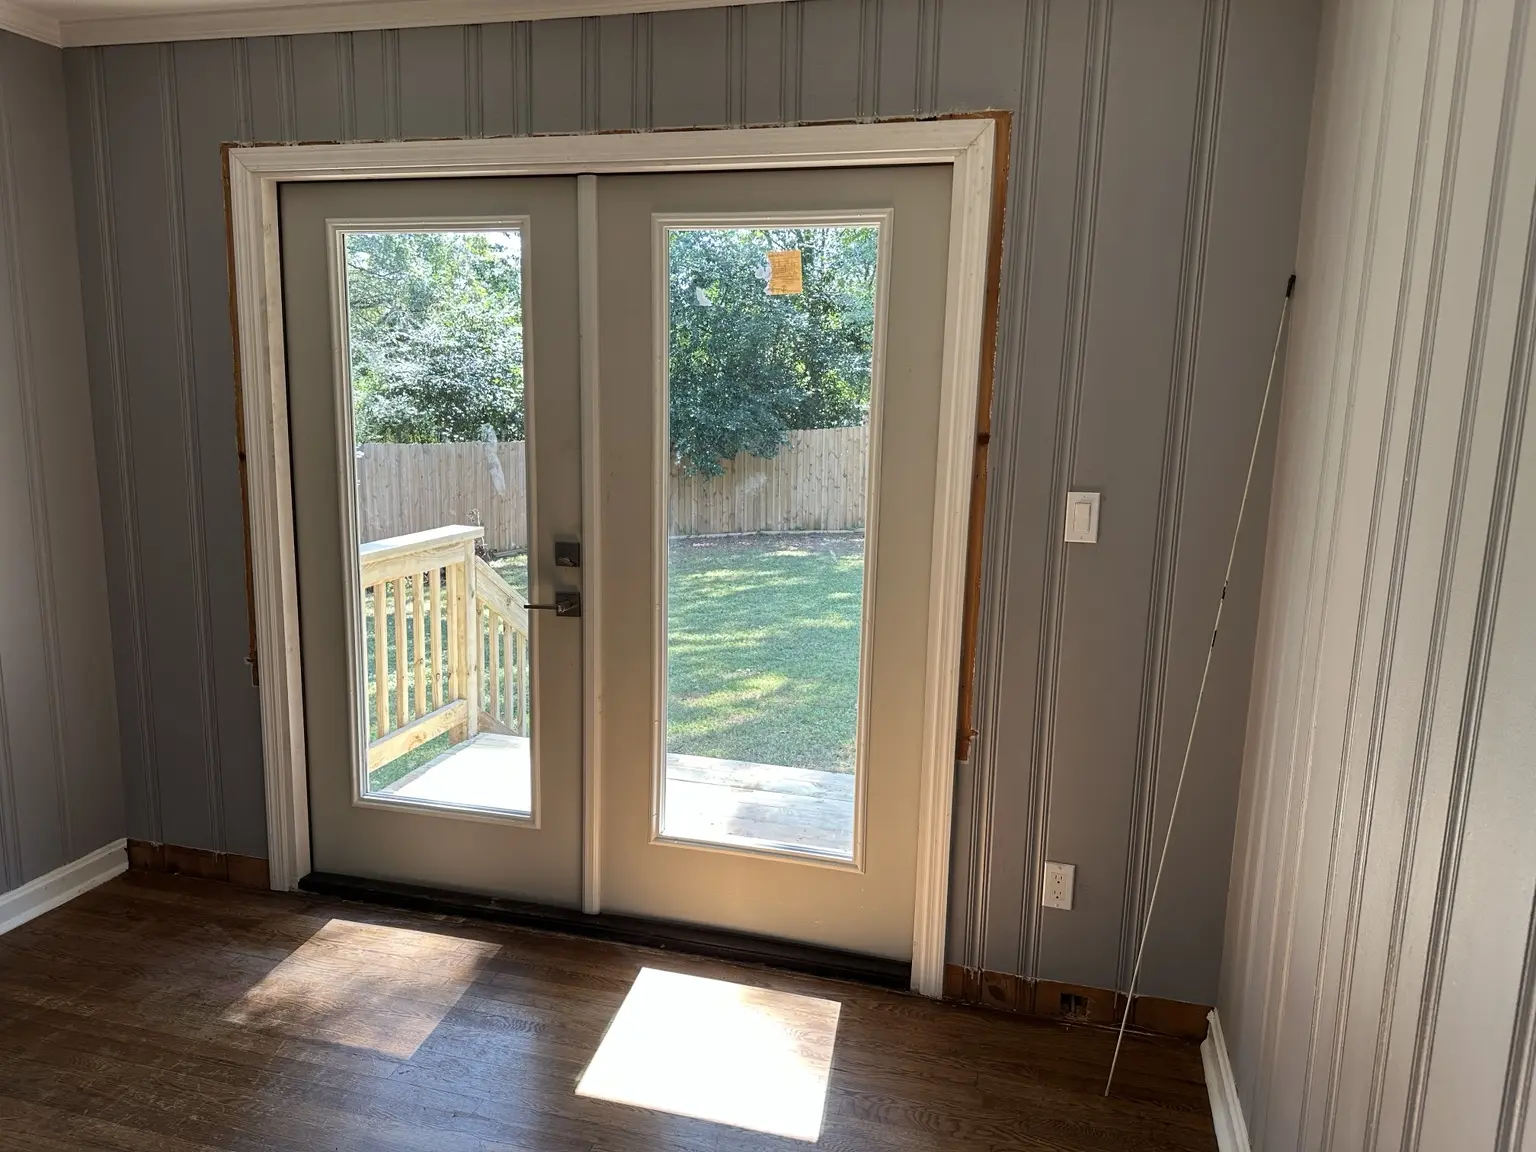
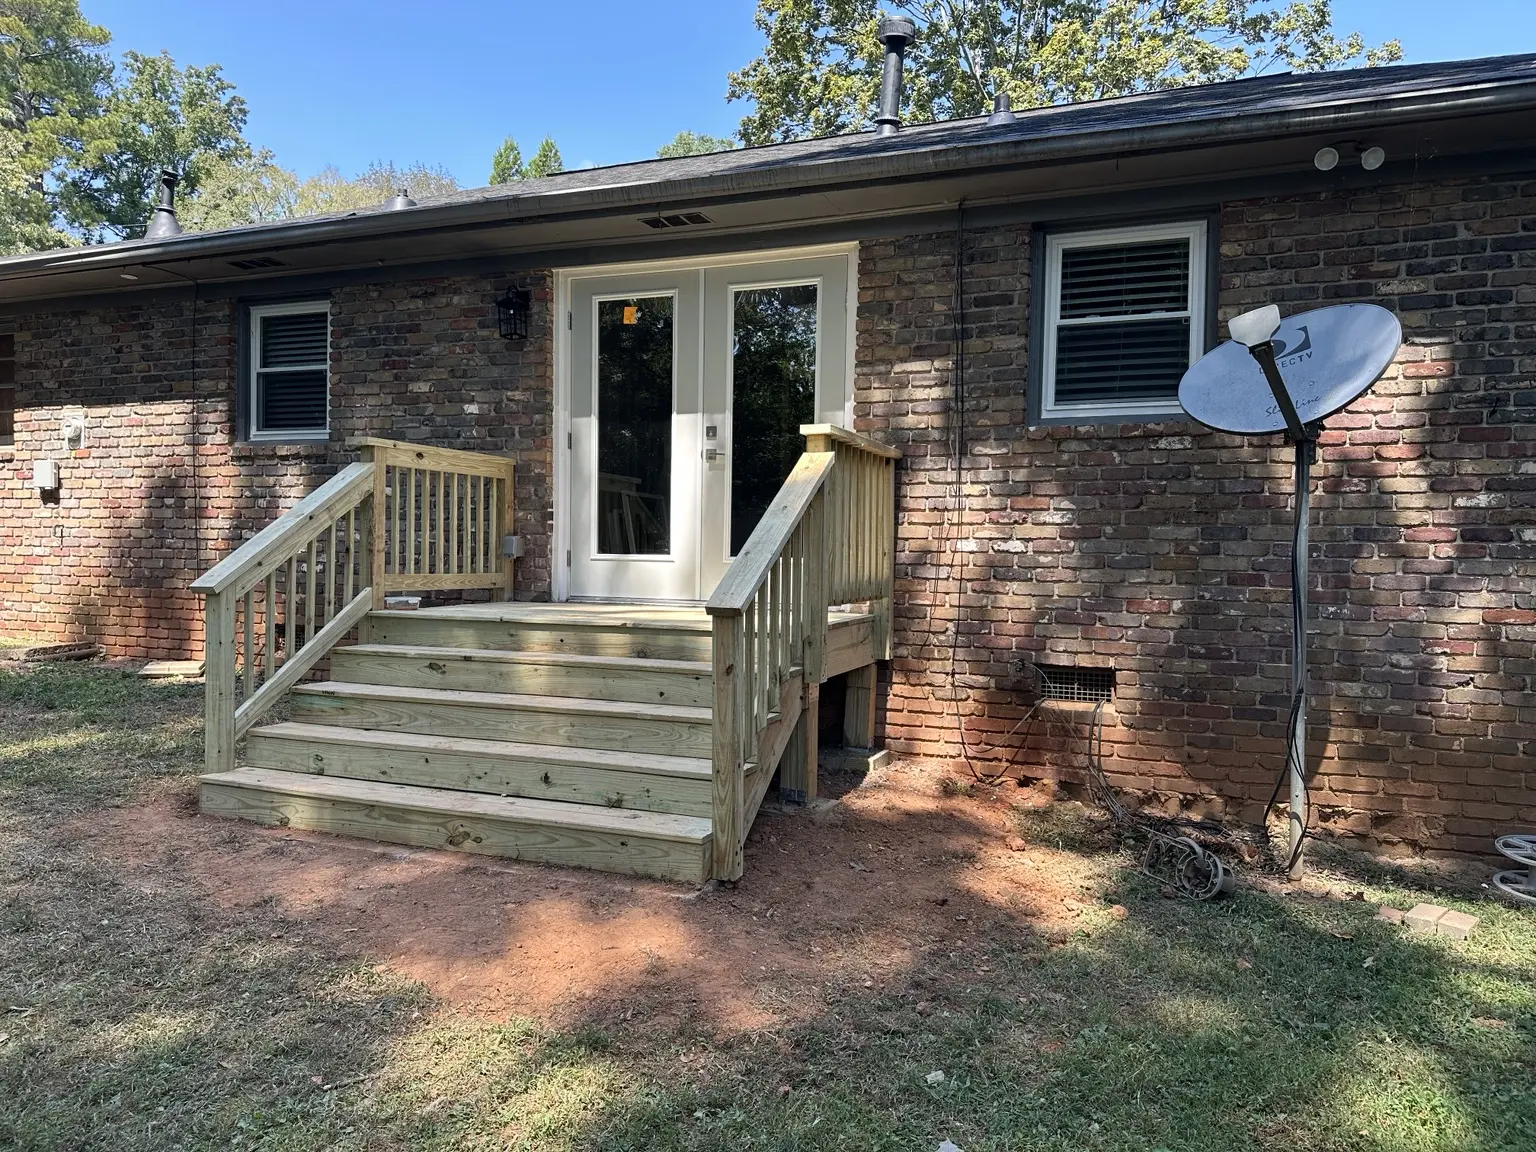
The existing window and brick opening were removed and rebuilt for double doors. Mo-Nady completed the new framing, door installation, interior finish work, and an exterior landing with stairs and railings.

MOST DEMANDING DETAILDemolishing and accurately creating the new opening through the brick wall.
01Brick opening02New framing03French doors04Landing & stairs
Plan a related project
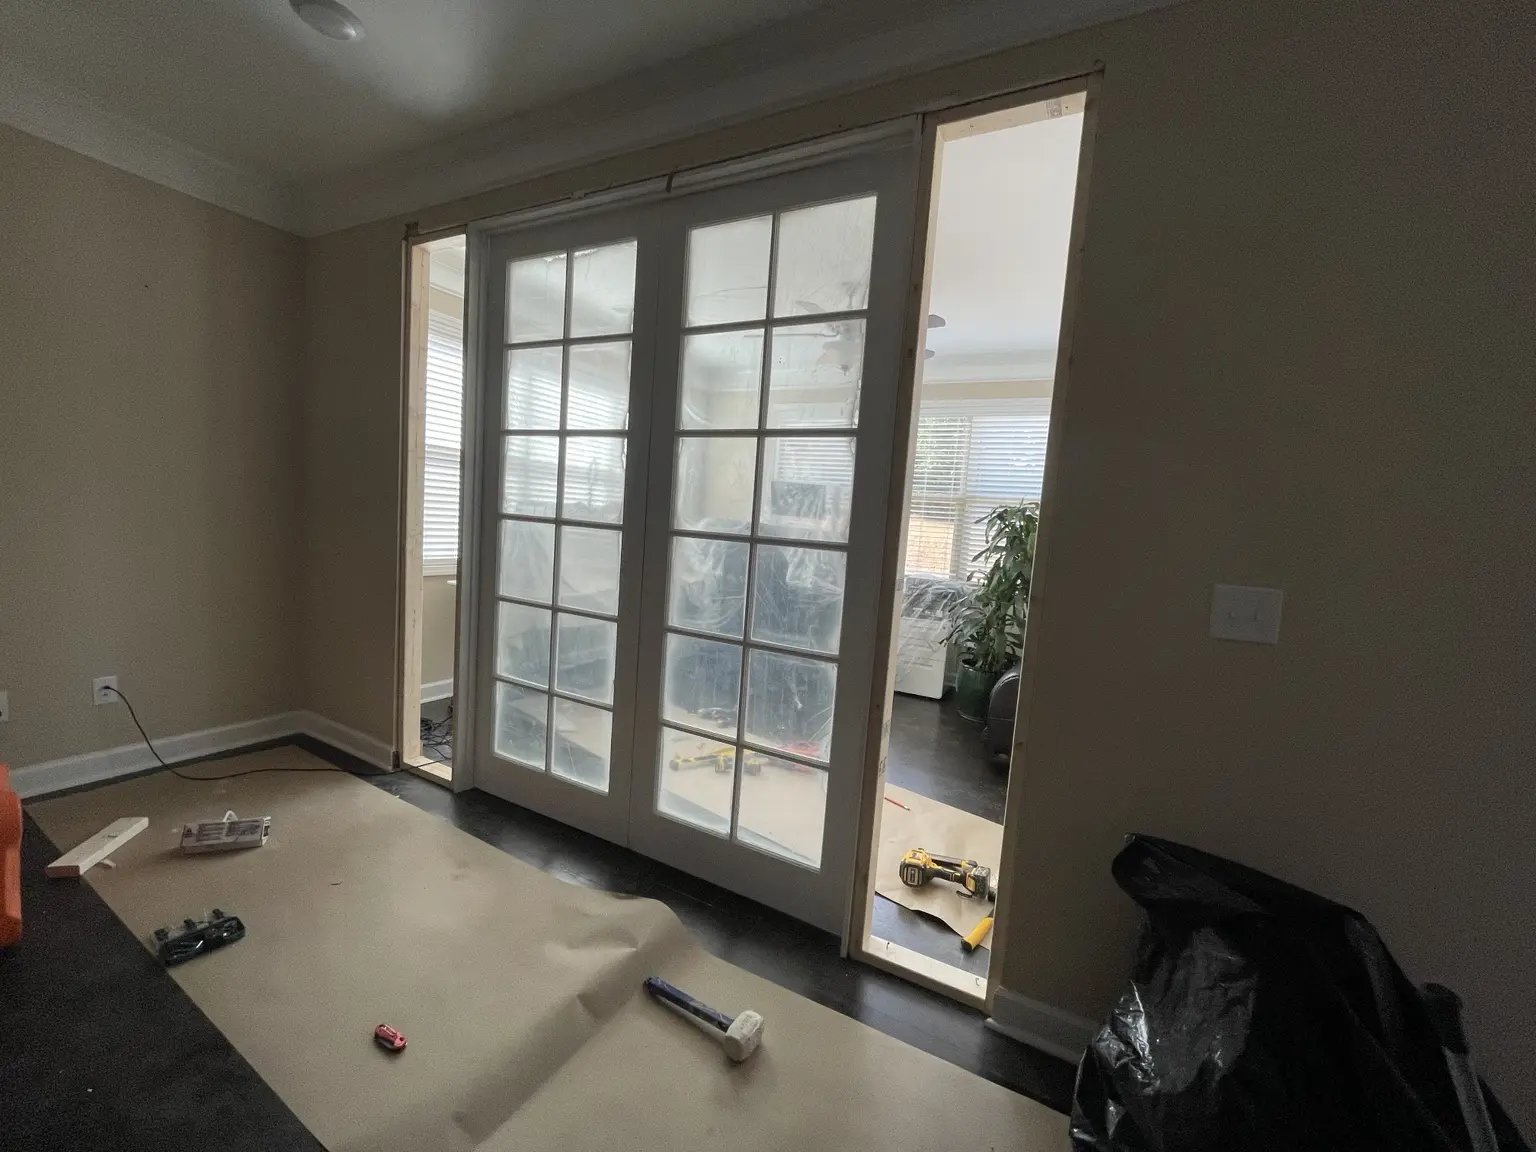
Interior wall opened after removal of the existing window for a French-door conversion
02.1OPEN
Prepared brick-wall opening for new double doors in Marietta
02.2PREP
Mo-Nady crew constructing the new exterior landing and stairs
02.3BUILD
New glazed double doors installed as seen from the living room
02.4INSTALL
Completed French doors with exterior landing, stairs, and railings
02.5CONNECT
03

Complete kitchen remodel · Marietta, GA · 10 business days

A dated kitchen rebuilt from the subfloor to the final backsplash cuts.

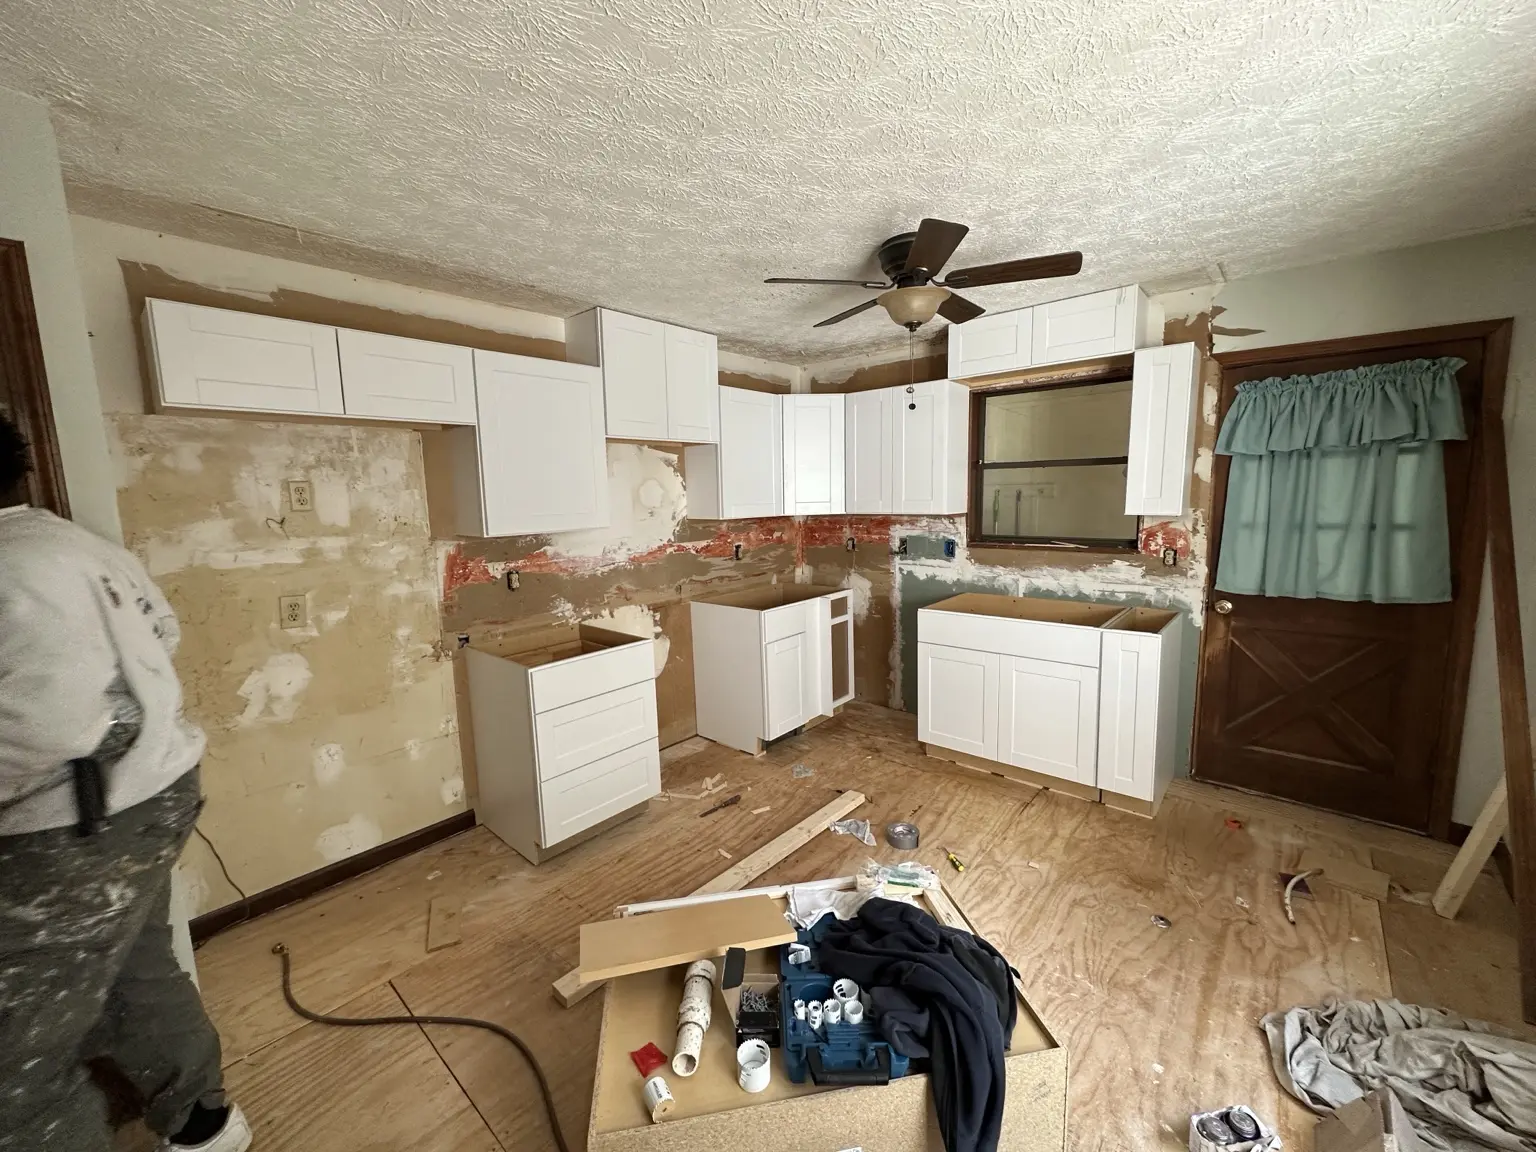
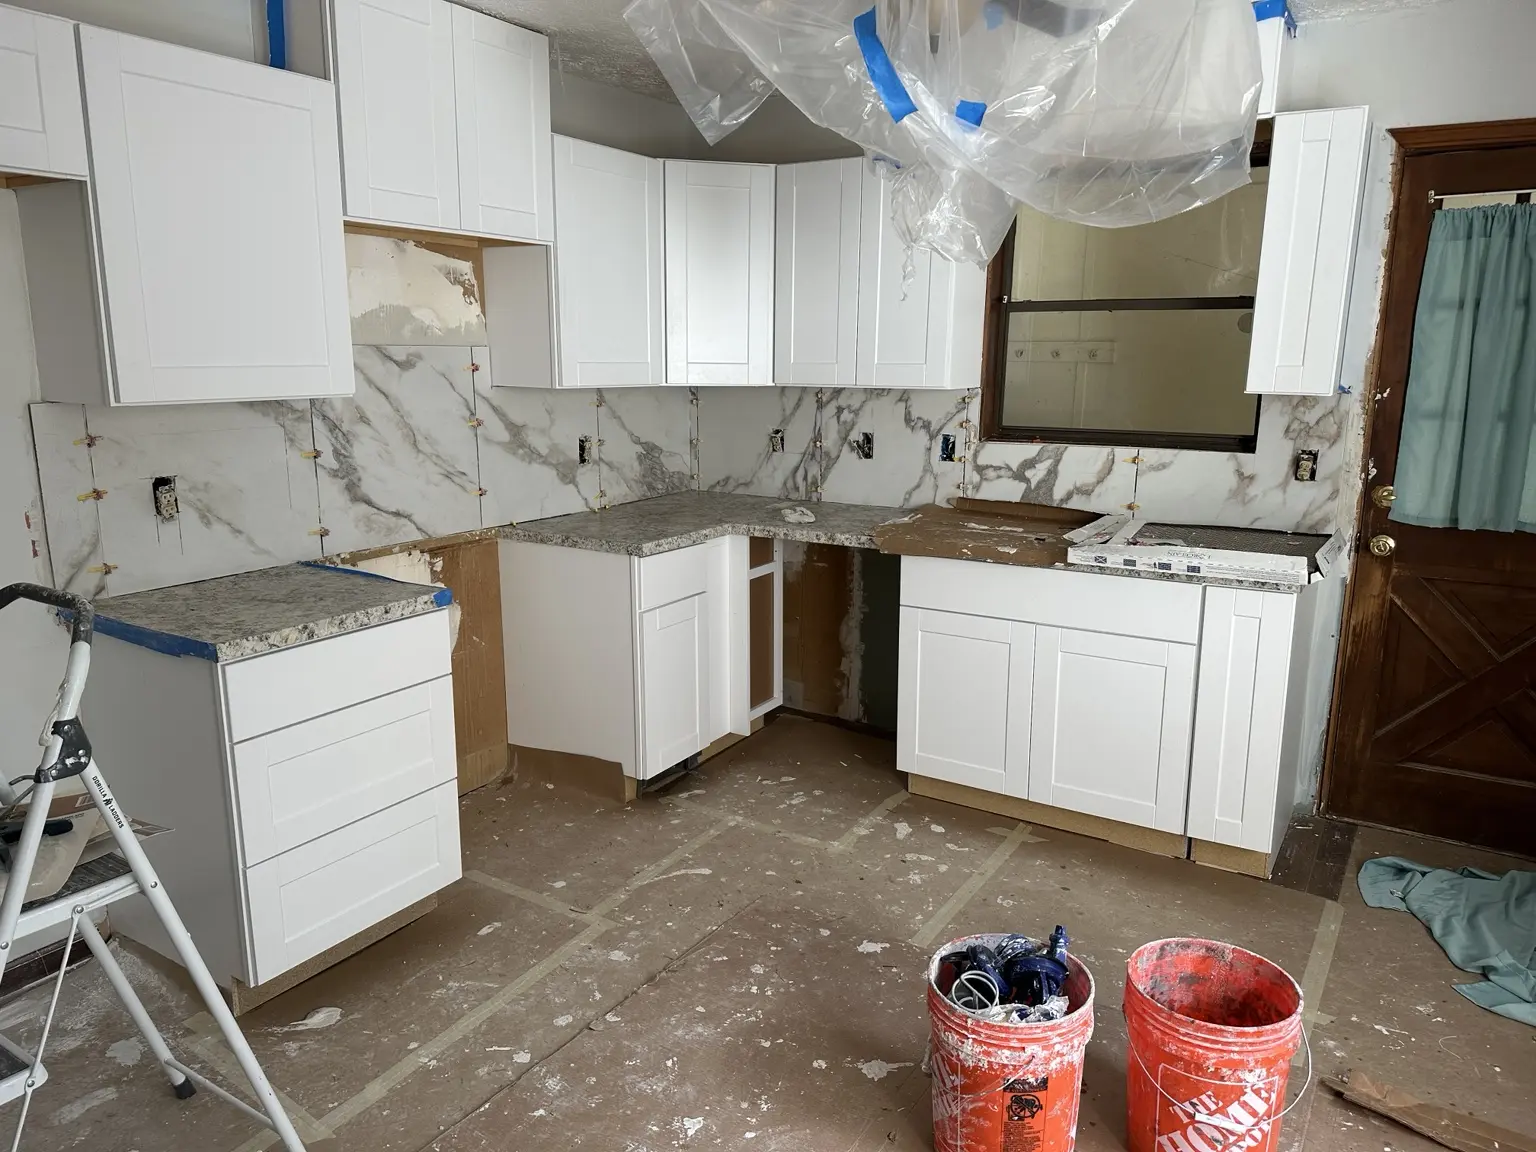
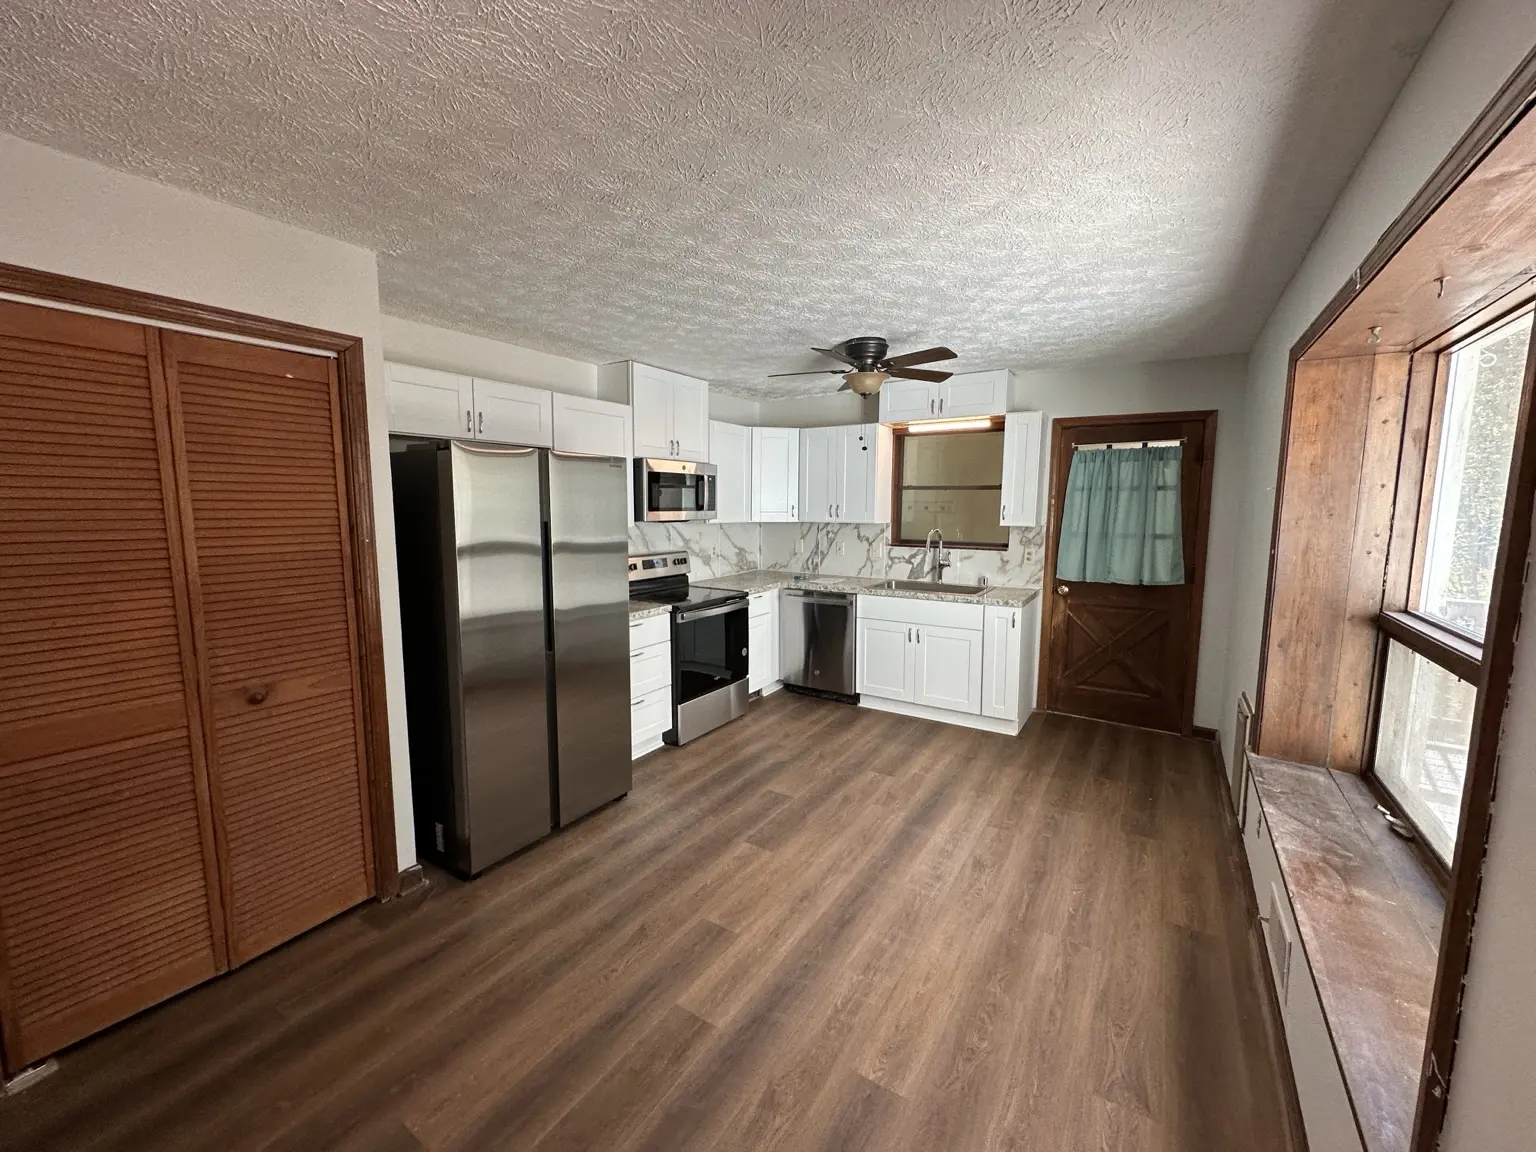
Mo-Nady handled the entire renovation: demolition, subfloor repair, new cabinetry, countertops, large-format backsplash tile, flooring, plumbing connections, and appliance installation.

MOST DEMANDING DETAILPrecision-cutting large-format backsplash tiles for narrow spaces and tight transitions.
01Demolition02Subfloor repair03Cabinet installation04Tile & finish
Plan a related project
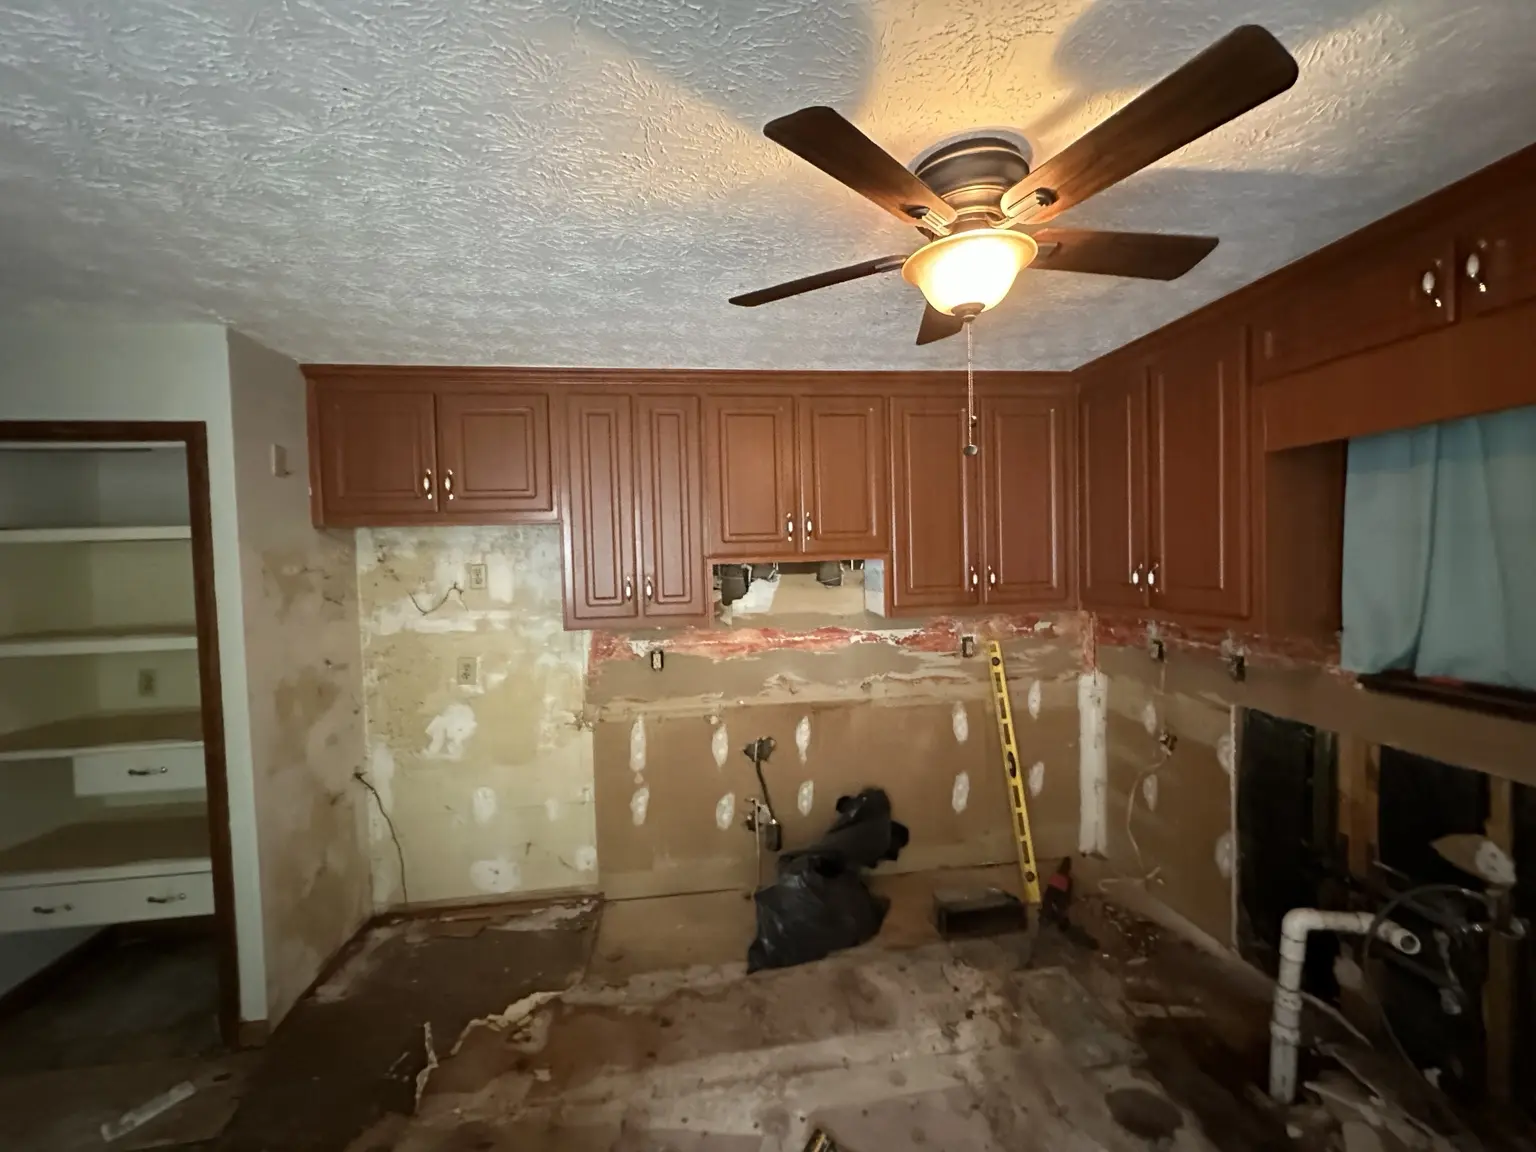
Marietta kitchen during demolition with old counters and lower cabinets removed
03.1DEMO
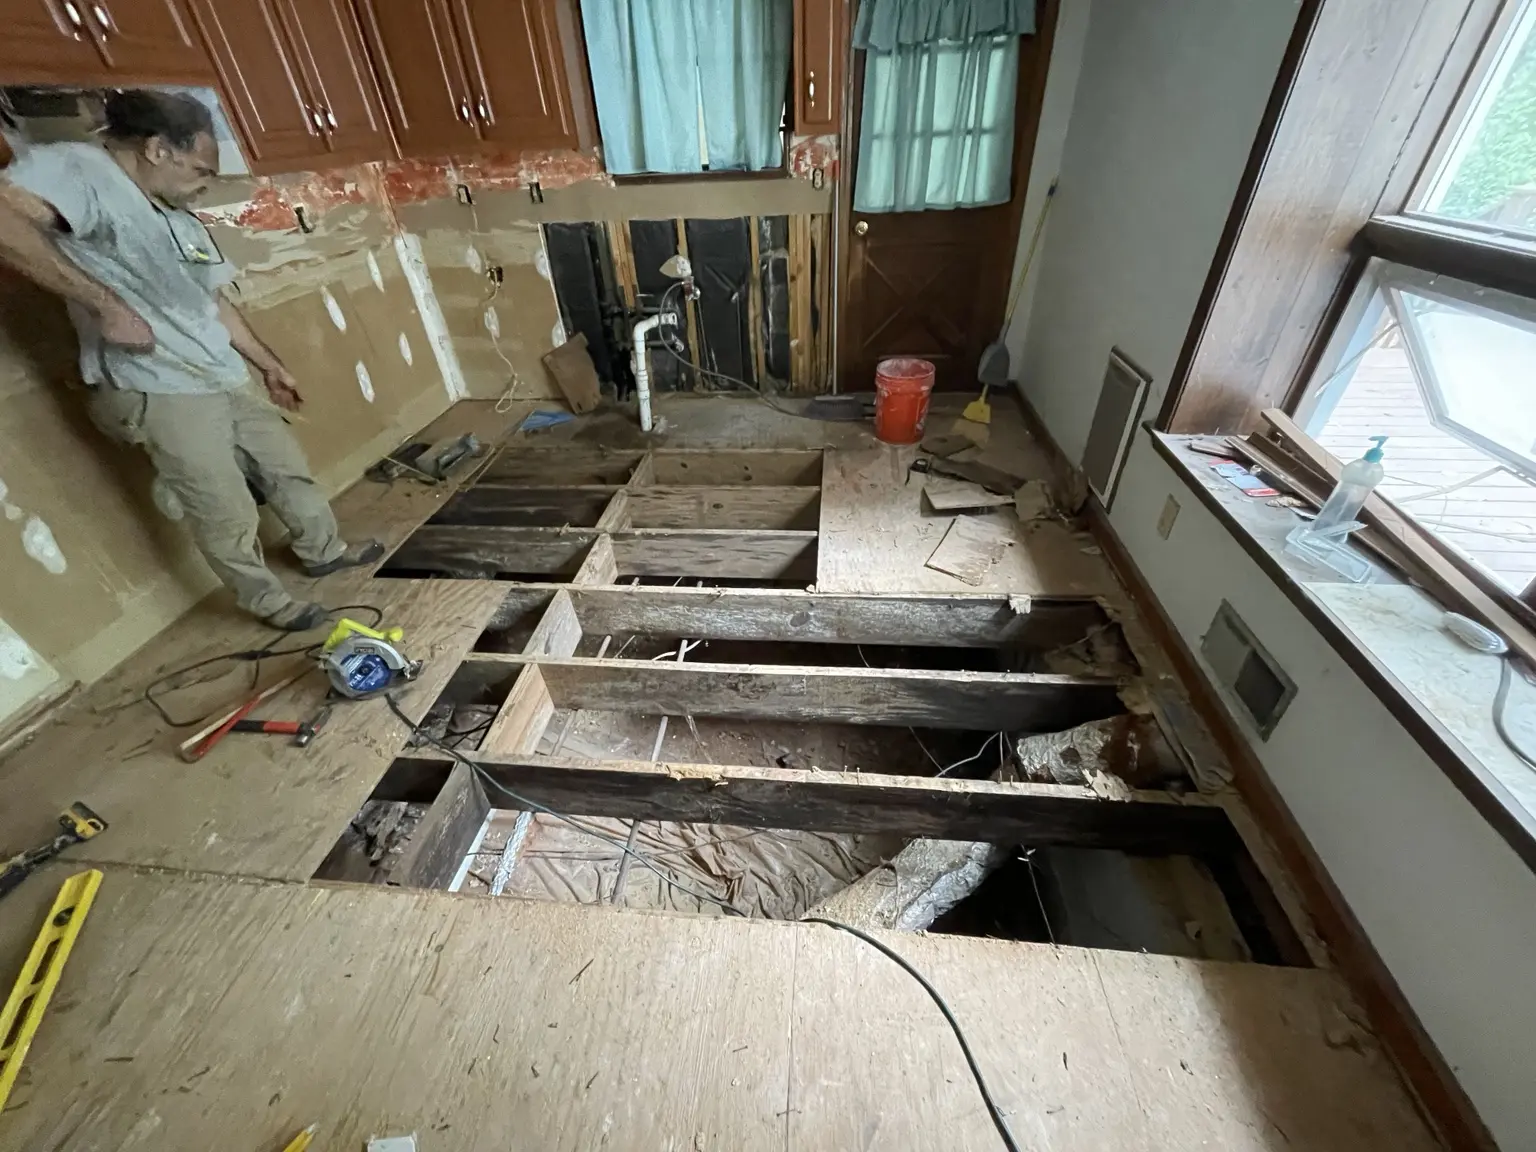
Kitchen subfloor opened to expose the floor framing for repair
03.2INSPECT
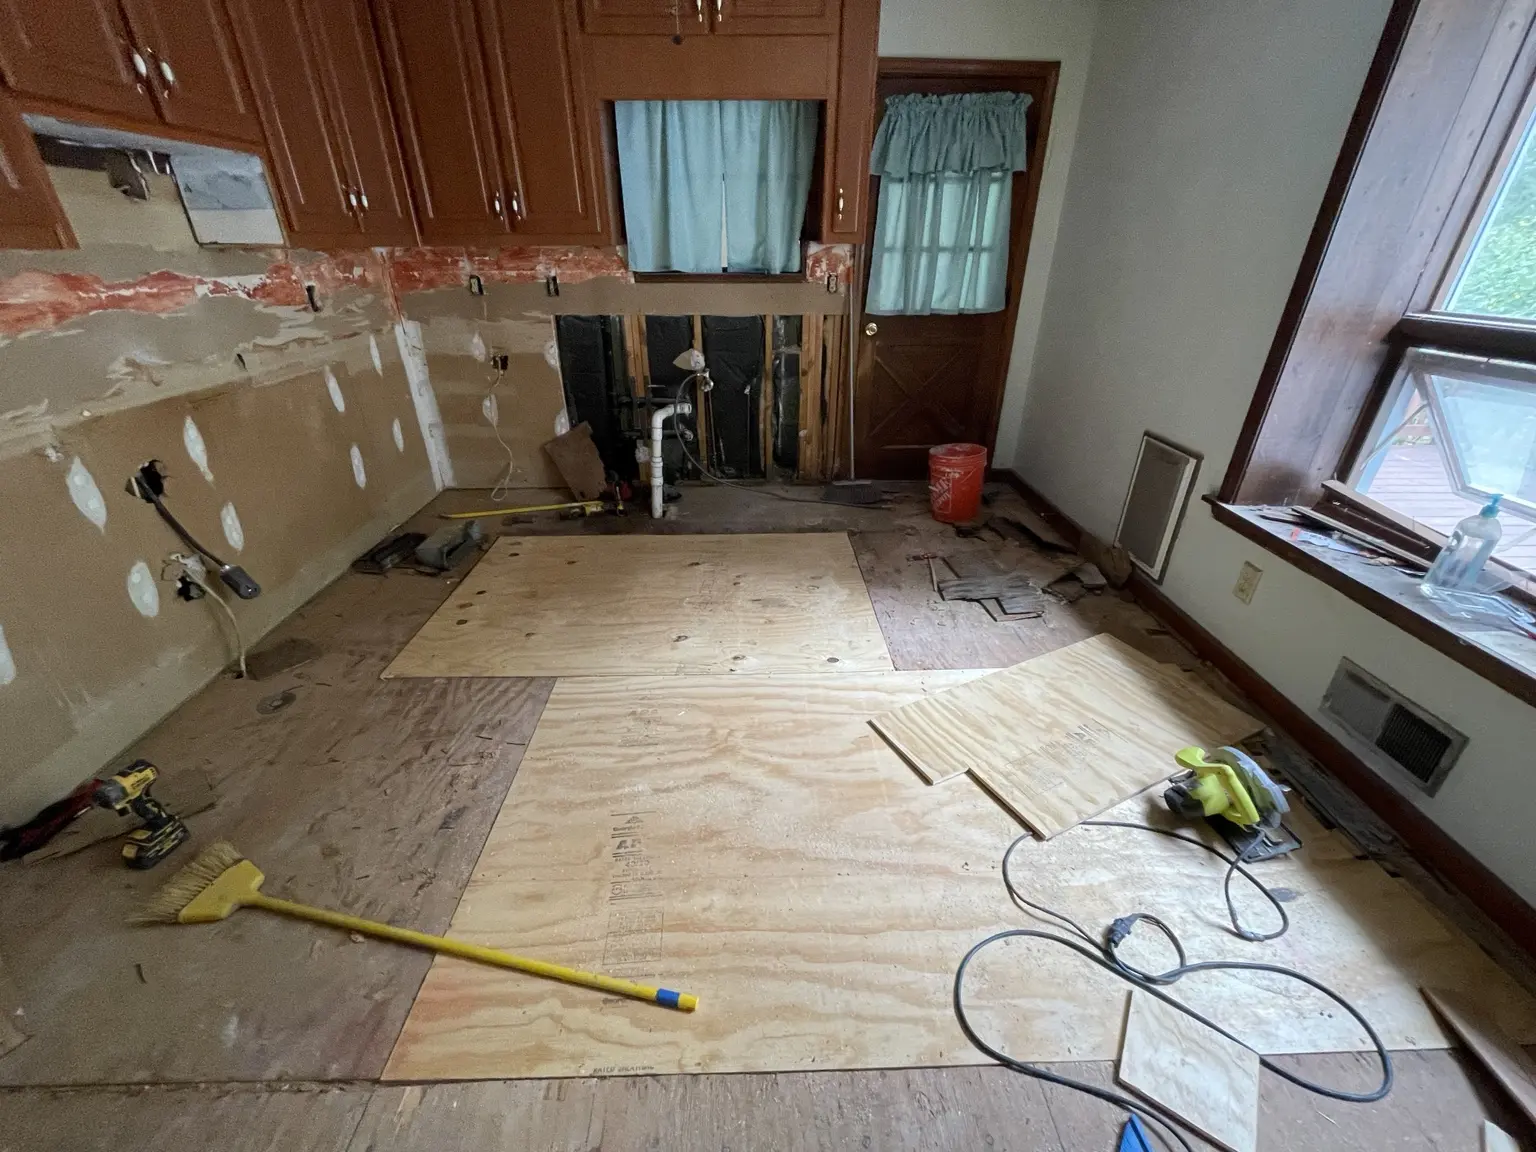
New plywood installed during kitchen subfloor repair
03.3REPAIR
White shaker cabinets being laid out for the remodeled kitchen
03.4SET
Large-format marble-look backsplash tile being installed around the new cabinets
03.5TILE
Completed Marietta kitchen with white cabinets, backsplash, appliances, and new flooring
03.6COMPLETE
04

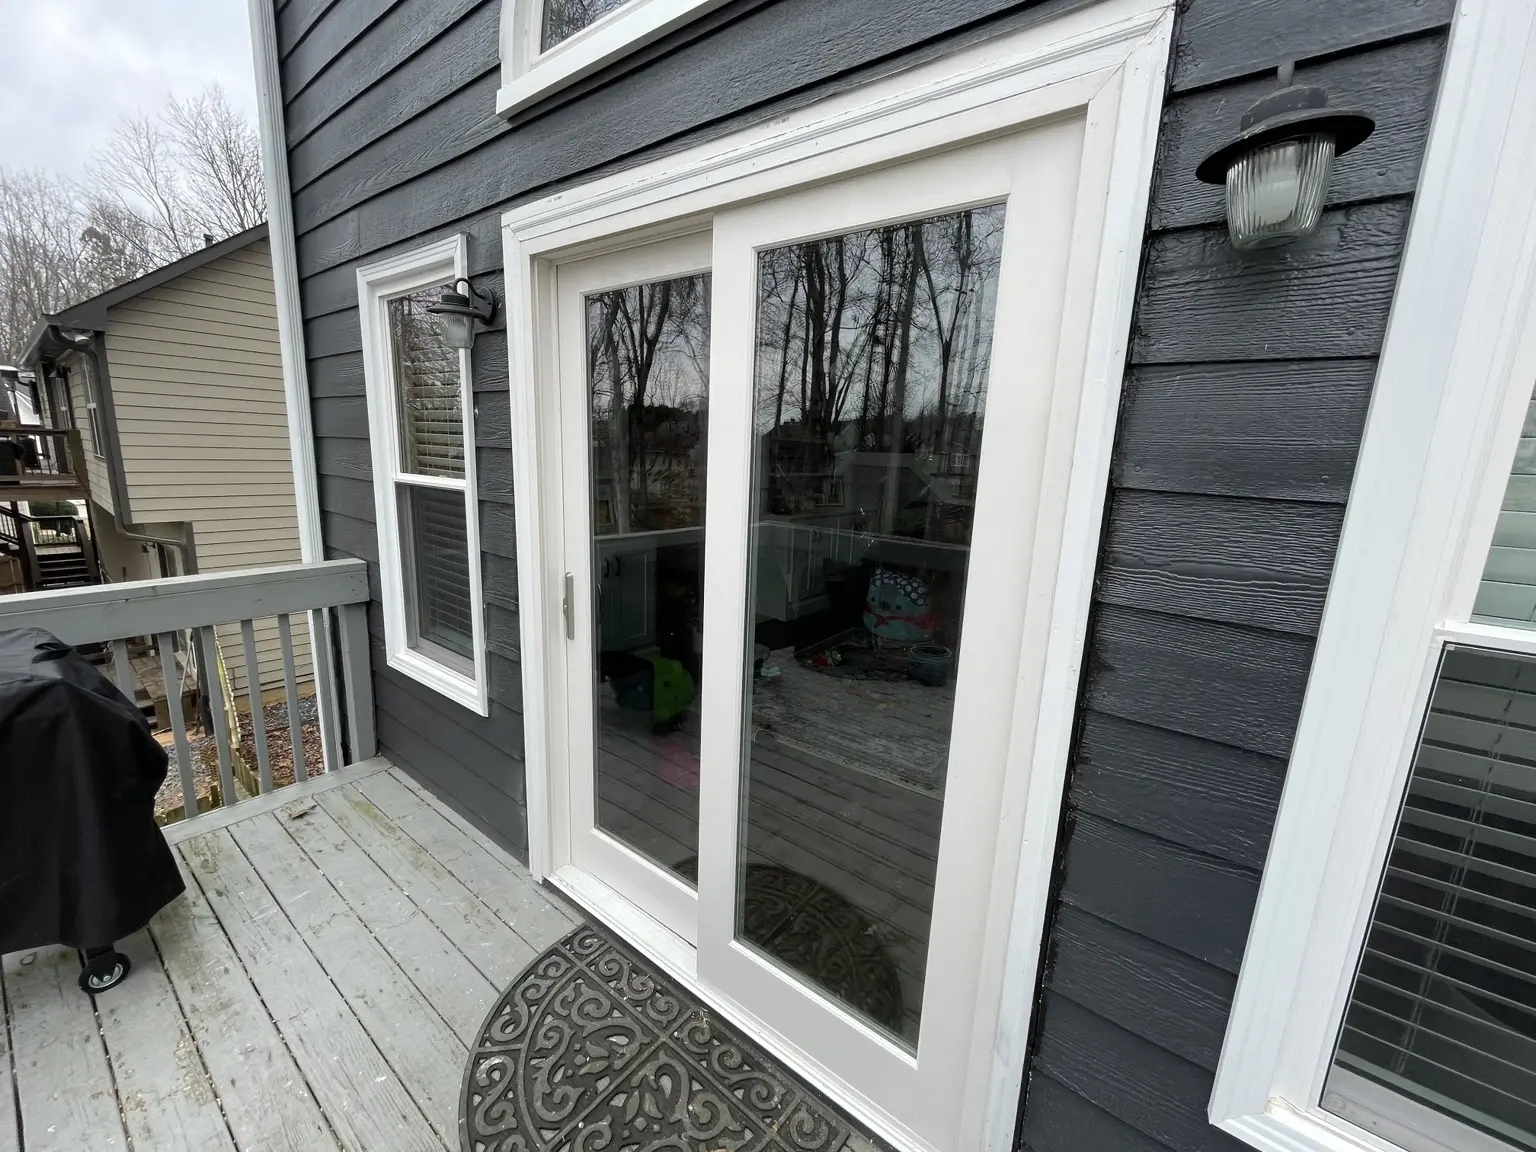
Door repair & replacement · Marietta, GA · 1 business day

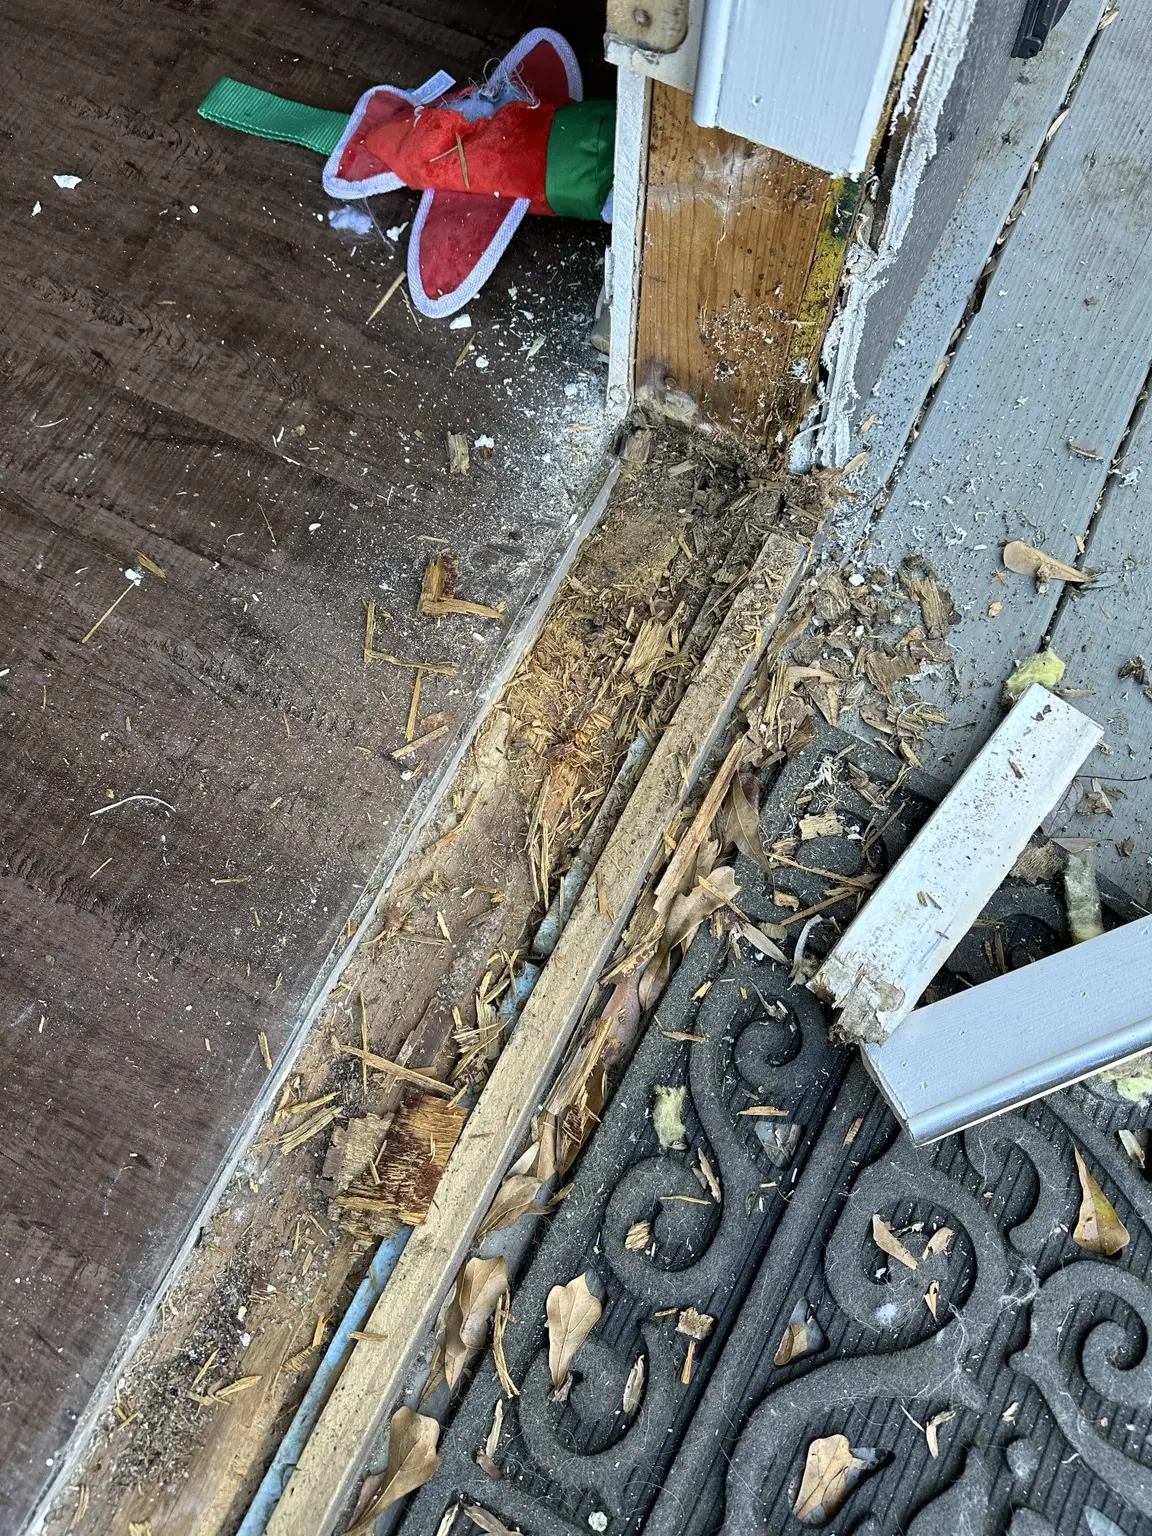
Hidden rot repaired before the replacement doors went in.

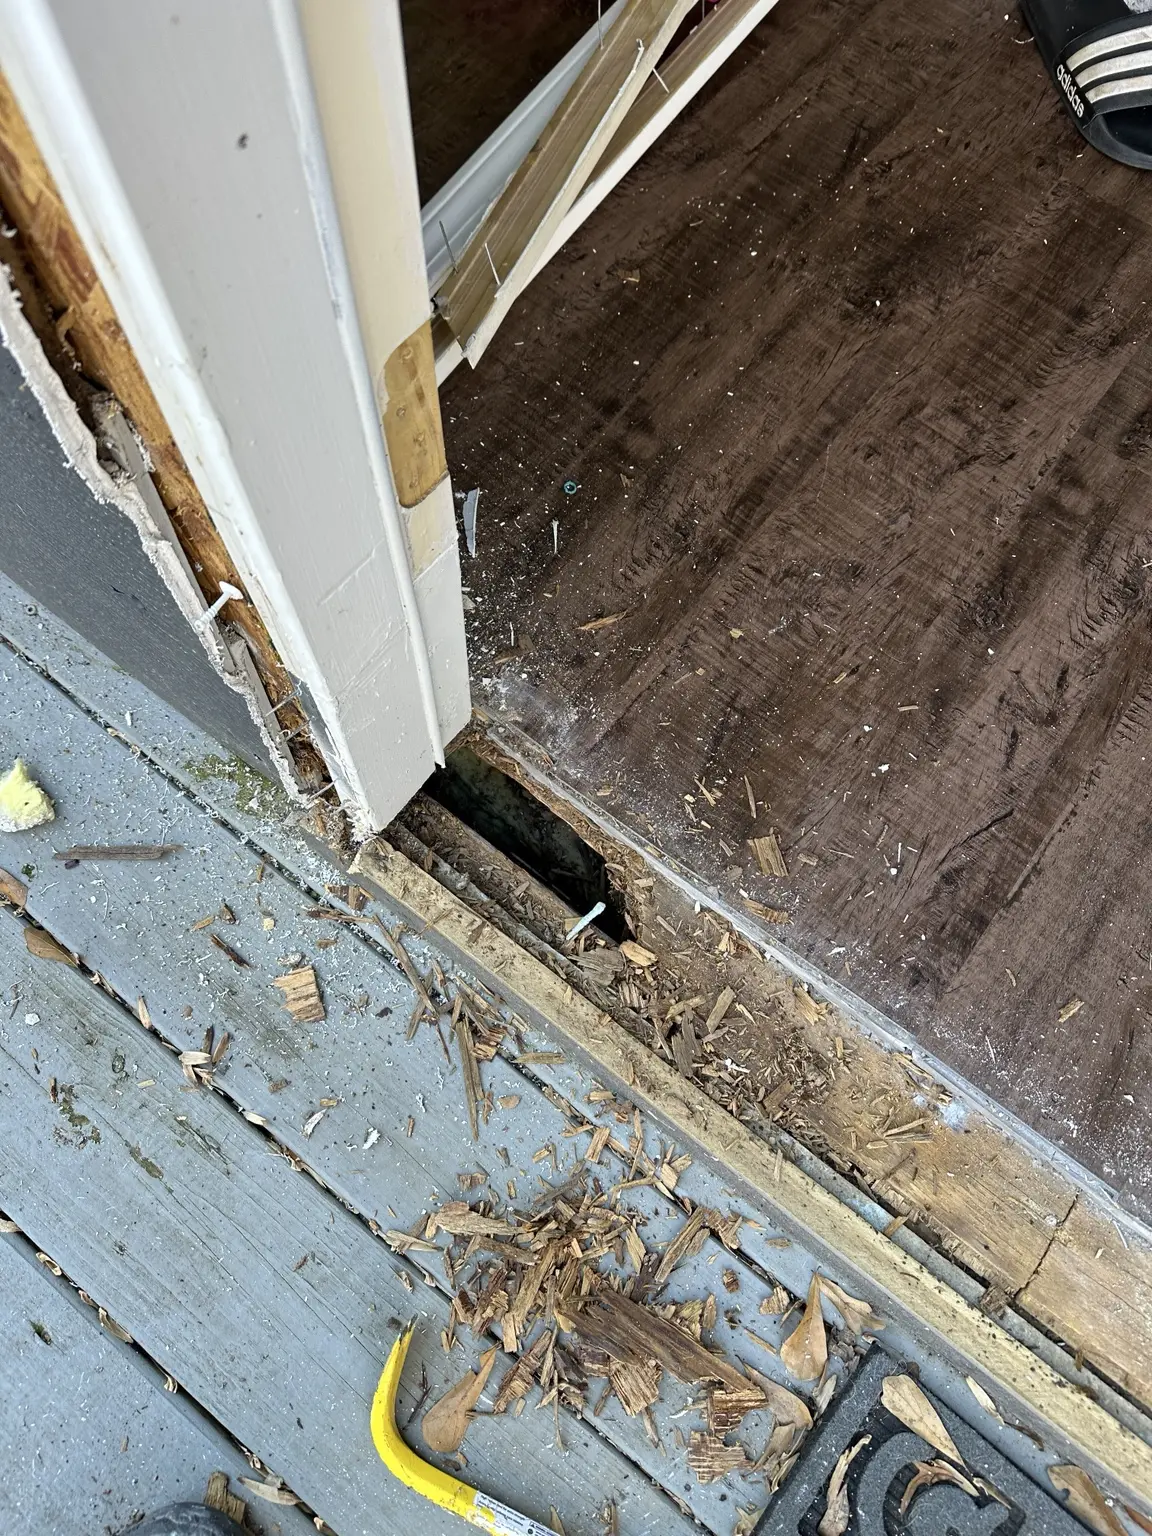
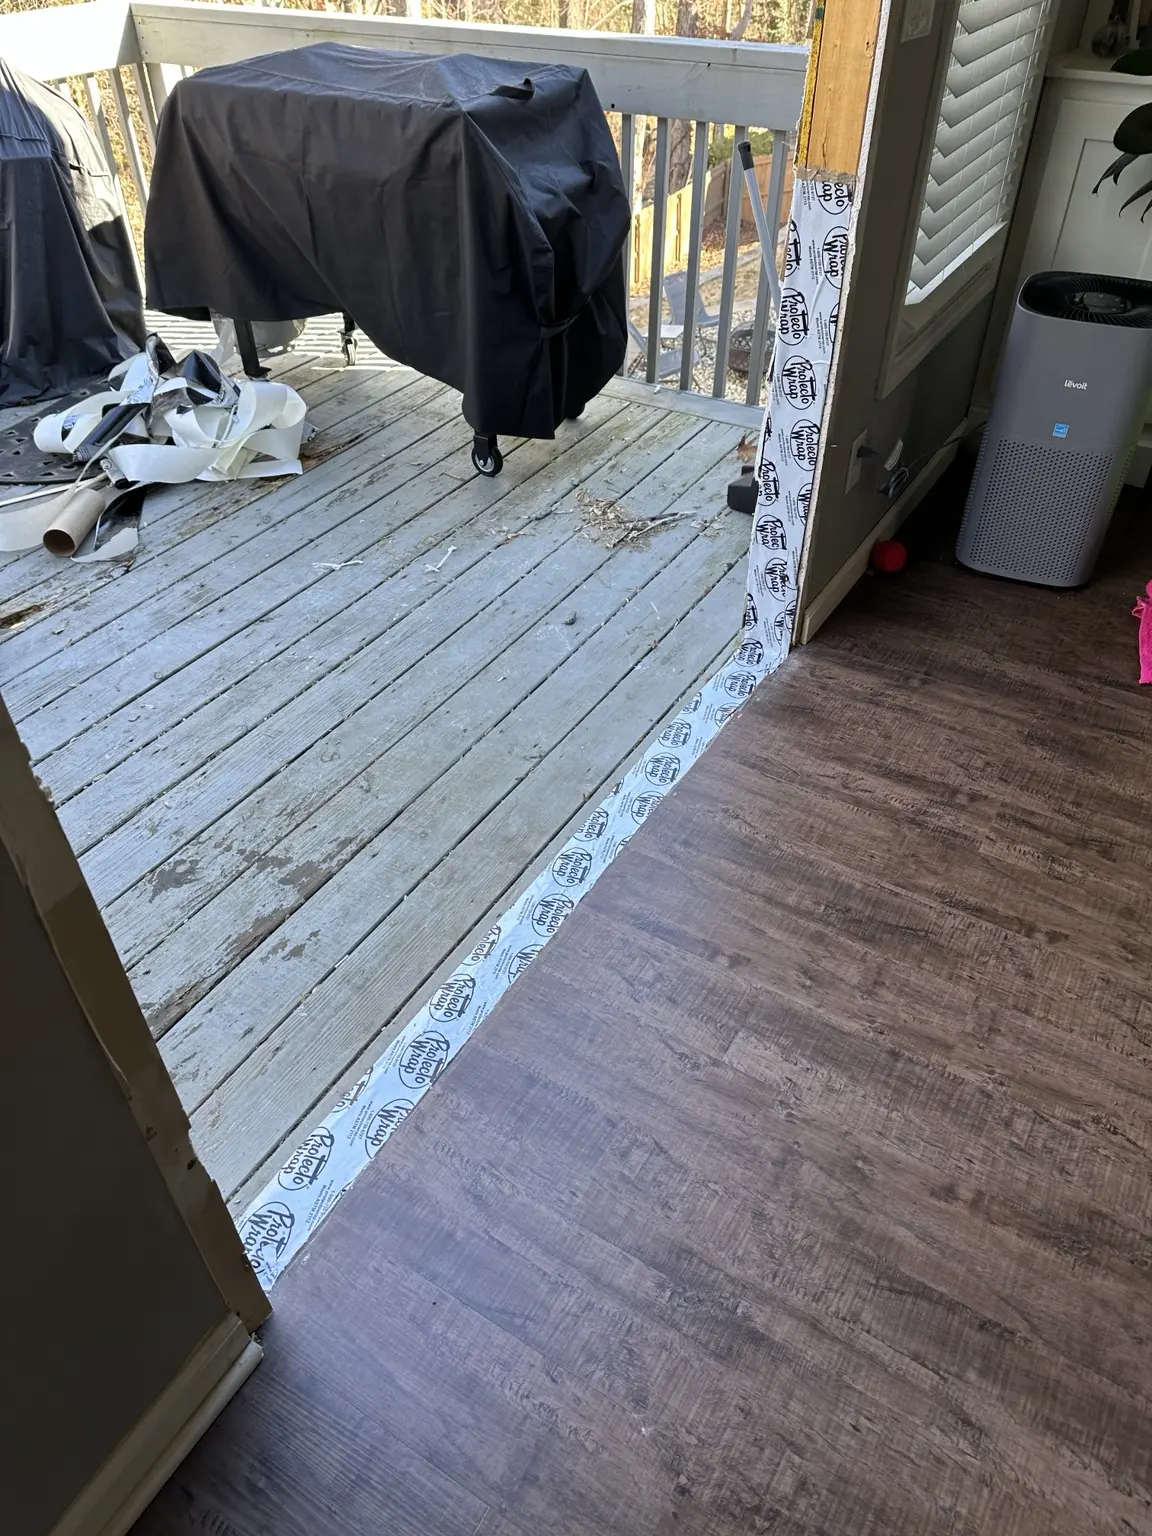
After the trim came off, deterioration was visible at the sill, threshold, molding, and adjacent subfloor. Mo-Nady retained every sound component, repaired the damaged areas, waterproofed the opening, and installed the replacement doors and trim without replacing the framing.

MOST DEMANDING DETAILRemoving only the compromised material while preserving the sound structure around it.
01Damage assessment02Selective removal03Waterproofing04Door replacement
Plan a related project
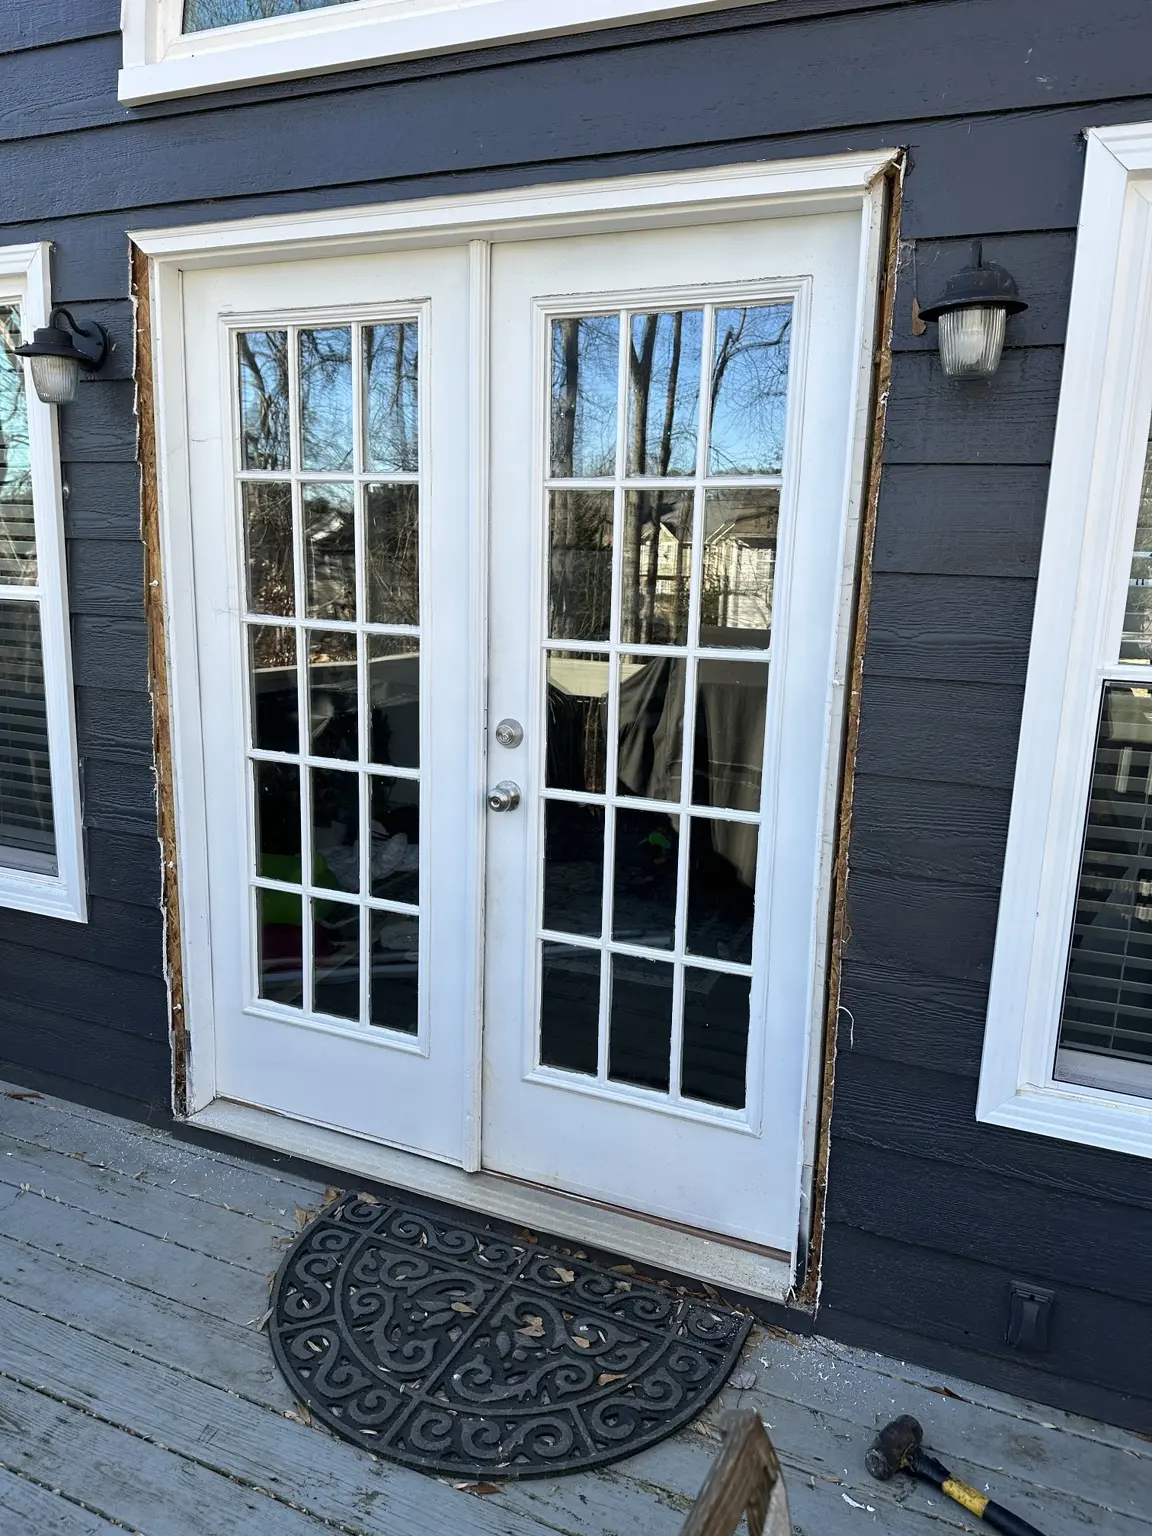
Original exterior French doors before repair in Marietta
04.1ASSESS
Rotten threshold and damaged subfloor exposed beneath the door opening
04.2EXPOSE
Close view of moisture-related wood deterioration at the doorway
04.3DETAIL
Repaired doorway opening with new waterproofing membrane
04.4SEAL
Completed replacement French doors with new exterior trim
04.5REPLACE
05

Interior transformation · Alpharetta, GA · 3 business days

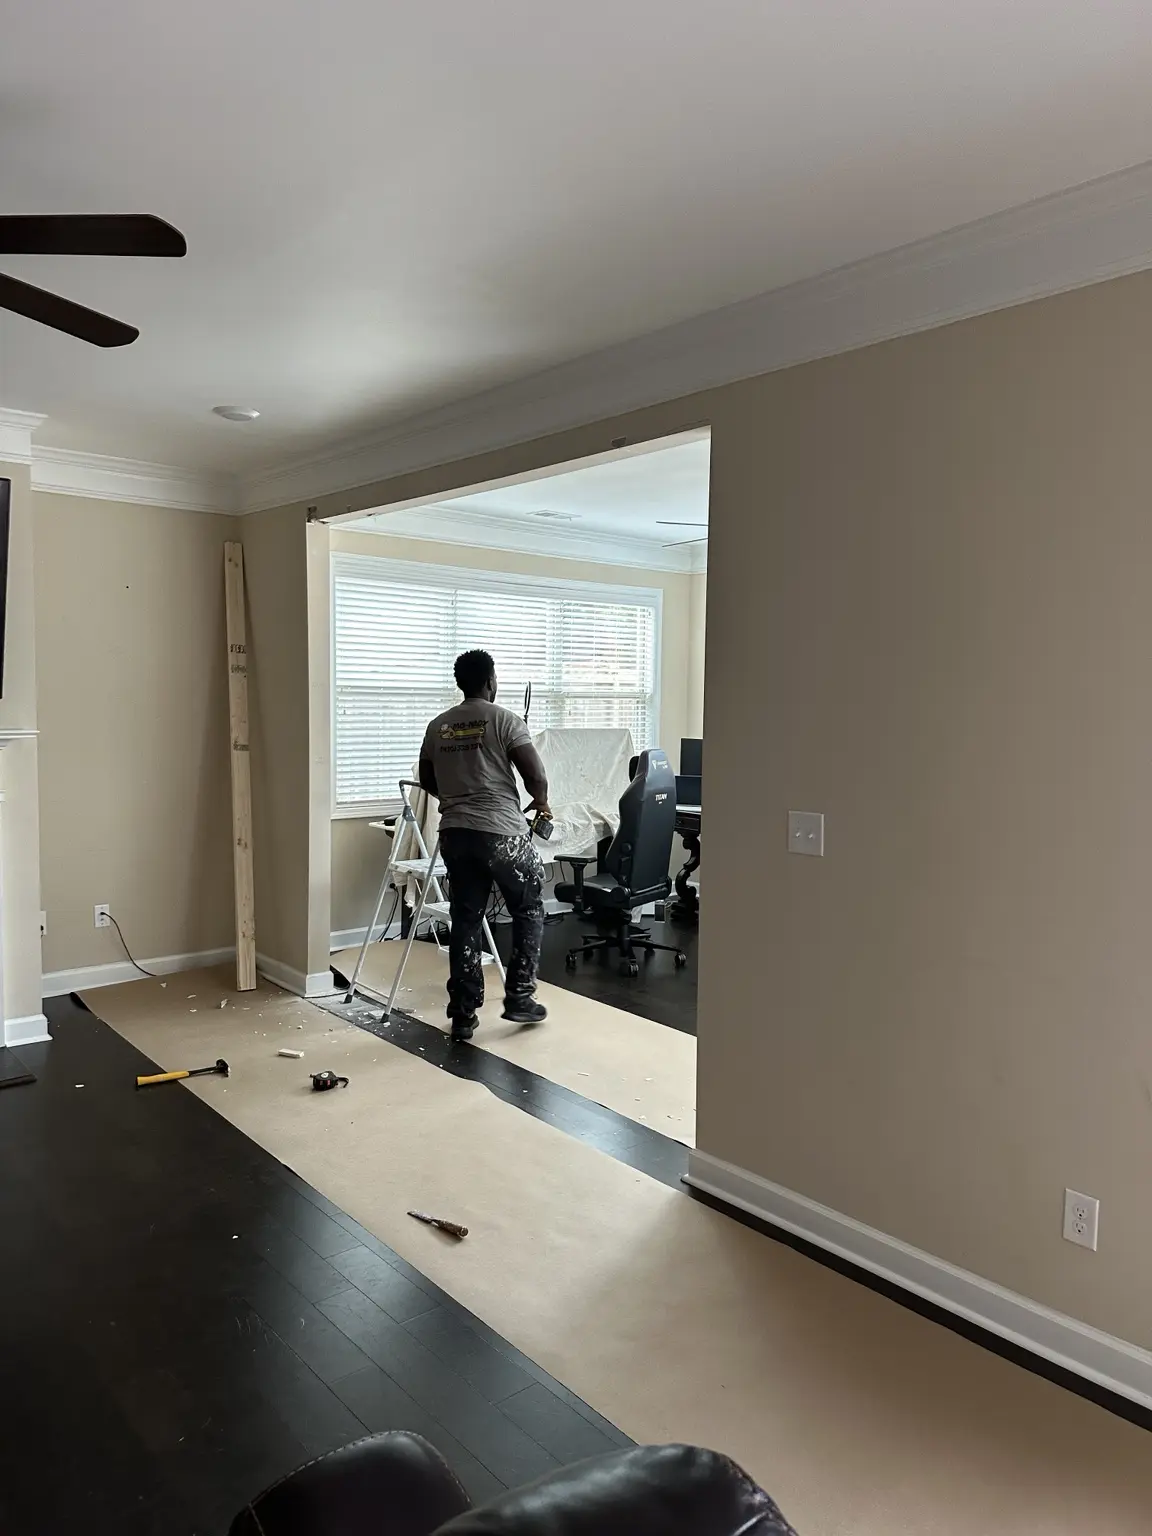
A wide open passage transformed into a finished French-door enclosure.

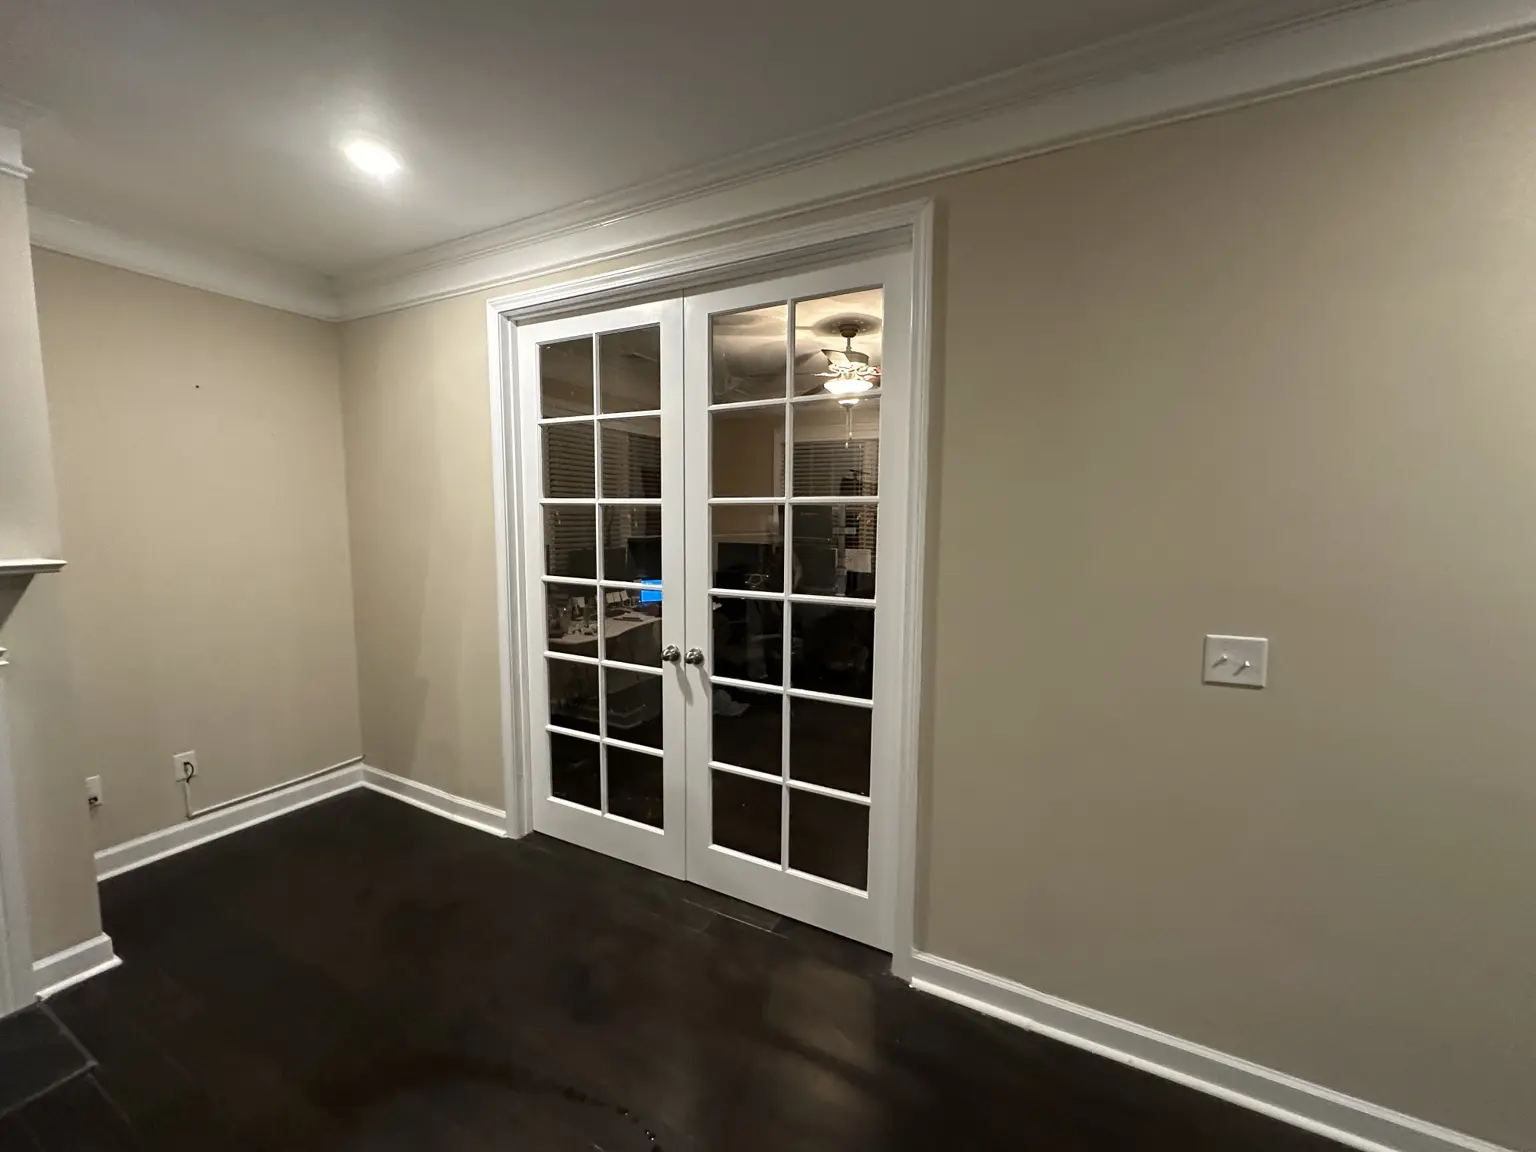
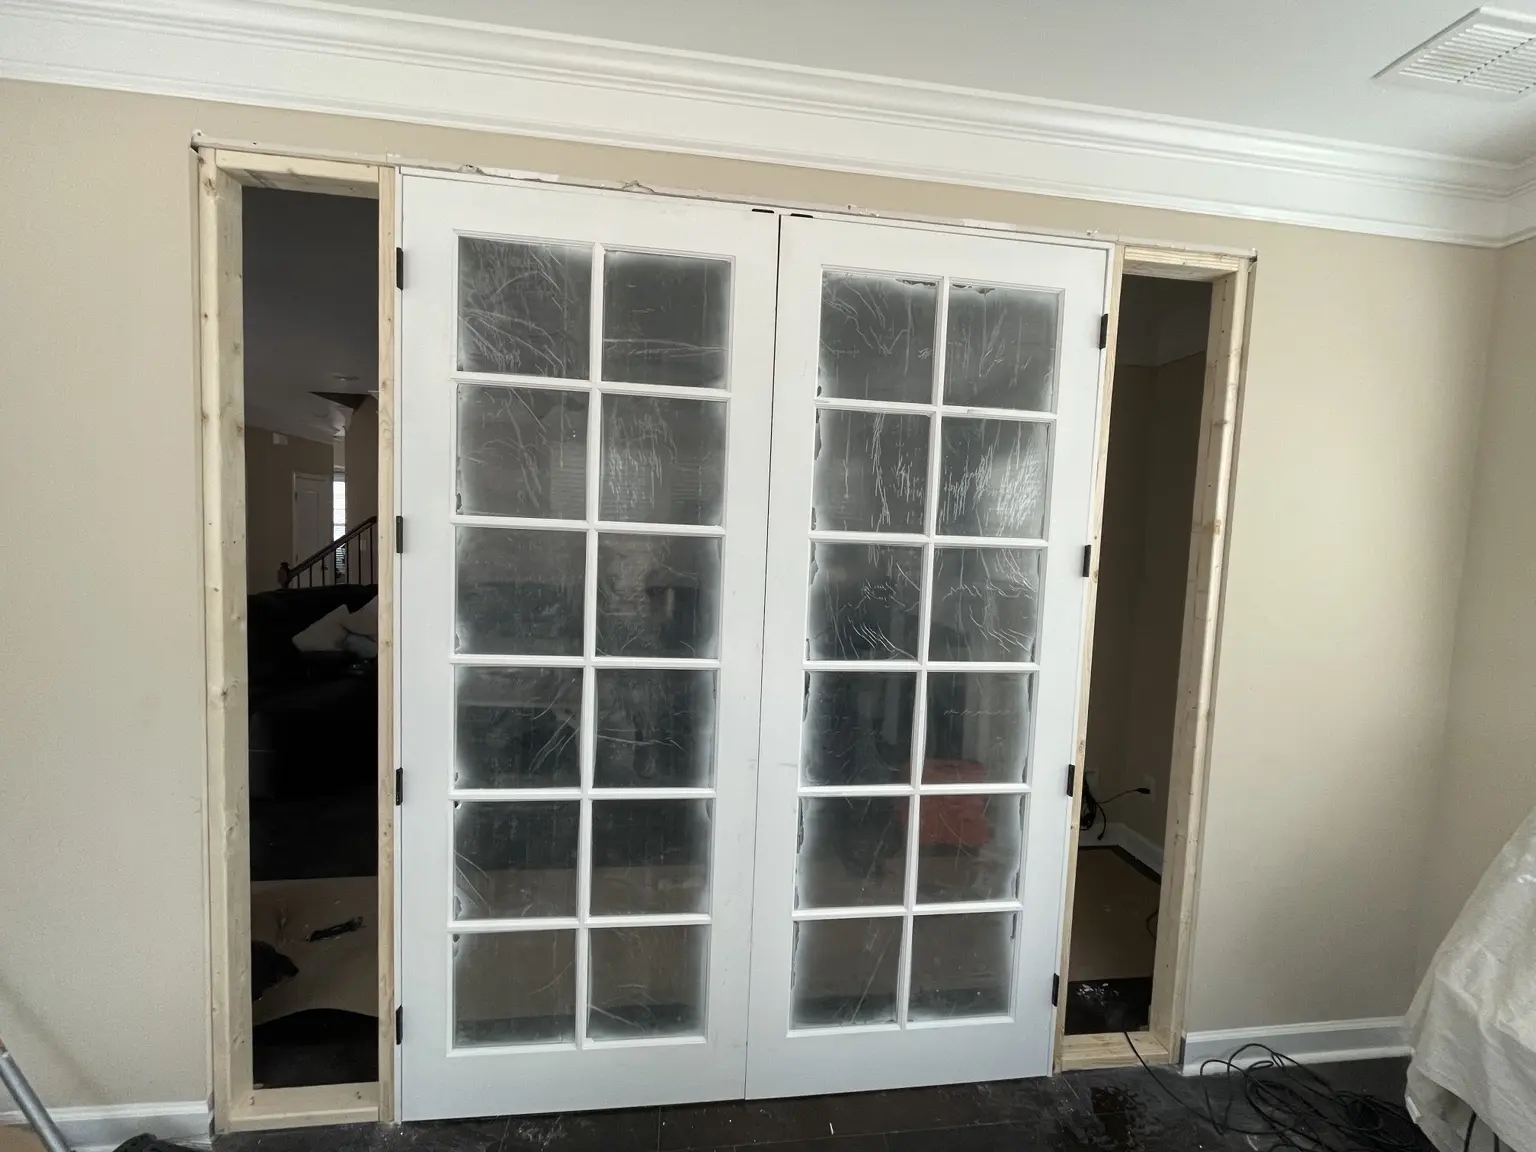
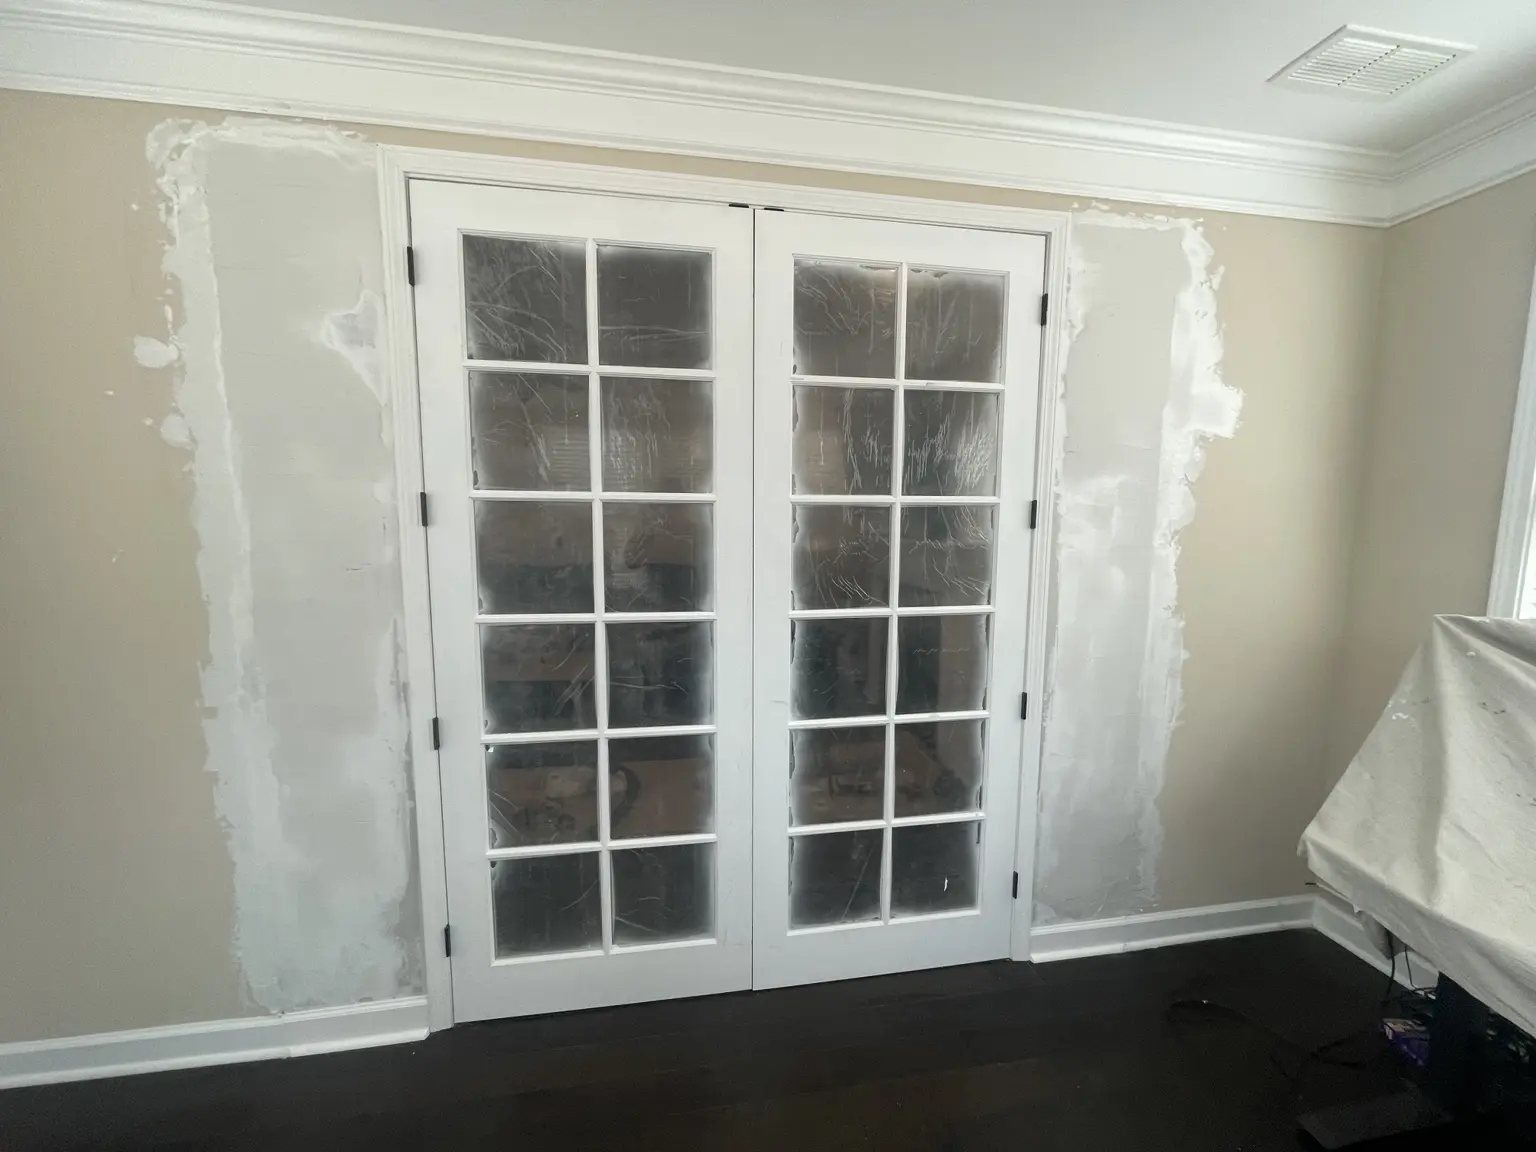
Mo-Nady fitted the glazed French doors within the existing opening, framed the side returns, rebuilt the surrounding wall surfaces, and completed the trim and paint so the enclosure belonged in the original room.

MOST DEMANDING DETAILFinishing the altered wall cleanly around the new door assembly.
01Opening layout02Door setting03Side framing04Wall finishing
Plan a related project
Original wide interior passage before French doors were added
05.1BEFORE
French doors positioned in the opening with side framing underway
05.2POSITION
French doors and framed side returns viewed from the opposite room
05.3FRAME
Drywall and trim finishing around the new interior French doors
05.4FINISH
Completed interior French-door enclosure in Alpharetta
05.5COMPLETE
06

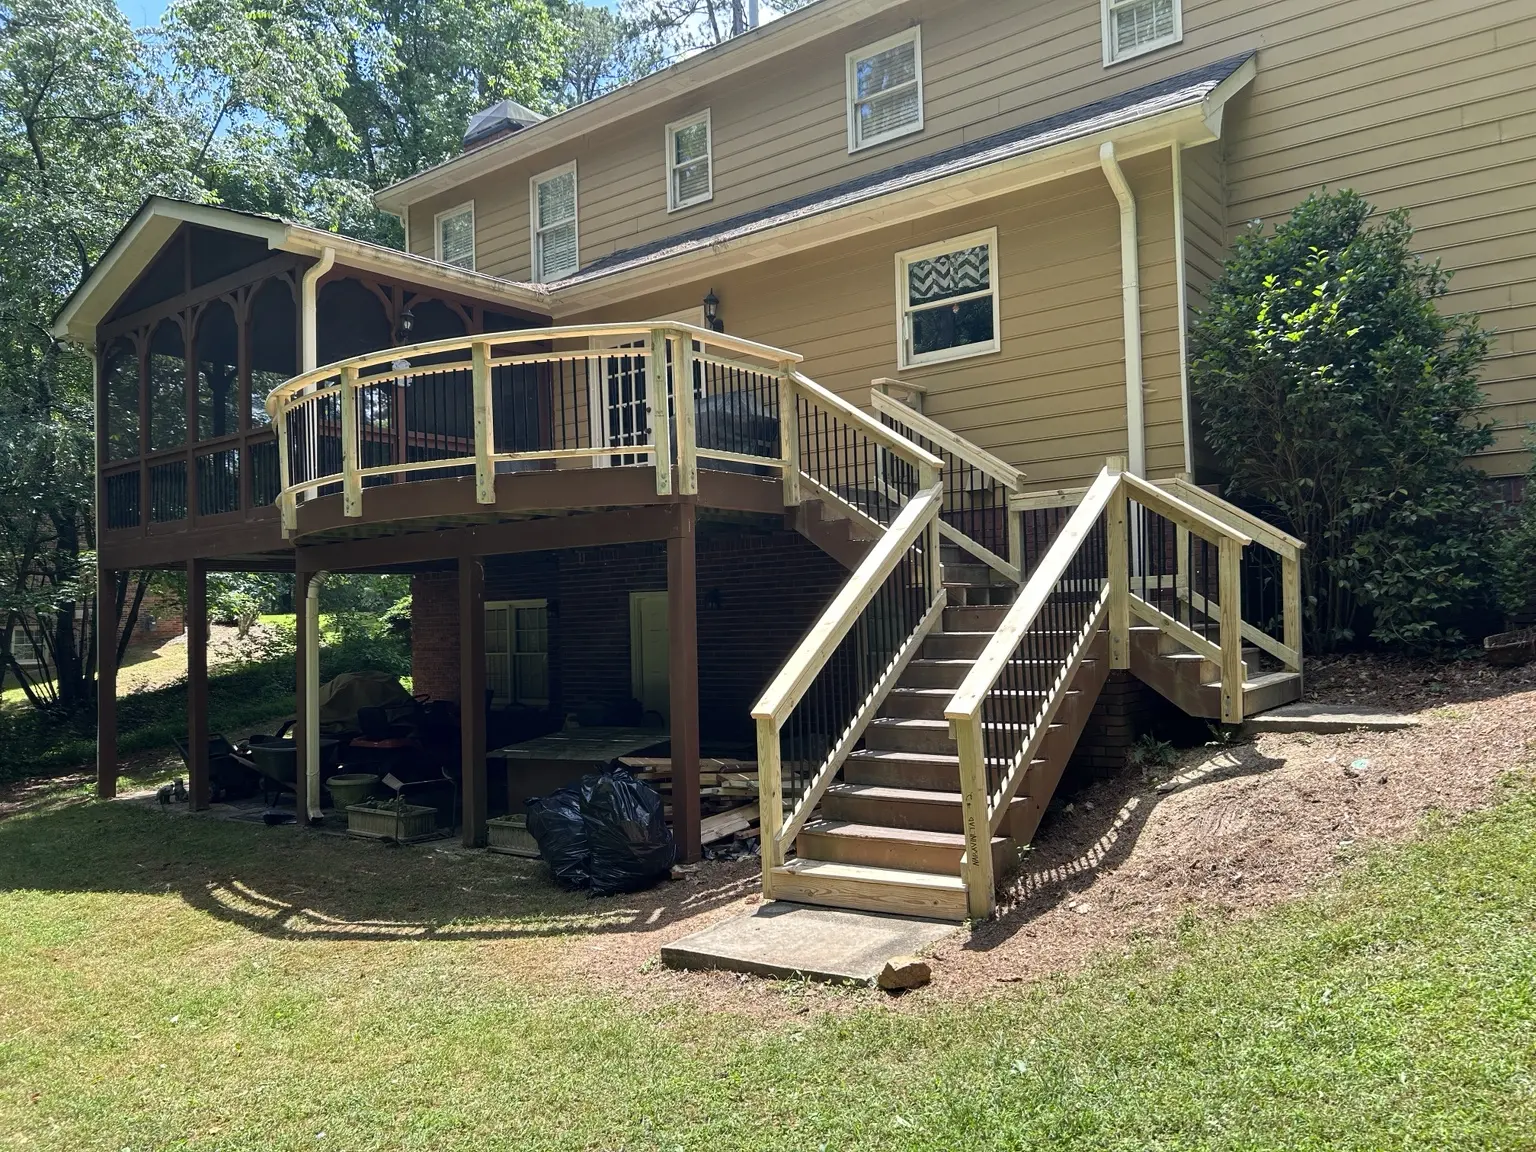
Deck & stair railings · Roswell, GA · 4 business days

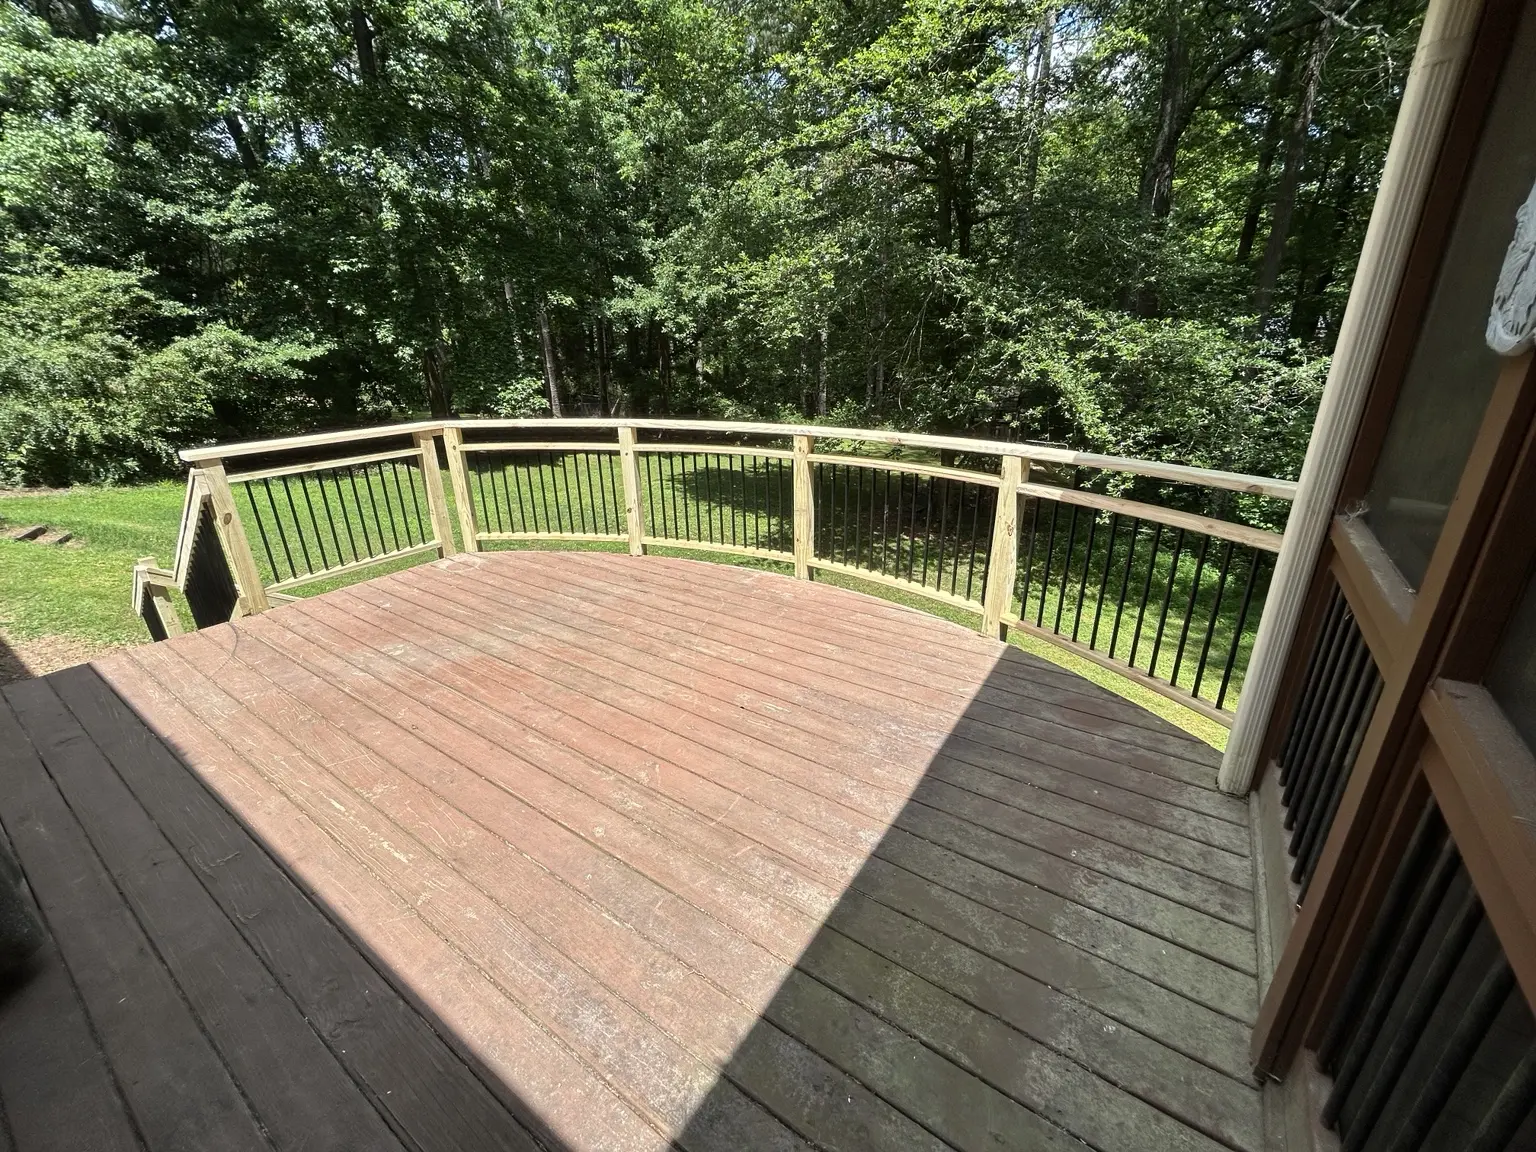
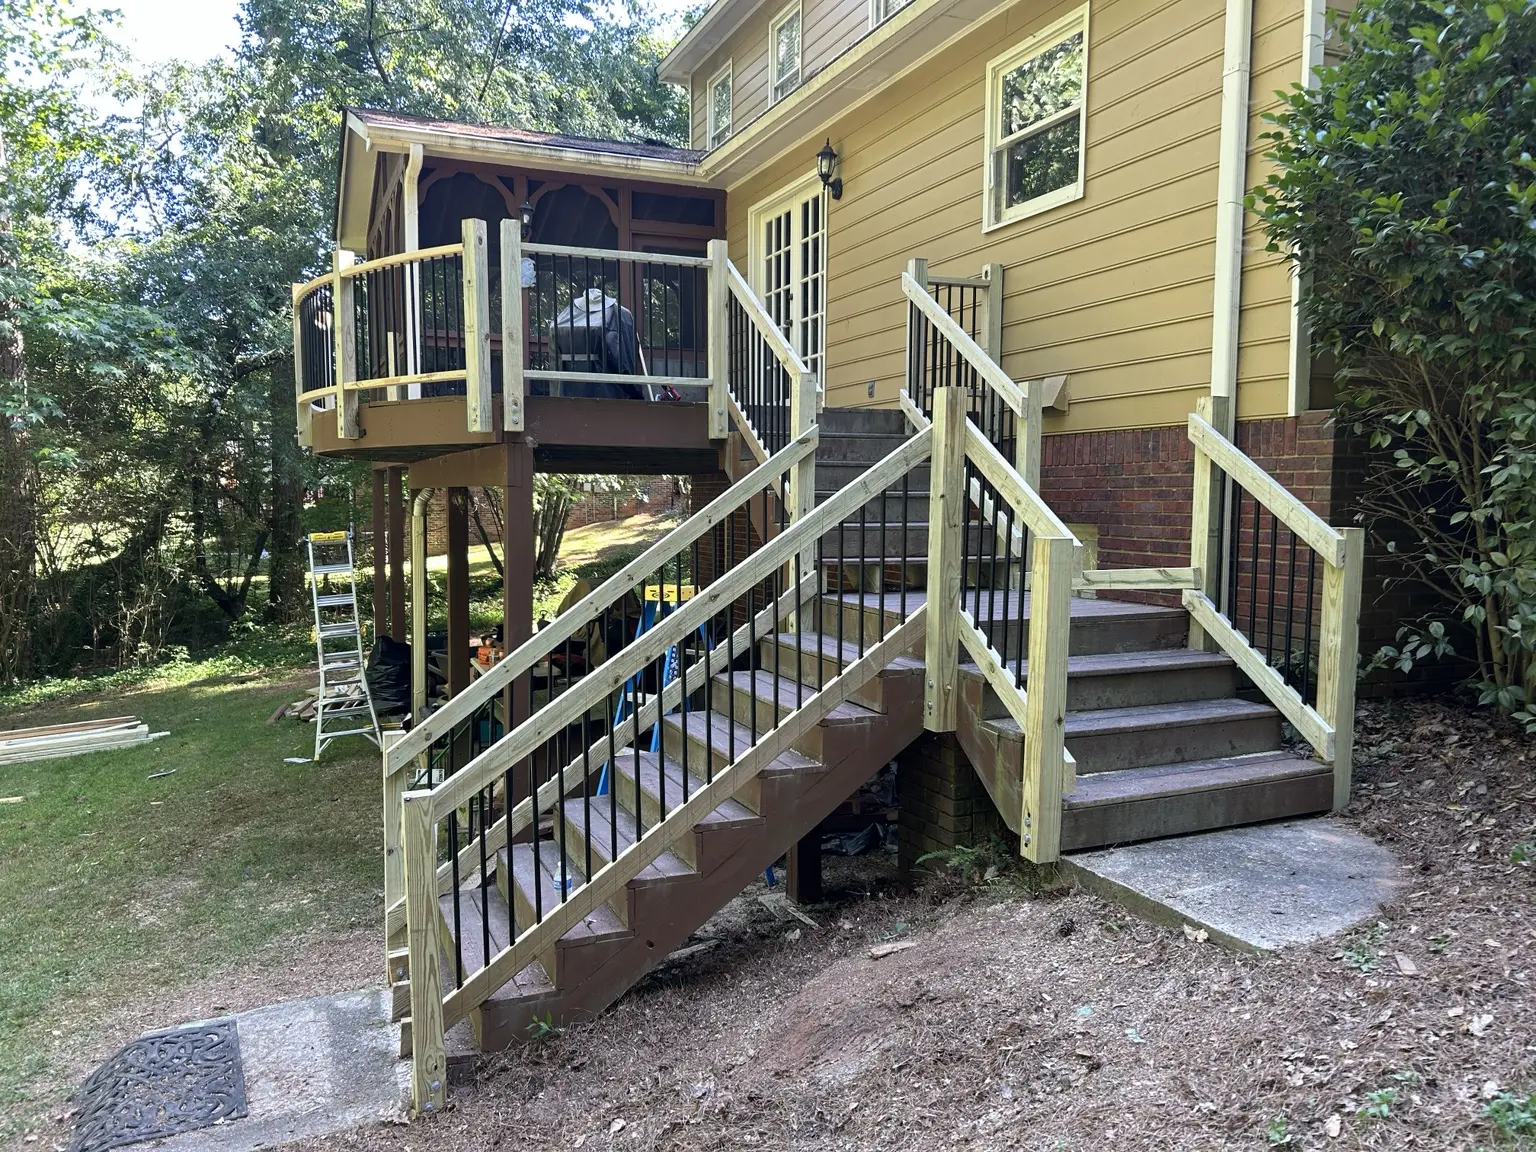
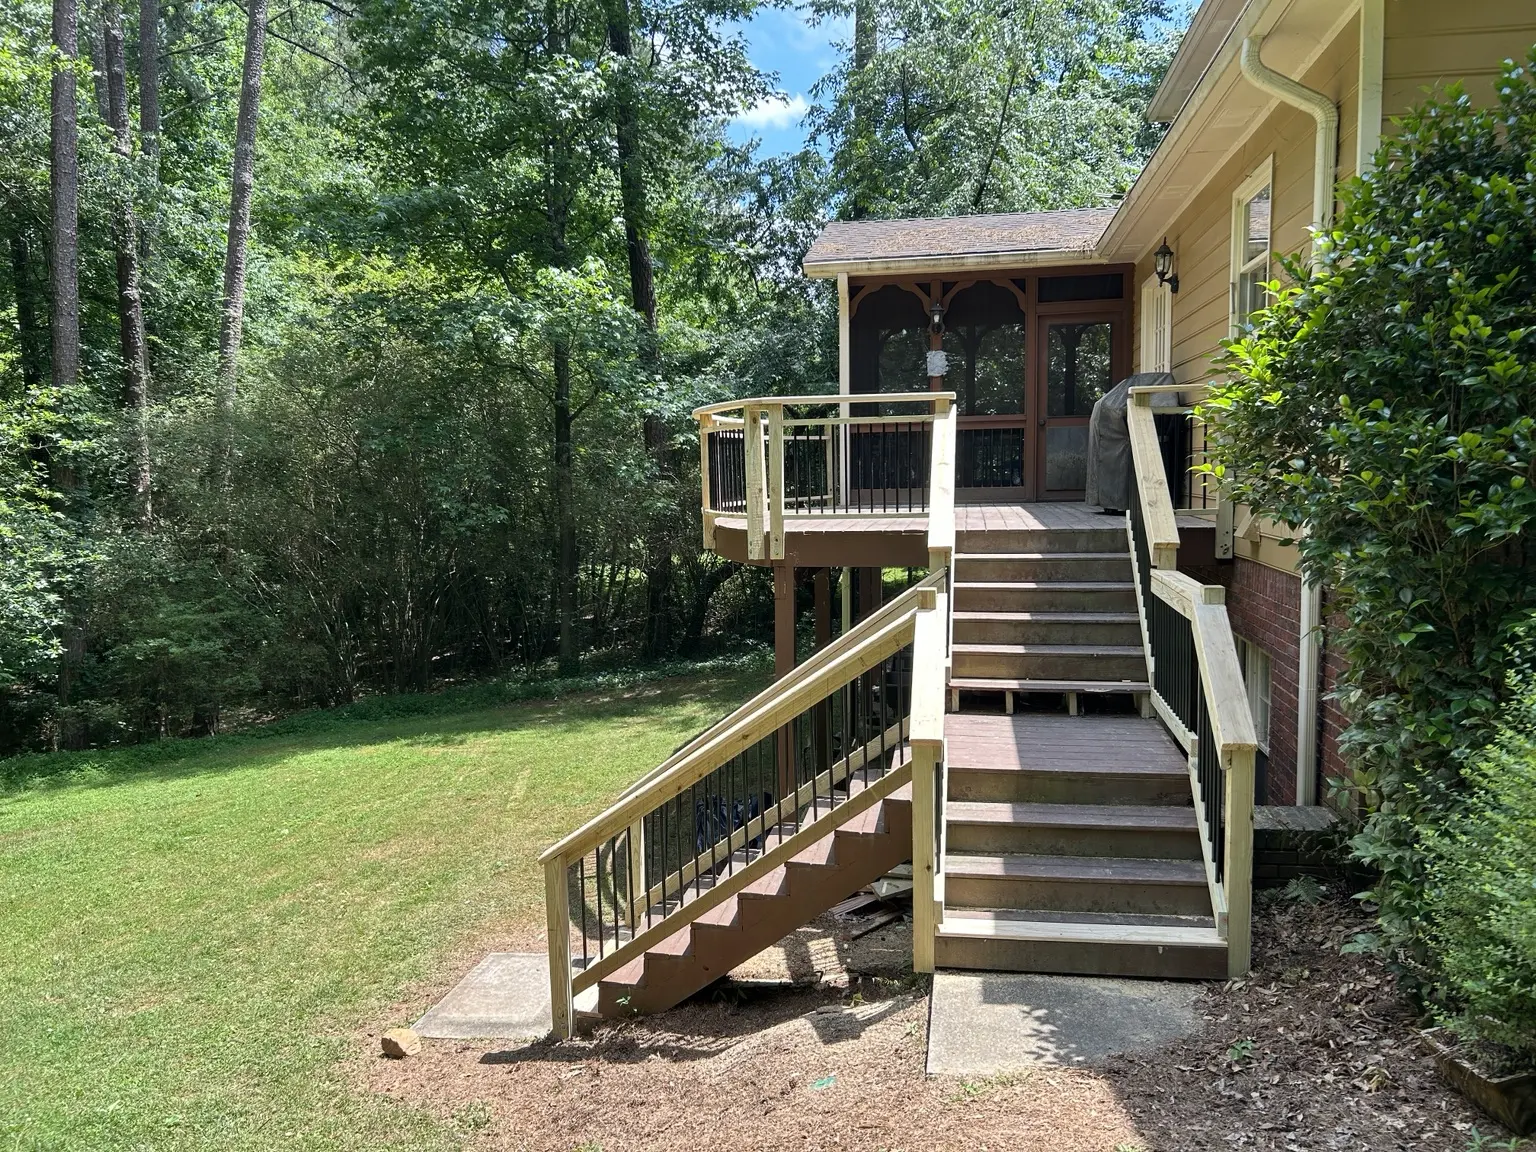
Custom railings that follow the deck’s curve instead of fighting it.

New wood rails and black metal balusters were fitted across the curved deck edge, landings, and multiple stair runs, creating a consistent guard system across a complex existing layout.

MOST DEMANDING DETAILFabricating and fitting the curved railing to accurately follow the shape of the deck.
01Curve layout02Post placement03Metal balusters04Stair connections
Plan a related project
Wide view of completed curved deck and stair railings in Roswell
06.1SYSTEM
Curved deck railing with wood rails and black metal balusters
06.2CURVE
Completed railing connections across the deck stairs and landings
06.3CONNECT
Full stair runs with new coordinated wood and metal railings
06.4DESCEND
07

Complete bathroom remodel · Woodstock, GA · 8 business days

A compact bathroom rebuilt around pattern, storage, and an illuminated niche.

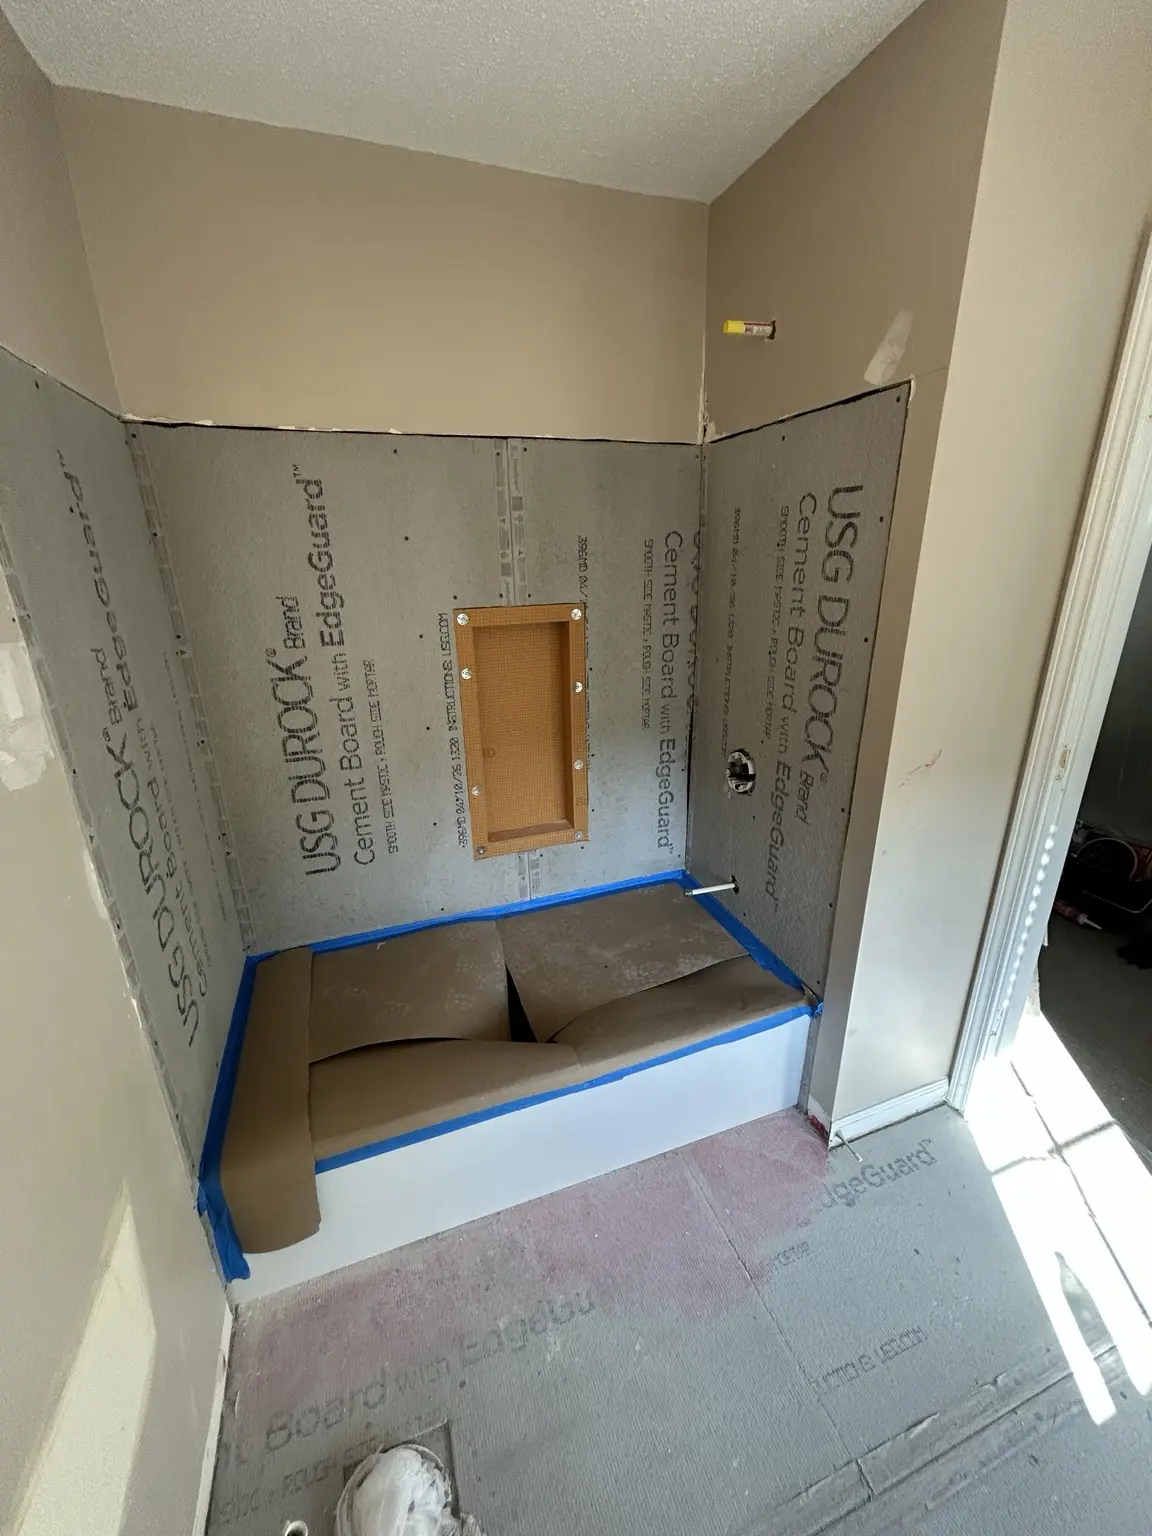
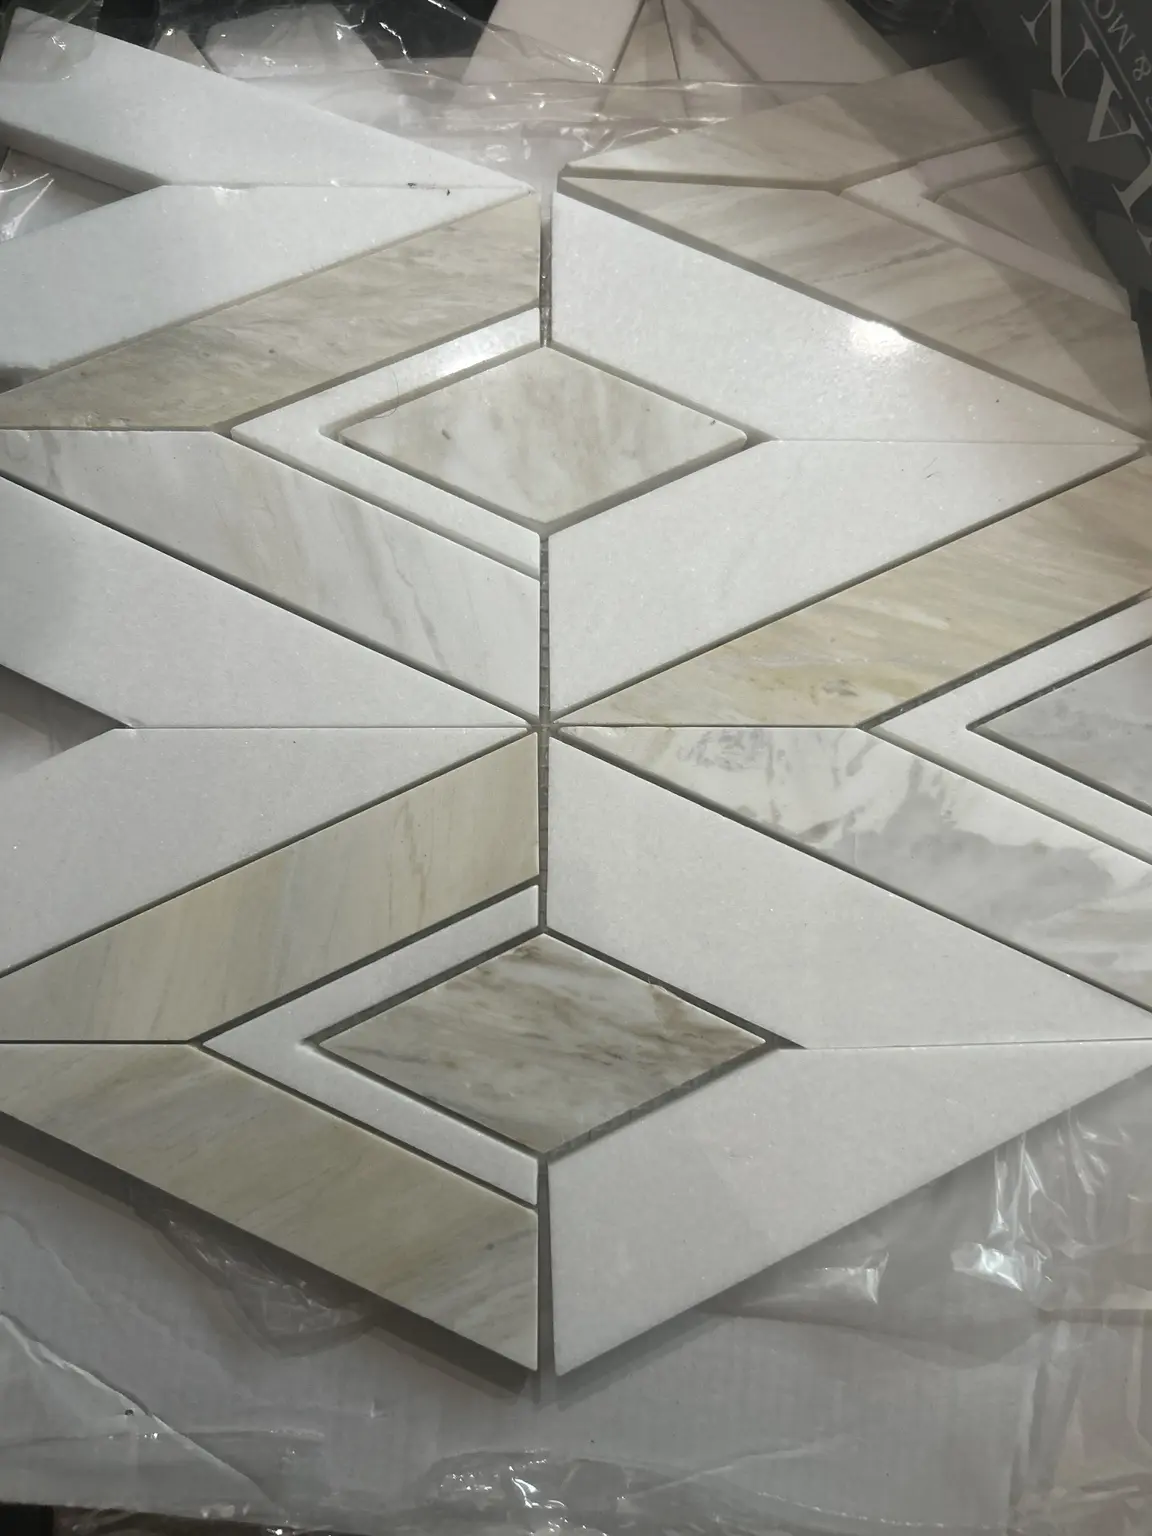
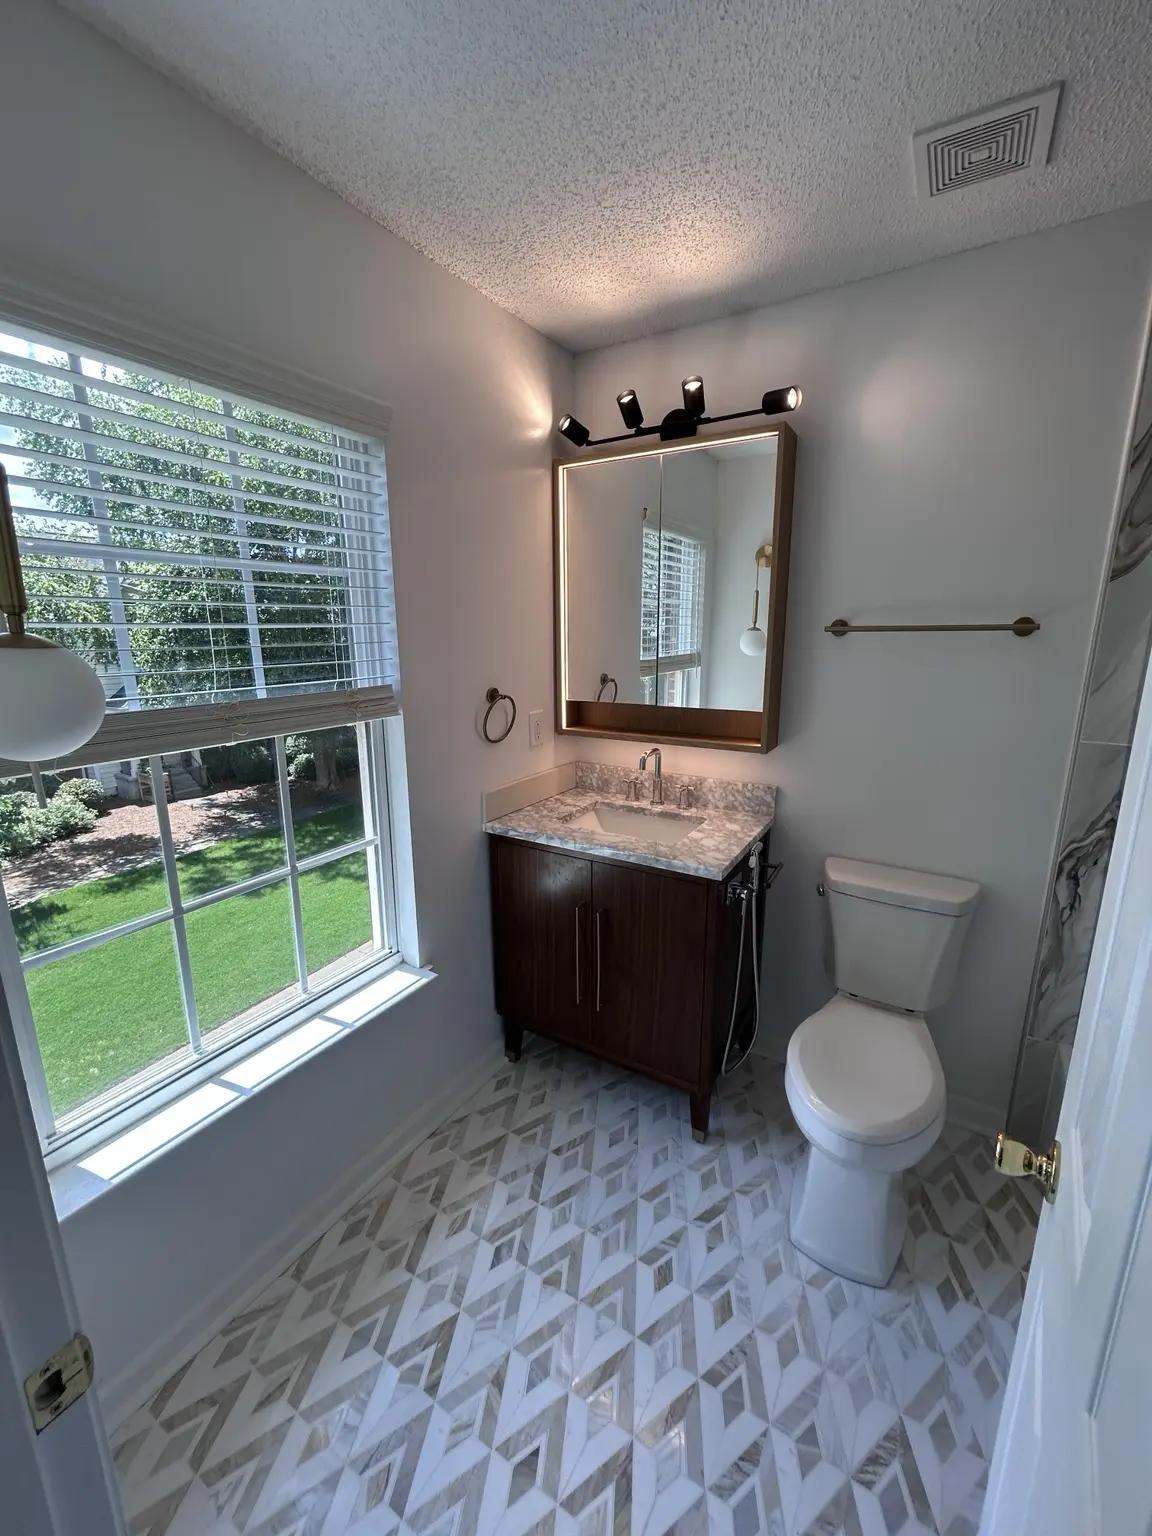
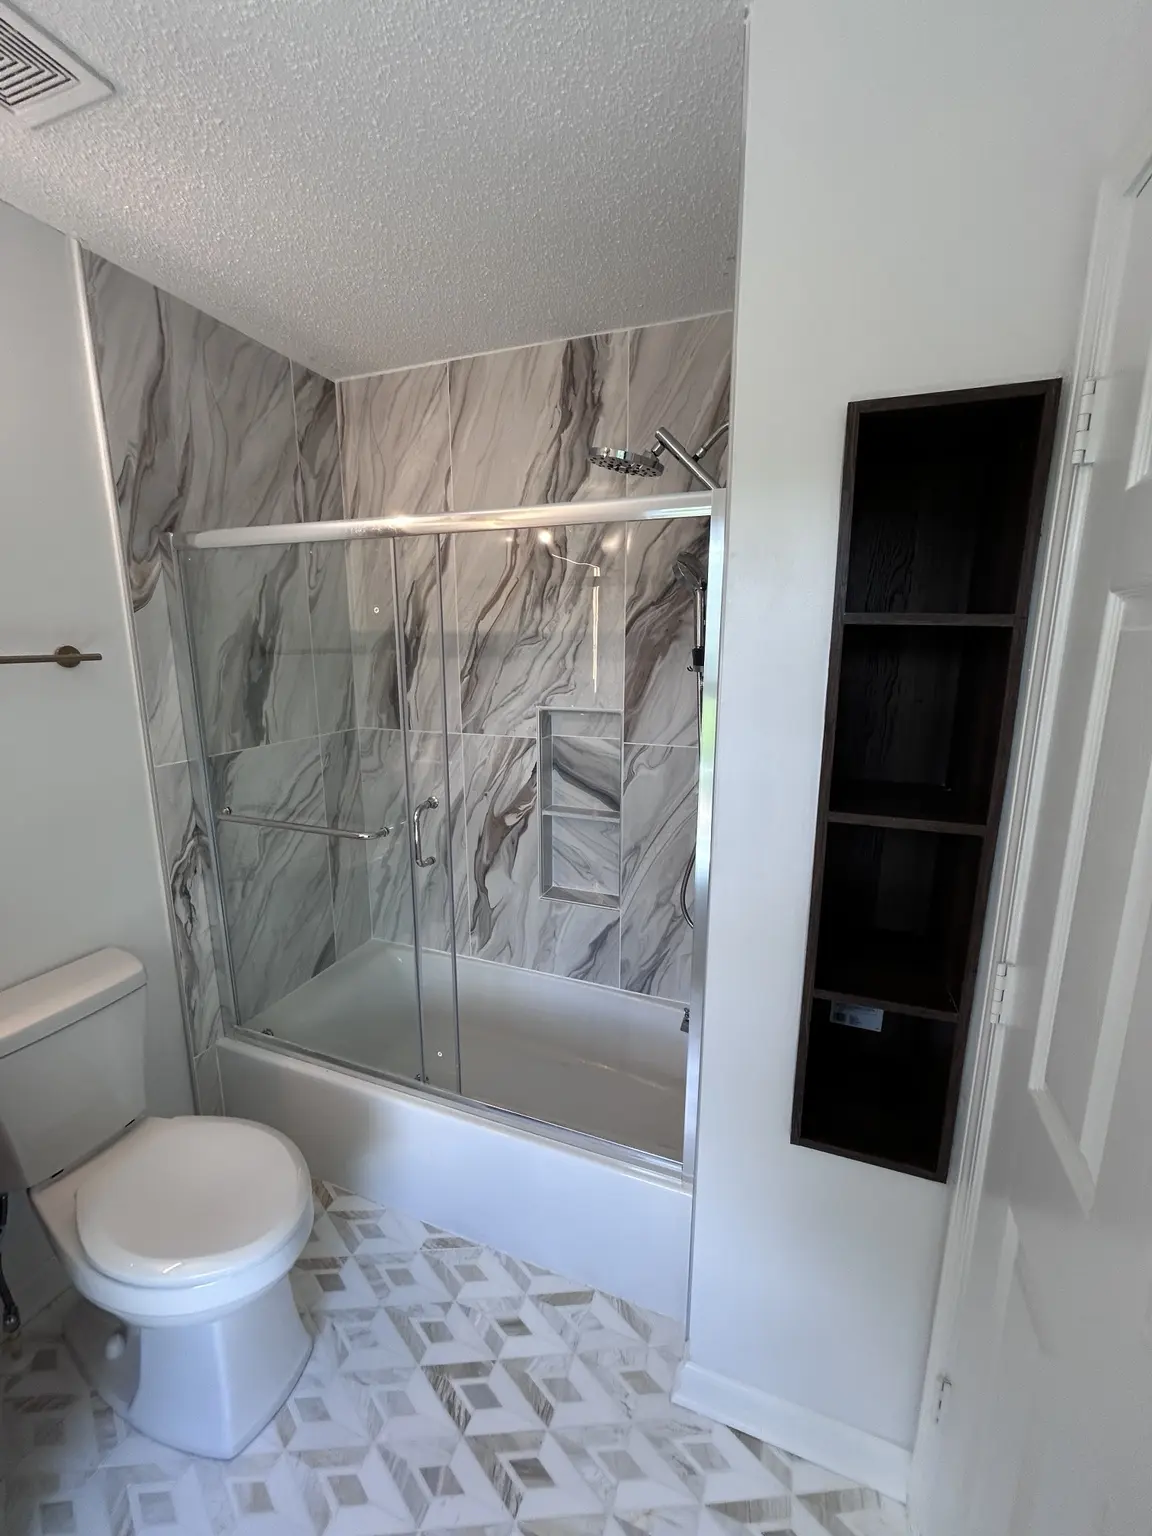
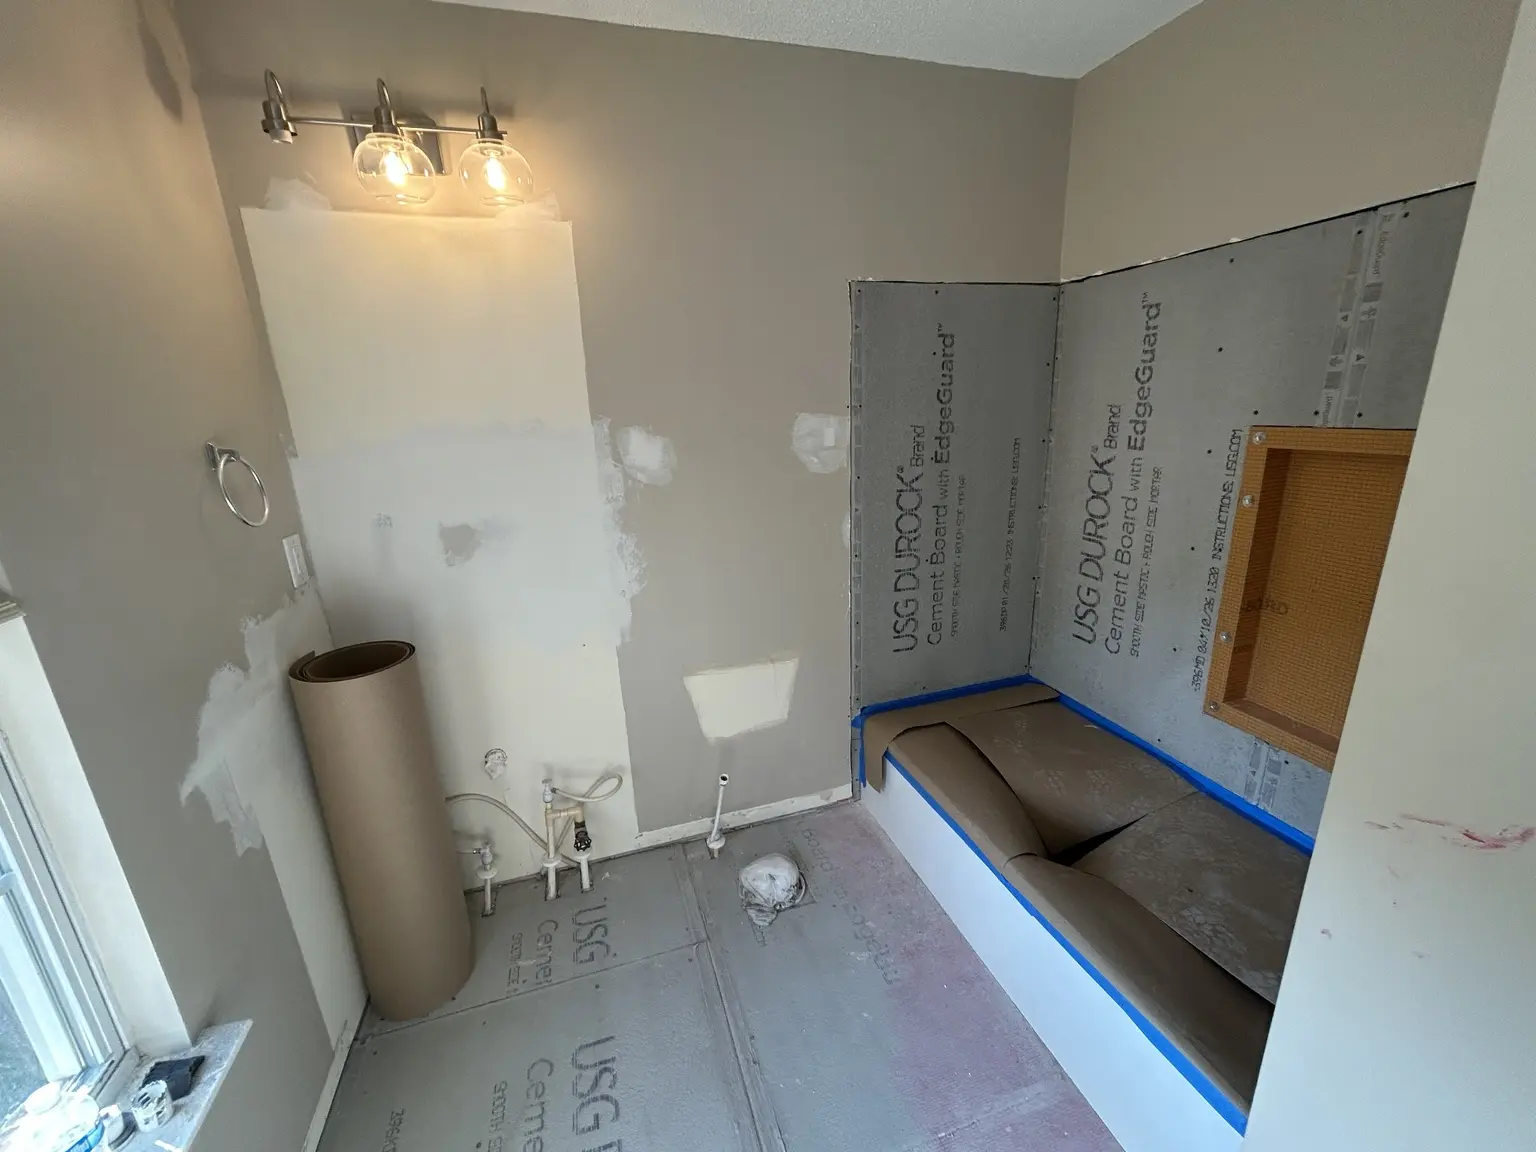
Mo-Nady completed the full bathroom renovation, including cement-board preparation, tub surround, patterned floor tile, vanity and fixtures, built-in shelving, and a recessed shower niche with integrated LED lighting.

MOST DEMANDING DETAILIntegrating the niche lighting while maintaining careful waterproofing throughout the recessed assembly.
01Surface preparation02Niche waterproofing03Patterned tile04Fixtures & storage
Plan a related project
Bathroom tub surround prepared with cement board and recessed niche
07.1PREP
Cement-board and floor preparation during the Woodstock bathroom remodel
07.2BUILD
Close-up of the geometric floor tile selected for the bathroom
07.3PATTERN
Completed bathroom vanity, illuminated mirror, fixtures, and patterned floor
07.4FURNISH
Completed tiled tub shower with glass enclosure, recessed niche, and built-in shelving
07.5COMPLETE
08

Exterior carpentry · Full build sequence

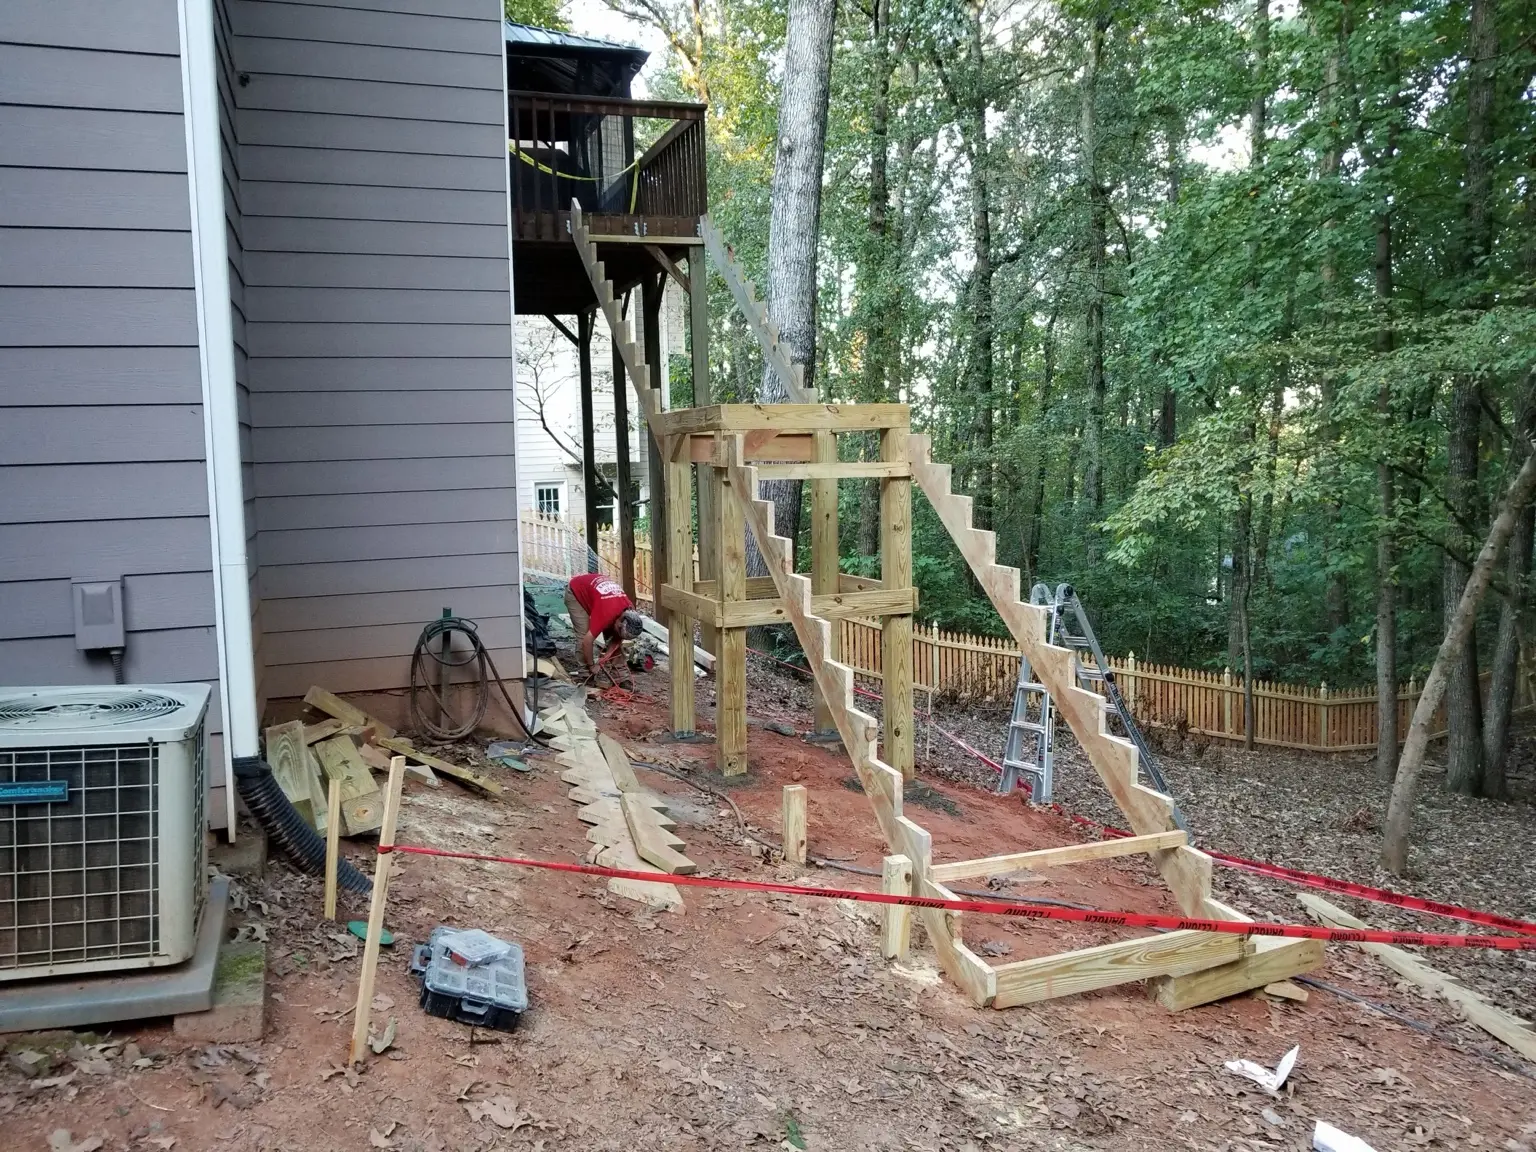
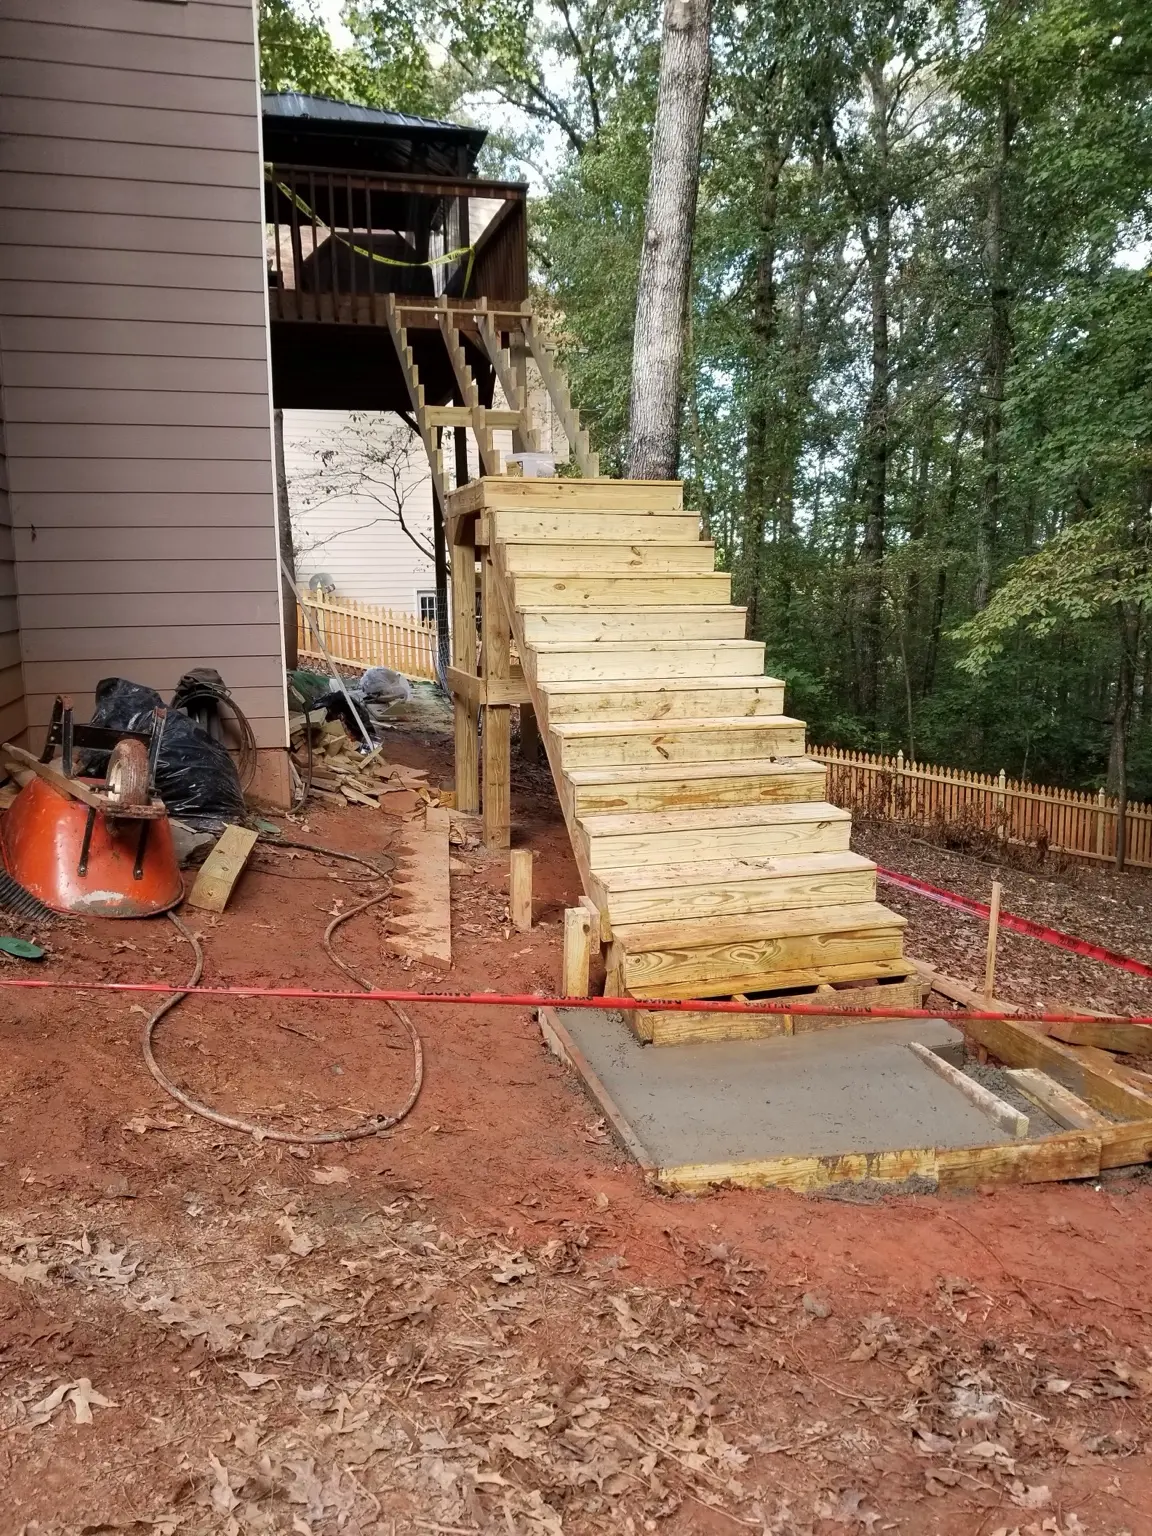
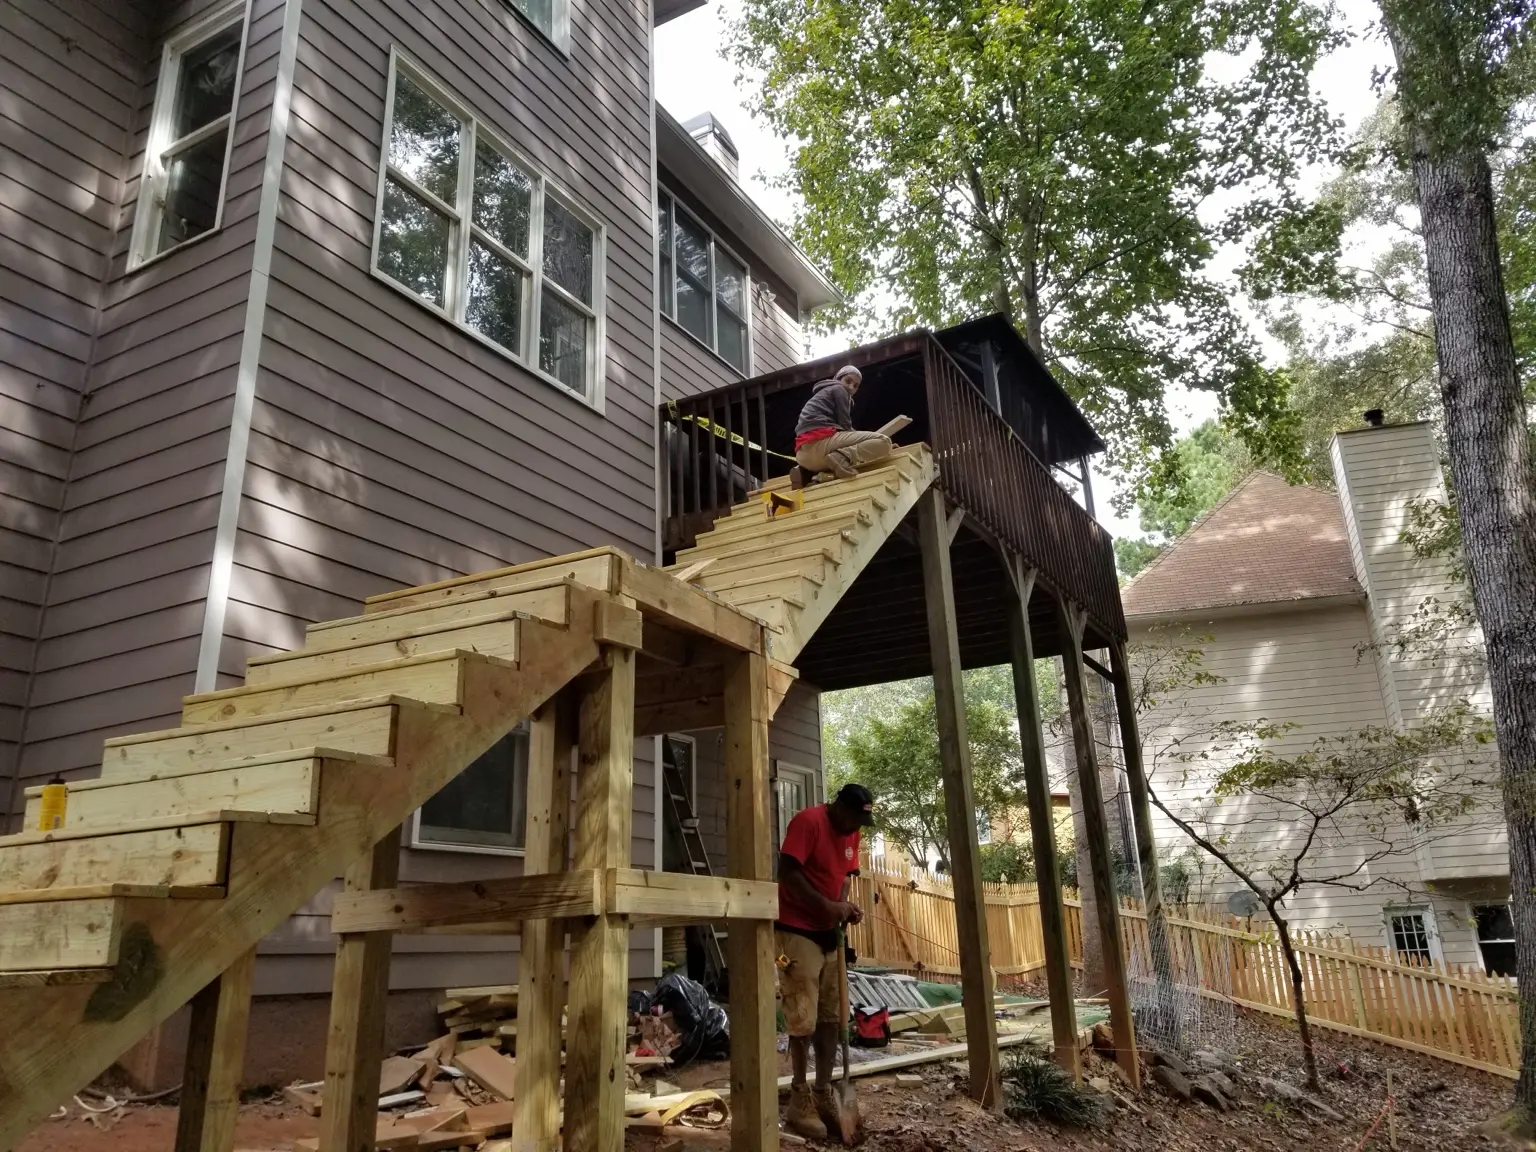
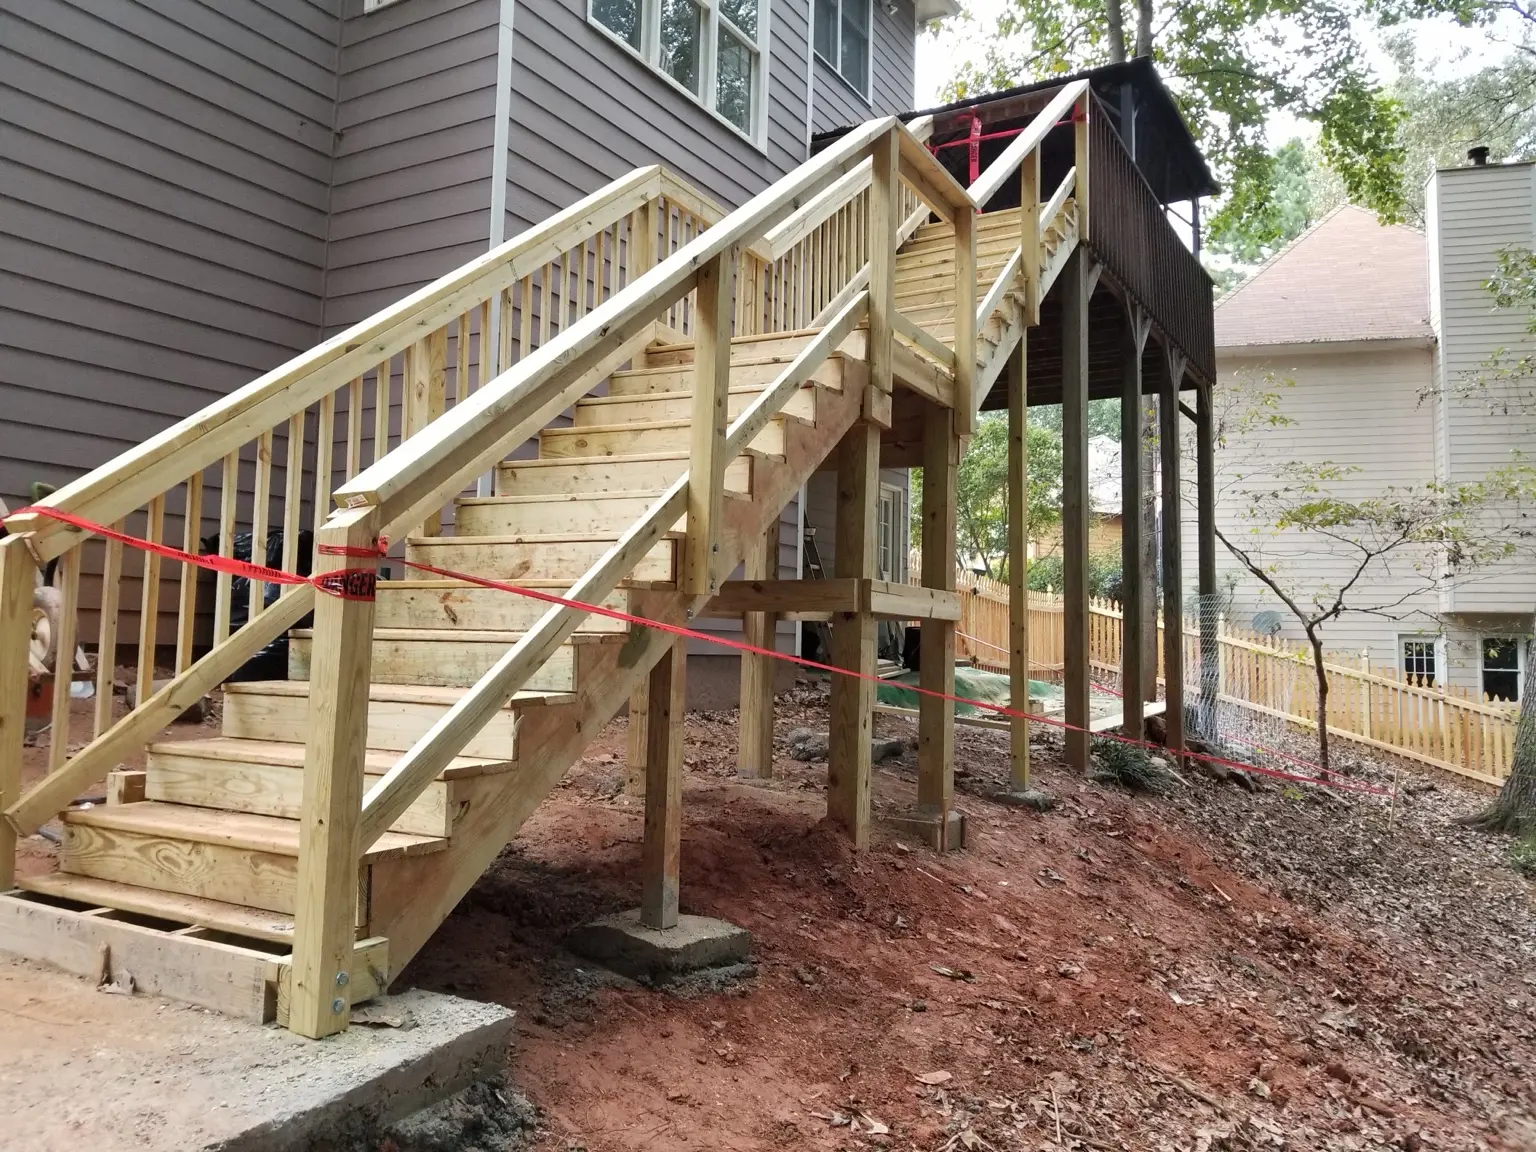
A two-flight exterior stair system built from the ground up.

Four photographs document the build as the support structure, lower flight, landing, upper flight, treads, and guardrails take shape.

MOST DEMANDING DETAILCoordinating two stair flights, an intermediate landing, and the existing elevated deck.
01Structure02Flights03Landing04Guardrails
Plan a related project
Mo-Nady framing the two-flight exterior staircase and intermediate landing
08.1FRAME
Lower exterior stair flight with treads installed during construction
08.2BUILD
Mo-Nady crew connecting the upper stair flight to the existing elevated deck
08.3CONNECT
Exterior staircase with landings and guardrail framing installed
08.4SECURE
09

Custom entry carpentry · Finished transformation

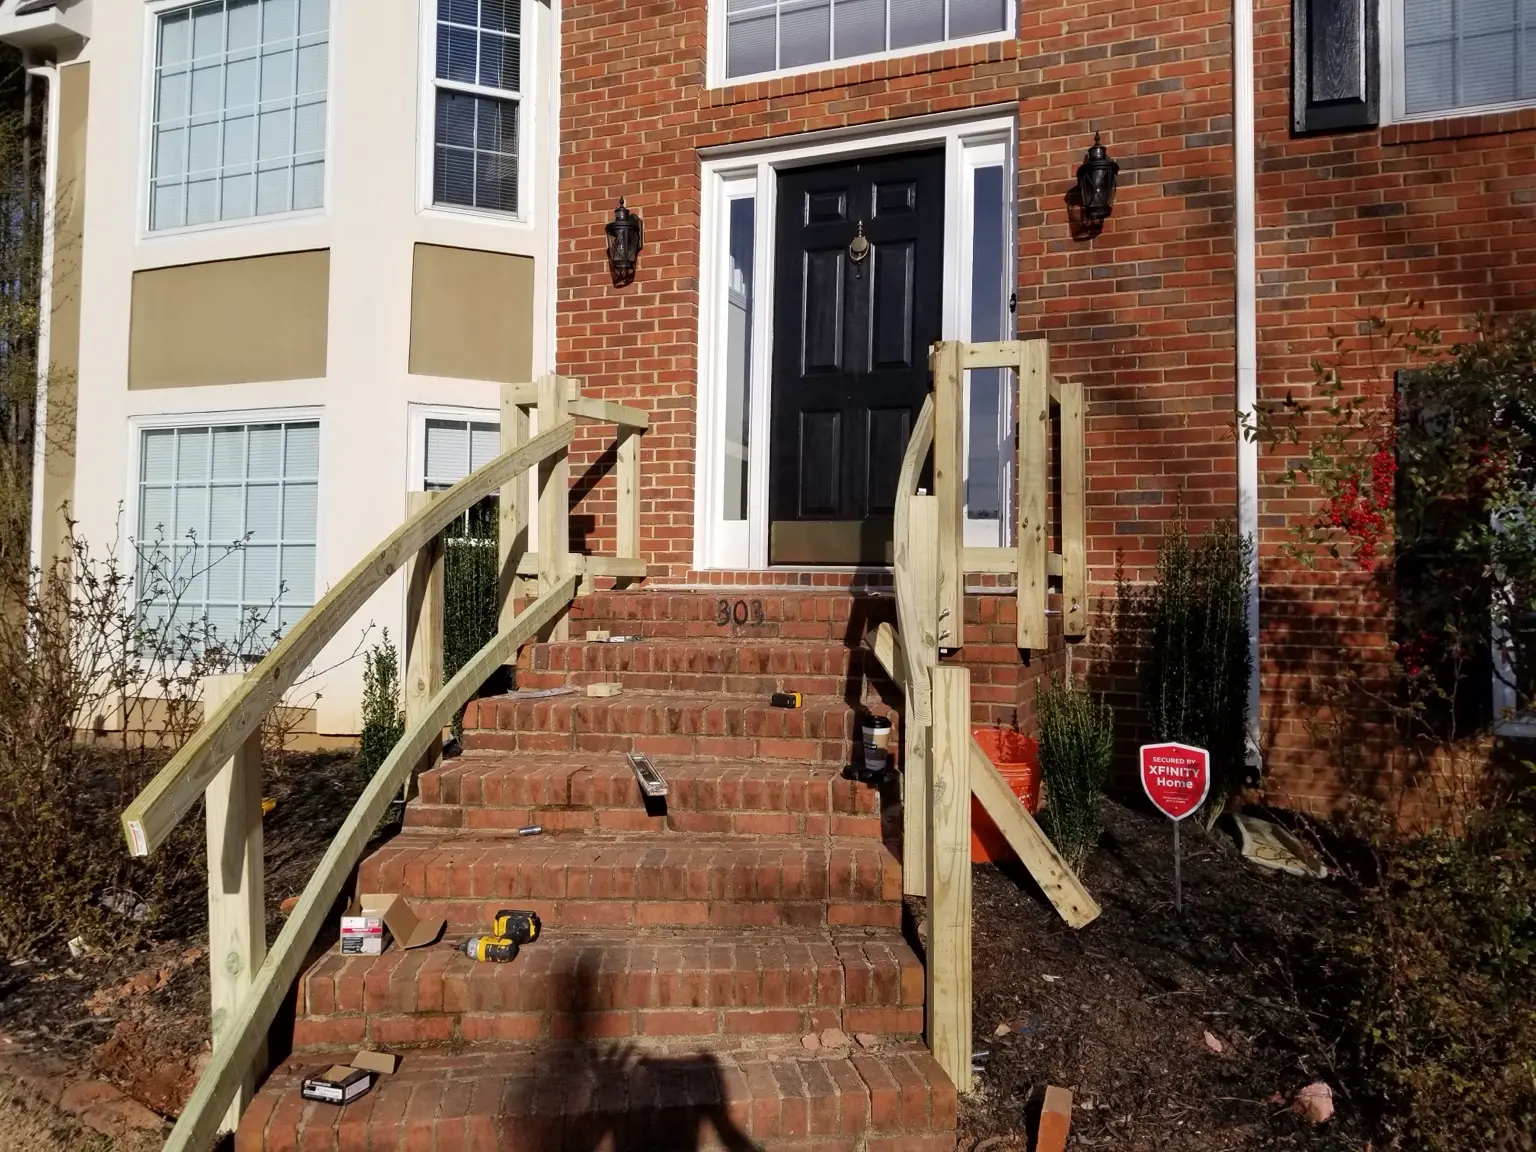
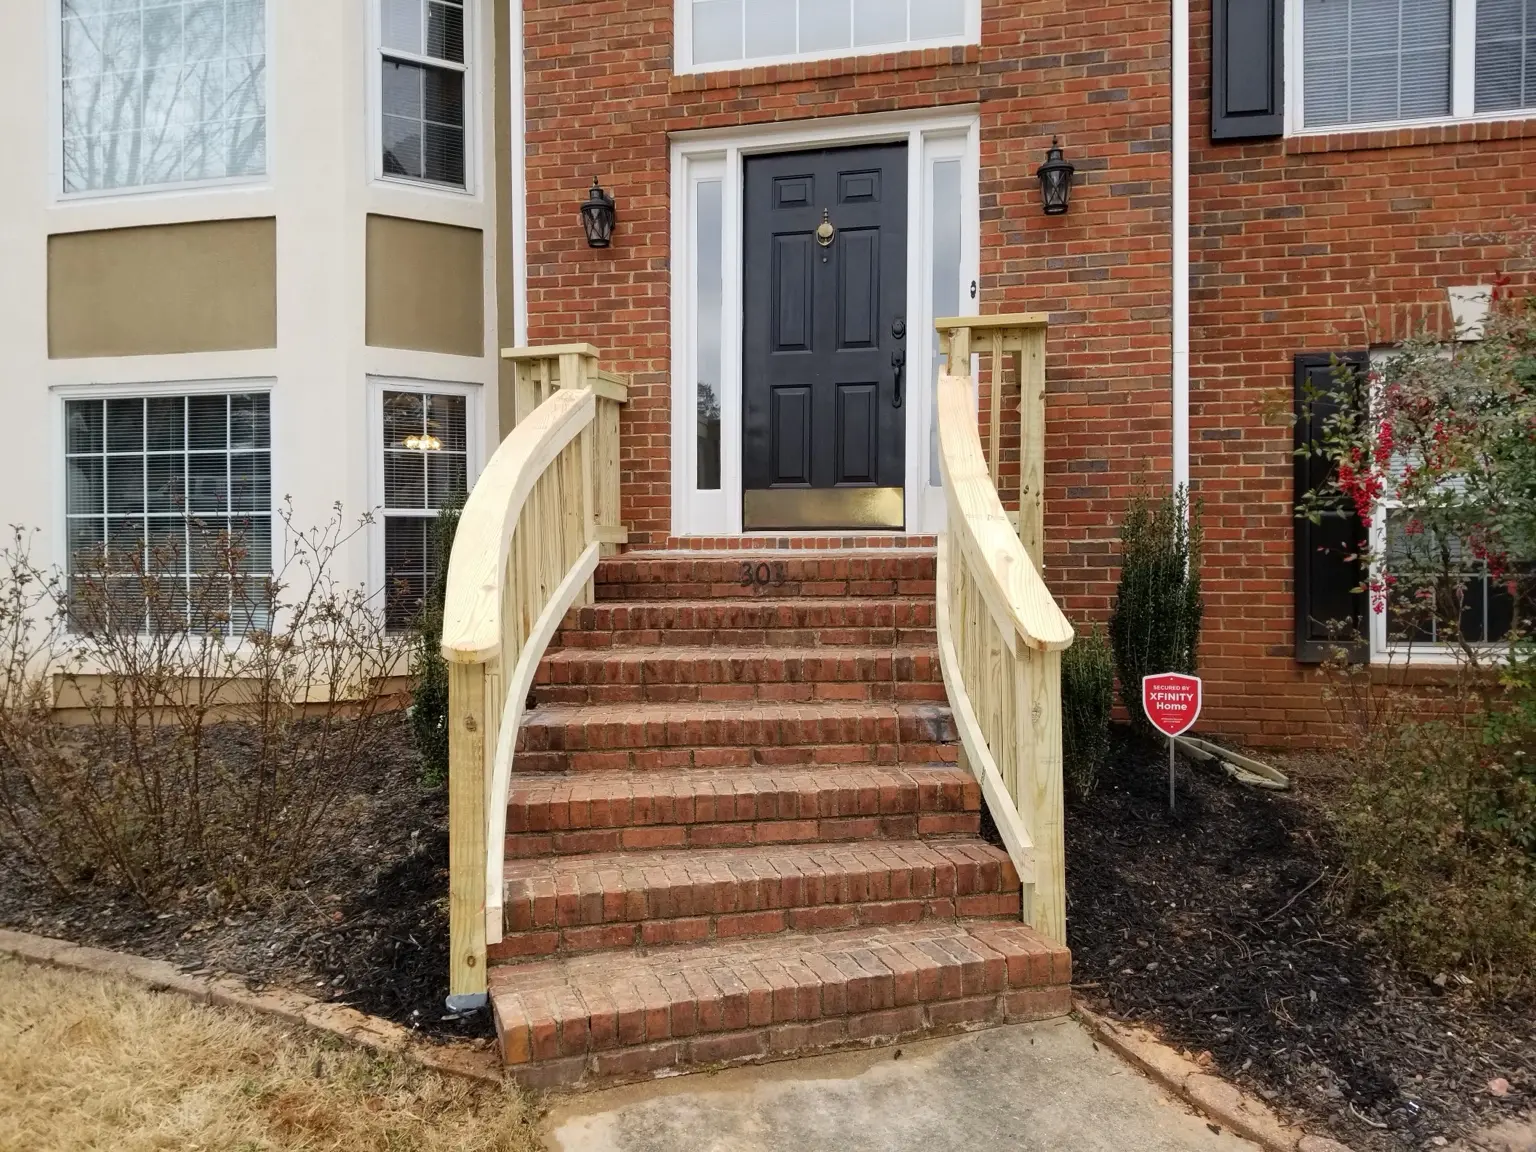
Straight framing shaped into a pair of curved entry rails.

The two-image sequence makes the transformation clear: structural posts and rails first, then shaped handrails and closely spaced infill completing the entrance.

MOST DEMANDING DETAILCreating matching curves on both sides of the brick entrance.
01Posts02Rail structure03Curved caps04Infill
Plan a related project
Mo-Nady framing new wood handrails on brick front steps
09.1FORM
Completed paired curved wood handrails and guards at the brick front entry
09.2SHAPE
10

Custom outdoor carpentry · Full build sequence

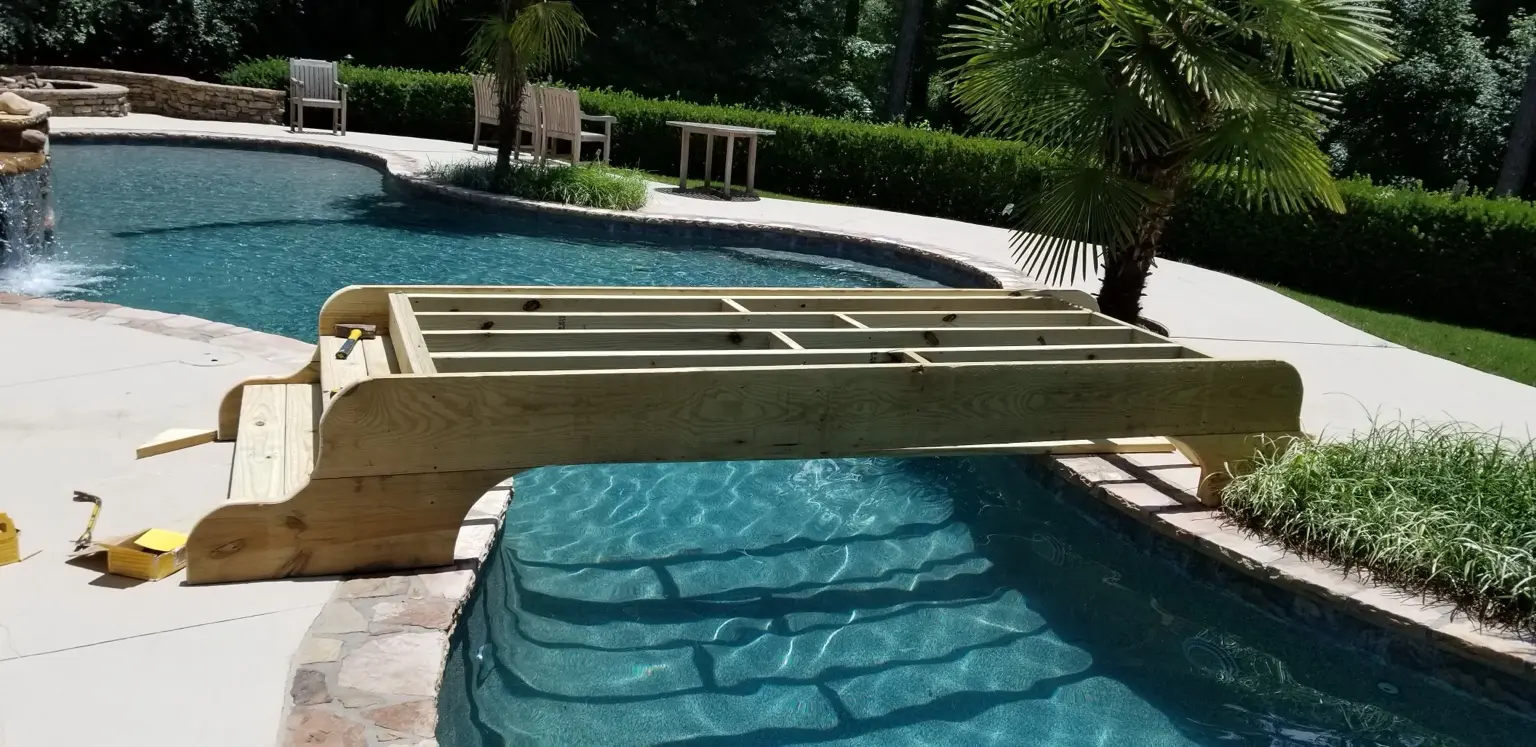
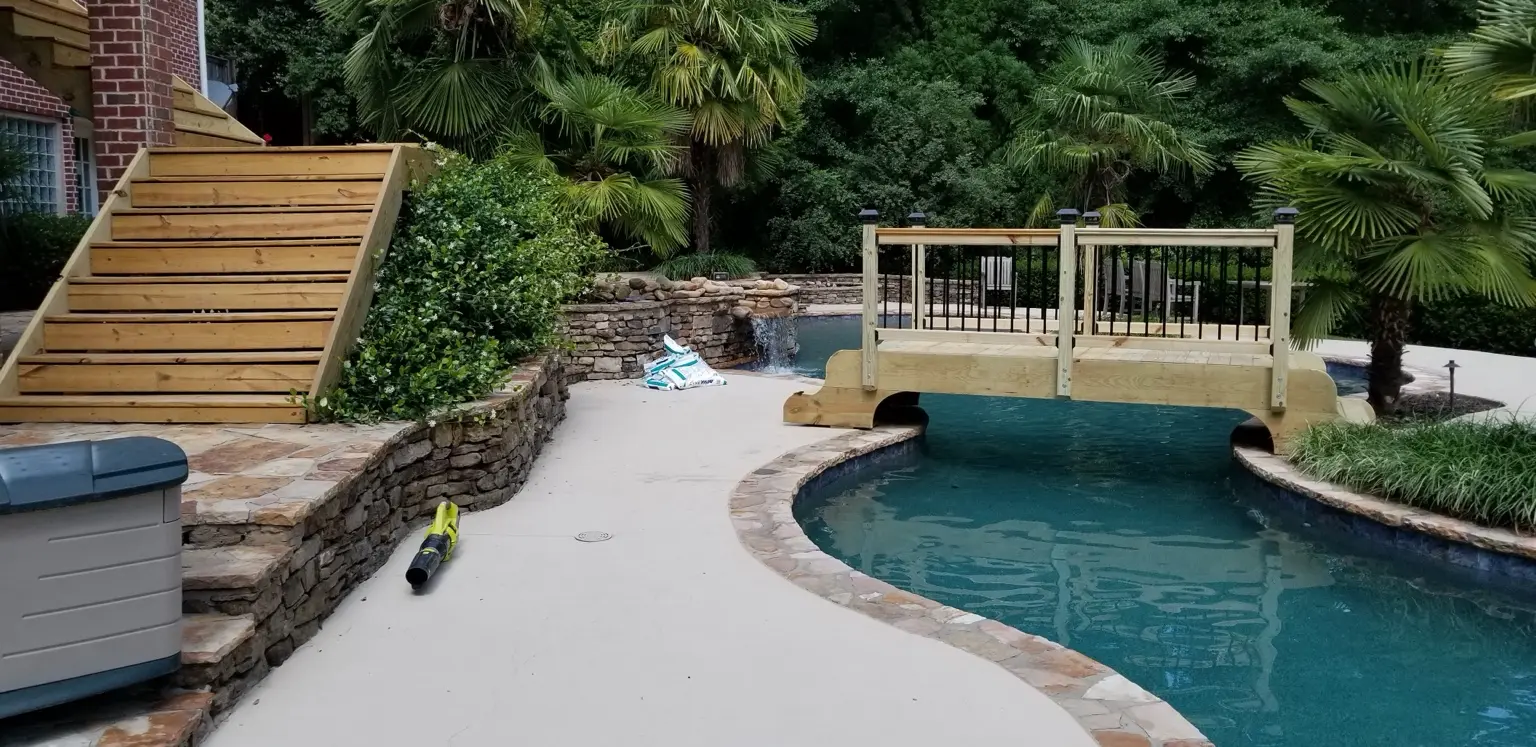
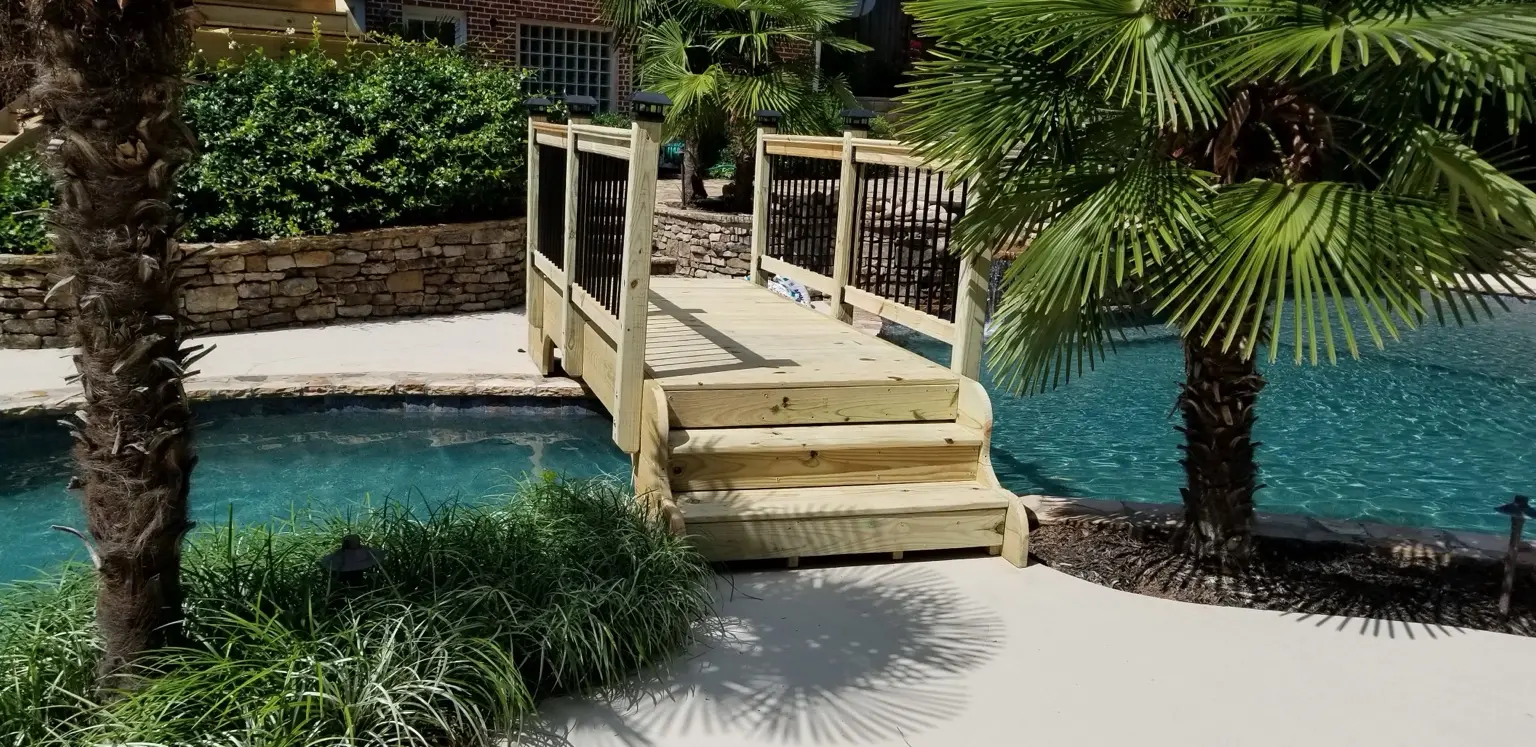
A custom wood bridge fitted to a curved pool landscape.

The sequence follows the bridge from shaped structural framing over the water to a walkable deck, railings, lighting caps, and connecting steps.

MOST DEMANDING DETAILShaping the structural span to the curved pool geometry.
01Curved framing02Deck surface03Railings04Steps
Plan a related project
Curved structural framing for a custom wood bridge over a swimming pool
10.1SPAN
Custom pool bridge with deck boards, railings, and post-cap lights installed
10.2GUARD
Completed custom pool bridge with connecting wood steps
10.3ARRIVE
ONE PROJECT · ONE ACCURATE STORY

No mixed galleries. No stock photography.

Every photograph on this page documents work completed by Mo-Nady.

Tell us what the property needs

Let’s get your project moving.
Share the property location, project details, and photos. We’ll route your request to the right branch and recommend the next step.